Learning how to strip paint off old furniture comes down to one method most people get right on the first try: brush on a paint stripper, let it bubble until the paint softens and blisters, then lift it away with a scraper. Add a mineral spirits wipe-down and a pass with 120-grit sandpaper and the bare wood is ready for stain or paint. Expect a dresser to take three to six active hours across a weekend or two, and expect the mess.
This guide walks through identifying what finish you are dealing with, picking between stripper, a heat gun or sanding, and cleaning up properly afterwards. It also covers lead paint, the safety question that comes up most often on furniture painted before the 1970s.
Table of Contents
- What You Need
- Core kit for every job
- Extra kit depending on your method
- Step-by-Step
- 1. Identify the Finish and Test the Paint
- 2. Prepare the Furniture and Work Area
- 3. Choose the Right Paint-Stripping Method
- 4. Remove the Paint
- 5. Clean and Restore the Surface
- 6. Inspect, Dispose Safely, and Finish
- Common Mistakes
- Frequently Asked Questions
- What is the safest way to strip paint off old furniture?
- Can you use a heat gun to remove paint from furniture?
- How do I remove paint without gouging the wood?
- What is the best way to strip paint from drawer bottoms?
- How do I know if old furniture paint may contain lead?
- Should I use chemical stripper or sand old furniture?
What You Need
Most of the gear is cheap and some of it you already own. Gather everything before you start, because halfway through a chemical strip you really do not want to go to the hardware store.
Core kit for every job
- Dense drop cloth or plastic sheeting, plus tape to secure it
- Chemical-resistant nitrile gloves
- Safety goggles
- N95 or P100 respirator, plus a paper mask if you are only sanding
- 120-grit sandpaper for the first smoothing pass and 220-grit for finishing
- Mineral spirits, clean rags and a bucket of warm soapy water for cleanup
Extra kit depending on your method
For chemical stripping, add a soy-based or citrus-based gel stripper, a chip brush for application, a plastic or dull-metal scraper, plastic wrap to slow drying, a nylon brush and a small container of grade 0000 steel wool for tight spots. A dental pick handles carvings. For heat, add a heat gun and you are set. For sanding, add an orbital sander, though you can absolutely do the whole job by hand and most people get better results that way on furniture.
| Method | Best for | Time per piece | Mess | Main risk |
|---|---|---|---|---|
| Gel or paste stripper | Thick layered paint, spindles, carvings, built-up caking | 3 to 6 hours across several sessions | High | Fumes, residue needing neutralising |
| Heat gun | Flat panels and frames with single or thin layers | 1 to 3 hours | Low | Warping, grain raise, softened lead in fumes |
| Scraper and sandpaper | Small pieces, touch-ups, final smoothing | 2 to 4 hours | Moderate dust | Gouging, sanding into soft wood |
| Low-chemical and natural | Light latex layers, sensitive noses, homes with small children | 4 to 8 hours, usually slower | Moderate | Least effective on decades of layers |
A project snapshot for planning: a six-drawer dresser with heavy layered paint is roughly 4 to 6 hours of active work, spread over two or three days because stripper needs full dwell time between passes. The skill level is beginner. The main cost is your time plus stripper, and a single can rarely covers a whole dresser, so plan on more than one.
Step-by-Step
1. Identify the Finish and Test the Paint
Find a hidden spot first, such as the underside of a drawer or the back panel where a piece sits against a wall. Scratch the coating with a coin. Paint flakes and scuffs off in layers. Varnish and shellac dissolve a little under a drop of denatured alcohol. Lacquer will stay put and needs lacquer thinner to budge. Knowing which one you have decides whether you need a paint stripper at all or just a varnish remover.
Next, rule out lead-based paint. Any piece made or painted before 1978 is suspect, especially solid wood furniture built before 1960. Look up the EPA lead paint guidance for your area or use a lead test kit sold at home improvement stores. A cheap, reliable test matters more than it feels like it should, because sanding suspected lead paint or heating it sends dust and vapour into the room you live in.
That test changes the plan. If lead is present, wet-sand inside a sealed room with a HEPA vacuum and skip the heat gun entirely. Heat changes the chemical compound of lead paint, which is the reason plenty of restorers abandon heat the moment a test comes back positive. Stripper with full protective gear is safer, and for a heavily contaminated piece, a professional abatement contractor is the right call rather than a weekend project.
2. Prepare the Furniture and Work Area
Work outside if you can, and if not, open windows on two sides and close the door to the rest of the house. Cover the floor and lay the piece on its back or on padded sawhorses so you can reach every side. Pull every knob, hinge, drawer pull and catch off and put them in a labelled bag, because screws go into baggy wood sooner or later.
Wash the piece down first. Dirt and grime under the paint make stripper work harder, and a quick scrub with warm soapy water and a degreaser means less brushing later. Let it dry fully before any stripper goes near it.
3. Choose the Right Paint-Stripping Method
Here is the honest comparison. Chemical stripper wins on every piece with nooks and crannies, because it soaks into carvings and under mouldings and lifts evenly. Heat is faster and less messy, but people report it warping wood, raising the grain and pushing melted paint down into the surface. Sanding is the least effective standalone method and the most abrasive to the wood.
Match the format to the surface. Liquid stripper suits horizontal flat areas such as a table top. Gel or paste stripper clings to vertical faces and drawer fronts, which is why it is the default for dressers and cabinets. Ready Strip and Citristrip are the widely used names; GreenEZ and Klean Strip are low-VOC and water-based options that work well on lighter layers but need longer dwell and more reapplication. Peel-Away is the one people reach for when they want a less chemical strip on painted trim.
You can strip without a power sander, and honestly hand sanding is the better default on furniture anyway. A power sander takes paint off faster and takes more wood with it, which matters on a thin veneer or an antique top. Use the machine only if the piece is flat, thick and in good shape.
4. Remove the Paint
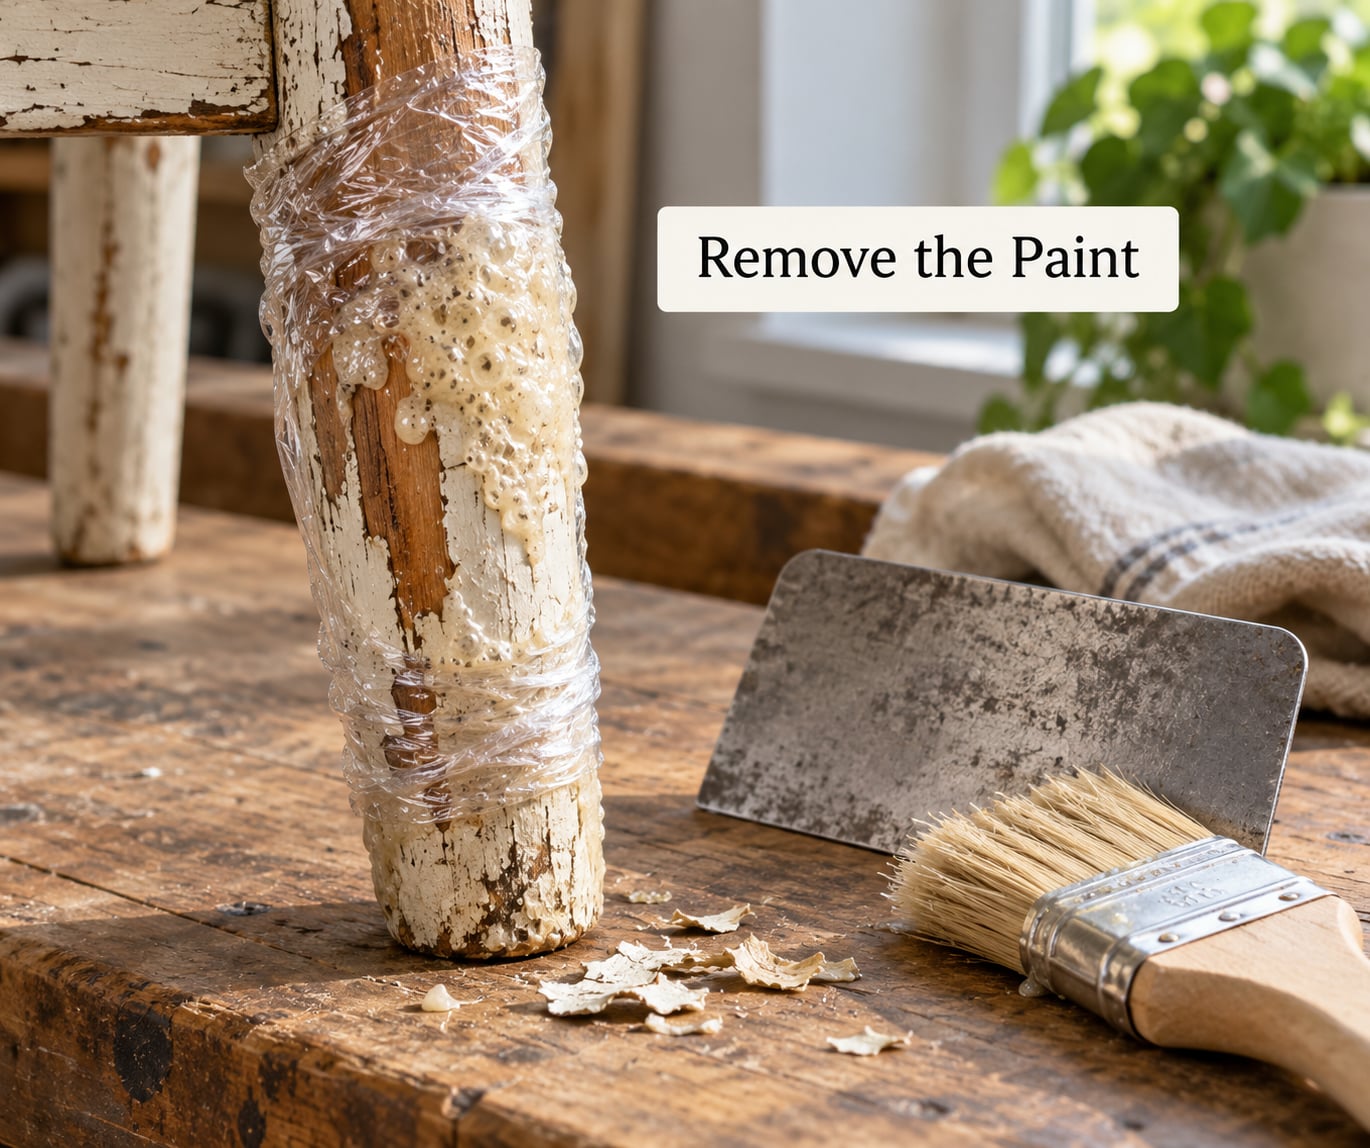
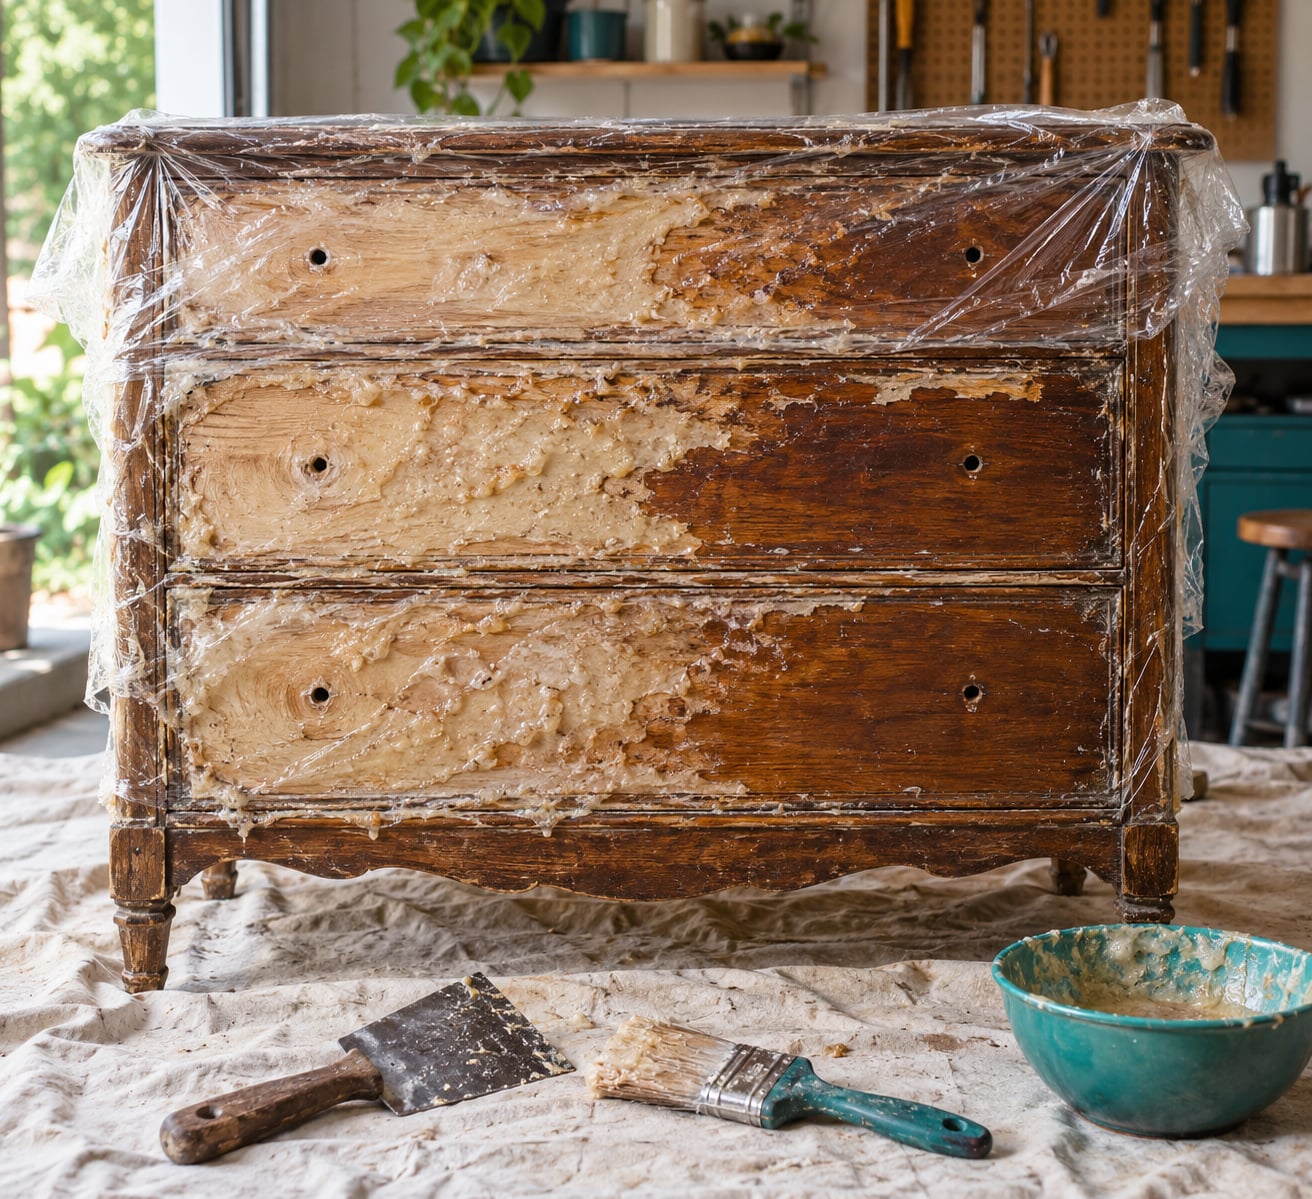
With chemical stripper, brush on a thick even coat, not a thin coat. Scrub the stripper into crevices with the chip brush. Then cover the area with plastic wrap and press it down, which slows evaporation and lets the stripper work longer. People who learned this the hard way call it the single biggest fix for slow-drying stripper. Aluminium foil does the same job and is cheaper.
Leave the surface for the dwell time printed on the can, usually 15 to 60 minutes. Test a spot: the paint should wrinkle, blister and lift at the edge with the corner of the scraper. If it is soft, scrape in long shallow strokes, keeping the blade flat and tilted slightly toward you so the edge does not dig in. Work in sections about 4 inches square so the stripper stays wet and the paint has not re-hardened by the time you reach it.
For spindles, turnings and carvings, forget the scraper. Use the chip brush to work gel into the detail, a nylon brush or grade 0000 steel wool to coax paint out of the crevices, and a dental pick for the undercut mouldings. This is where a chemical method earns its keep; a heat gun simply cannot reach without scorching the surrounding wood.
With a heat gun, hold it 2 to 3 inches away, sweep constantly, and never leave it on one spot. Work the same 4 inch squares and scrape immediately, because the paint re-hardens fast as it cools. Put the gun down between squares. The moment you smell burning varnish, back off further.
Strip hardware separately. Boiling knobs, hinges and handles in a pot of water with a spoonful of baking soda loosens caked paint off metal in about 20 minutes, and it will not touch your skin the way a stripper would.
5. Clean and Restore the Surface
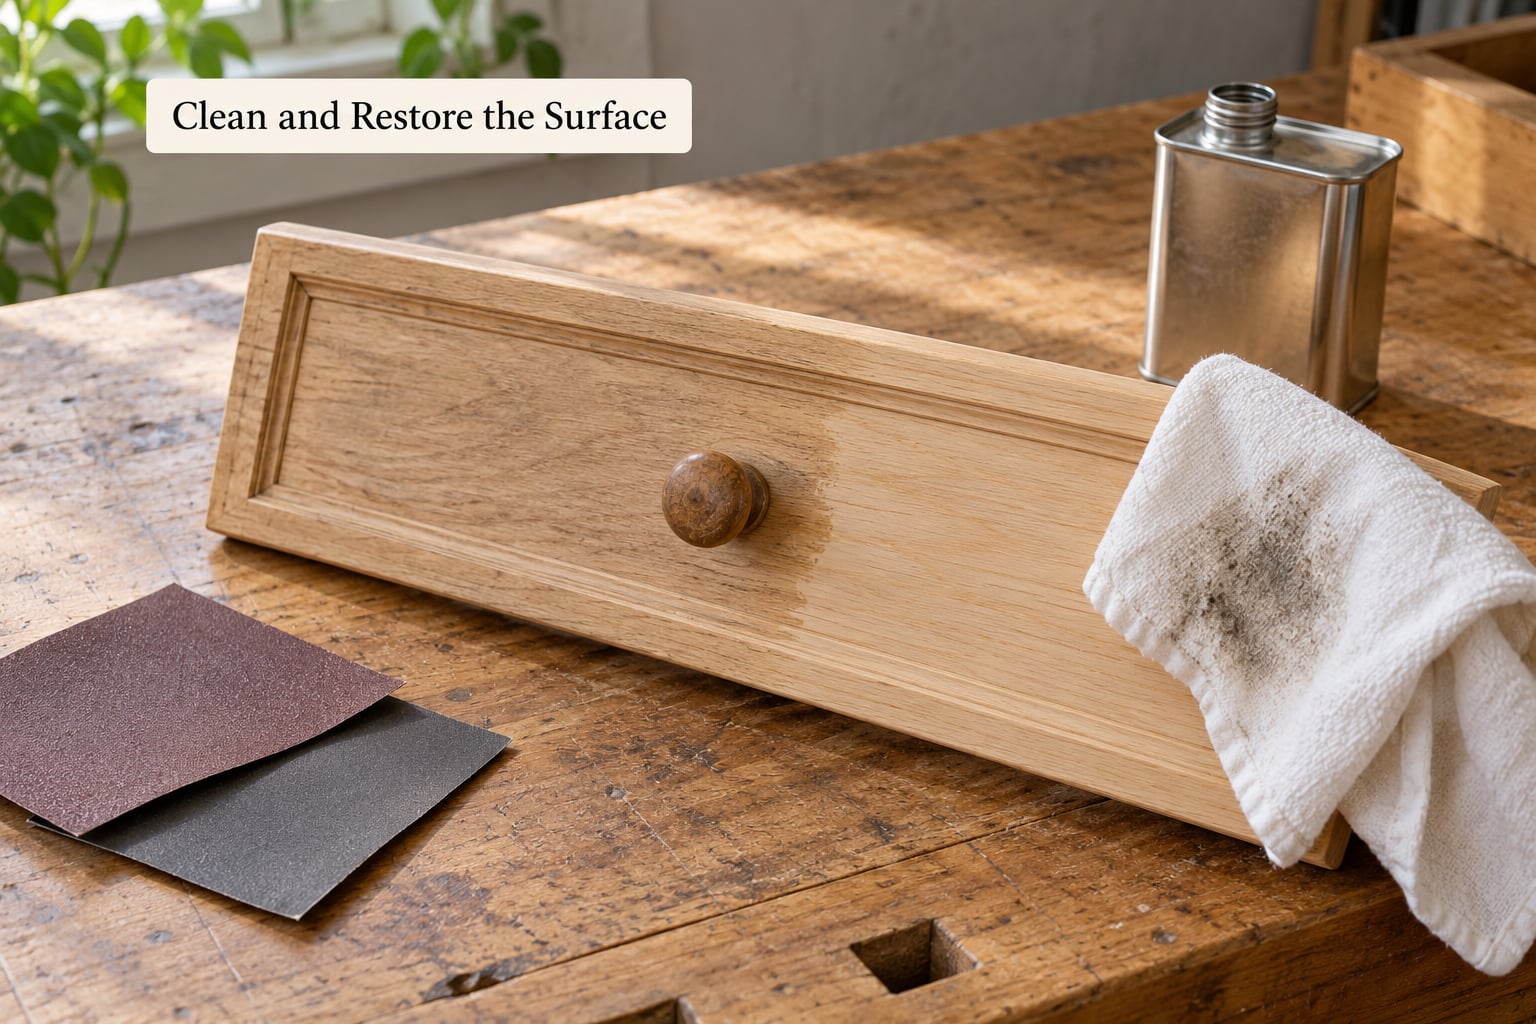
Skip this step and your new finish will peel within months. Wipe the stripped surface with mineral spirits or lacquer thinner, working the same grain direction, to lift any stripper residue still in the wood. Follow with warm soapy water if the coating was varnish or shellac, then dry it. Alkaline and water-based strippers have specific neutralising instructions on the can, so follow those rather than guessing.
Sand it down with 120-grit to level the surface and knock back the grain the stripper raised, then finish with 220-grit for a smooth base. Sand with the grain, use light pressure and stop often to look. Old wood turns soft under the paint, and gouges here do not sand out.
If you did gouge, the fix is straightforward. Sand the surrounding area flat, fill the gouge with wood filler or a hard wax stick, level it, and stain the filler separately if you are going to stain. It will never be invisible, but on a drawer front nobody has ever noticed.
6. Inspect, Dispose Safely, and Finish
Run a finger along the surface and look under rails, in drawer runners, behind backboards and inside drawer bottoms, which are frequently the last hiding places for old paint. Hit any spot you find with 120-grit until it is level with the rest.
For disposal, let the sludge sit until the paint solids settle to the bottom, then pour off the fluid and strain it through a paint filter or a fine mesh strainer. Several restorers reuse that fluid on the next piece, which stretches one can across two jobs. Check your local hazardous waste rules before pouring anything down a drain, and seal the solid waste in a container with a tight lid. Many local household hazardous waste days take solvent and paint waste for free.
Finish with bare wood in mind. If the grain looks blotchy or fuzzy, it needs one more pass of wet sanding at 220 grit followed by a coat of denatured alcohol to raise the grain again, then let it dry and scuff lightly before finishing. Raw wood drinks the first coat and looks patchy; seal or prime first, and the colour will even out. Choose an oil, stain or paint based on how much the piece will be handled.
Sometimes the right answer is not to strip at all. If the piece has thin veneer, an unknown history or forty caked layers, painting over it is legitimate. Paint over clean bare wood or a solid sealed surface, never over a failure, and the result lasts.
Common Mistakes
Skipping the finish test. You strip a coat of varnish with paint stripper, spend two hours scrubbing sludge off a piece that only needed denatured alcohol. Always test the underside first.
Heat parked too close. Warping and grain raise are the two complaints that come up most often about heat guns, and both come from holding the gun still. Sweep it continuously, keep 2 to 3 inches of gap and work in small squares.
Over-sanding. Paint that looks thick is often paint sitting on soft, dry wood underneath. Sand by feel, check the bare wood every few minutes, and switch to 220-grit before you dig a valley.
No ventilation and no respirator. Stripper fumes and dust are the reason this job needs a mask. Windows open on two sides, respirator on, gloves on, and take the kids out of the room.
Leaving residue behind. Paint that peels off in sheets after a month means the stripper was never fully neutralised. Wipe with mineral spirits, then with soapy water, and test the bare spot with a damp cloth before finishing.
Thin coats and no plastic wrap. A thin coat evaporates before it can bubble. Scrub it on thick and seal it under wrap or foil. If the paint has already re-hardened, do not fight it, reapply and wait the full dwell time again.
One-pass sanding. Going straight from stripper to 220-grit leaves lumps. Start at 120-grit, work up, and take breaks, because tired hands push too hard.
Two habits make the biggest difference. Work in sections smaller than you think you need, and stop while you are still enjoying it. Paint that dries on a piece is the reason projects get abandoned halfway and end up painted over anyway.
Frequently Asked Questions
What is the safest way to strip paint off old furniture?
A soy-based or citrus-based gel stripper with nitrile gloves, goggles and a respirator, applied in a well-ventilated space, is the safest general method because it avoids both sanding dust and heat fumes. On a piece that may contain lead-based paint, wet-sand inside a sealed room or hire a professional abatement contractor rather than heating it.
Can you use a heat gun to remove paint from furniture?
Yes, on flat panels with single or thin paint layers, holding it 2 to 3 inches away and sweeping constantly. Heat is fast and far less messy than stripper, but it raises the grain, can warp a piece and drives fumes from older coatings into the room. Never use it on furniture that may contain lead paint, and avoid it on veneers, laminate and anything with fine detail.
How do I remove paint without gouging the wood?
Keep the scraper flat and tilted slightly toward you so only the edge touches the wood, and work in short strokes once the paint has fully bubbled. Use a nylon brush or grade 0000 steel wool in crevices instead of a blade. After stripping, sand lightly with 120-grit and finish with 220-grit, checking the bare wood often because decades-old wood is soft.
What is the best way to strip paint from drawer bottoms?
Drawer bottoms are usually thin plywood with a seal on the underside, so heat is a bad idea here. Apply gel stripper, cover with plastic wrap, let it sit the full dwell time, then lift with a plastic scraper and scrub the seams with a nylon brush. Sand only lightly with 120-grit, since sanding through the veneer leaves nothing to hold the new finish.
How do I know if old furniture paint may contain lead?
Any furniture manufactured or painted before 1978 should be treated as suspect, especially solid wood pieces built before 1960. Buy a lead test kit from a home improvement store and test a hidden area before you start. Do not rely on a smell or a chip test alone. The EPA lead paint guidance for your area explains what a positive result means for a homeowner.
Should I use chemical stripper or sand old furniture?
Use chemical stripper when the paint is layered, thick or caught in carvings and spindles, because sanding alone will take hours and still leave build-up. Sand when the coating is thin and even. Most real projects need both: stripper to get to bare wood, then 120 and 220-grit sandpaper to level it before refinishing.
Start with the test patch on the underside. Everything else, the method, the gear, the number of stripper applications, depends on what that patch tells you about the finish and whether lead is present.