How to organize kitchen cabinets for real life comes down to one rule: every item gets a home based on where you use it, how often you use it, and how heavy it is. Empty one cabinet at a time, sort by frequency of use, measure before you buy a single bin, and put daily-use items in the cabinet nearest your stove or prep counter.
The part most guides skip is the end. A kitchen tidied on a Saturday looks perfect on Saturday and is back to chaos by Thursday, because nothing in the system tells anyone where the whisk or the lunch bags go at 7am. Fix the return rule and the organizing sticks.
Table of Contents
- What You Need
- How to Organize Kitchen Cabinets for Real Life: Step-by-Step
- 1. Empty One Cabinet at a Time
- 2. Sort Items by How You Actually Use Them
- 3. Measure the Cabinet and Its Awkward Spaces
- 4. Create Daily-Use Zones
- 5. Choose Containers That Fit the Space
- 6. Arrange for One-Hand Access and Visibility
- 7. Move Rarely Used Items Out or Up High
- 8. Finish With a Quick Reset Plan
- Common Mistakes
- Frequently Asked Questions
- How do you decide where to put things in kitchen cabinets?
- What are the 7 steps to organize kitchen cabinets?
- What is the most efficient way to organize kitchen cabinets?
- What should not be stored in kitchen cabinets?
- How do you organize a kitchen in zones?
- How do you stop items from migrating back to the wrong cabinet?
- Conclusion
What You Need
You need less than organization blogs suggest. A tape measure, a pack of labels or masking tape, a damp cloth and a garbage bag cover most of it.
- A tape measure for cabinet width, depth and the gap between shelves.
- Labels — masking tape and a marker work fine, and removable labels are better if you rent.
- Cleaning supplies: warm soapy water, a toothbrush for corners and hinges, and paper towels.
- Bins or baskets in two or three sizes, not fifteen.
- A simple inventory — a notepad or your phone notes, listing what is in the cabinet and what you kept.
Most solutions do not need a shopping trip. Repurposed cereal boxes, a wooden crate from the pantry, a shallow baking tray, and a tension rod all solve real problems. Start with what you already own, then buy only what you still cannot solve after the shelves are empty.
How to Organize Kitchen Cabinets for Real Life: Step-by-Step
Work in this order and the cabinets stay workable: empty, sort, measure, zone, choose storage, arrange, relocate the rare stuff, then set the reset habit. Most people can reset one cabinet in 20 to 30 minutes, so a full kitchen spreads over a week or a weekend rather than one punishing afternoon.
1. Empty One Cabinet at a Time
Pull everything out onto a bed, a table or the floor, and wipe the shelves while they are bare. Group the contents into rough piles as they come out — everyday, occasional, and doubtful — rather than putting everything back and starting over.
Anything expired, broken, or duplicated goes in the bag. Duplicates are the quietest culprit: most stacks of lids and containers come from one container losing its partner a year ago. Keep the pair that actually fits and let the rest go.
You know the cabinet worked when someone in the house can find a single item without being told where it lives, and nothing in the reset pile is on a shopping list you did not plan.
2. Sort Items by How You Actually Use Them
Sort by frequency, not by category alone. Make three piles: daily, weekly, and rare. Everyday dishes, the wooden spoon, a colander, coffee, and lunch bags go in the daily pile. Bulk flour, cake pans, and the good serving platter go in the rare pile.
For anything you are unsure about, use the two-week test. Put it in a bin, a high shelf, or the back of a closet, and give it two weeks of honest use. If nobody reaches for it, it moves out of the cabinet or goes to donation. This is the single most effective step, and it is the one people skip because the drawer is already open.
You know the sorting worked when every item in the rare pile has a reason for being in the rare pile, not just an absence of a better home.
3. Measure the Cabinet and Its Awkward Spaces
Measure before you buy organizers. Most base cabinets run about 24 inches wide and 24 inches deep, upper cabinets about 12 inches wide and 12 inches deep, but yours may be an odd 23.5 or a deep 30-inch unit, and organizers are sold in fixed sizes.
Record four numbers per cabinet: interior width, interior depth, the vertical gap between shelves, and the clearance where the door swings or the hinges sit. That last one is what kills purchases — a beautiful set of bins that will not close the door.
For deep lower cabinets, measure how far back you can reach without bending and craning. Most people can comfortably reach about two-thirds of the depth. Anything past that needs to come forward on a shelf riser or a pull-out rather than live at the back.
You know the measuring worked when every bin slides in, the door closes, and nothing blocks the hinge or the drawer above.
4. Create Daily-Use Zones
Kitchen zones are simply groups of tasks — cooking, prep, cleaning, drinks, snacks, baking — and each one should have the items it needs within one step. Pots go in the deep lower cabinet nearest the stove because that is where the cooking zone already sits. Spices go in a step shelf or a small tray on the shelf nearest the range, not scattered across three cabinets.
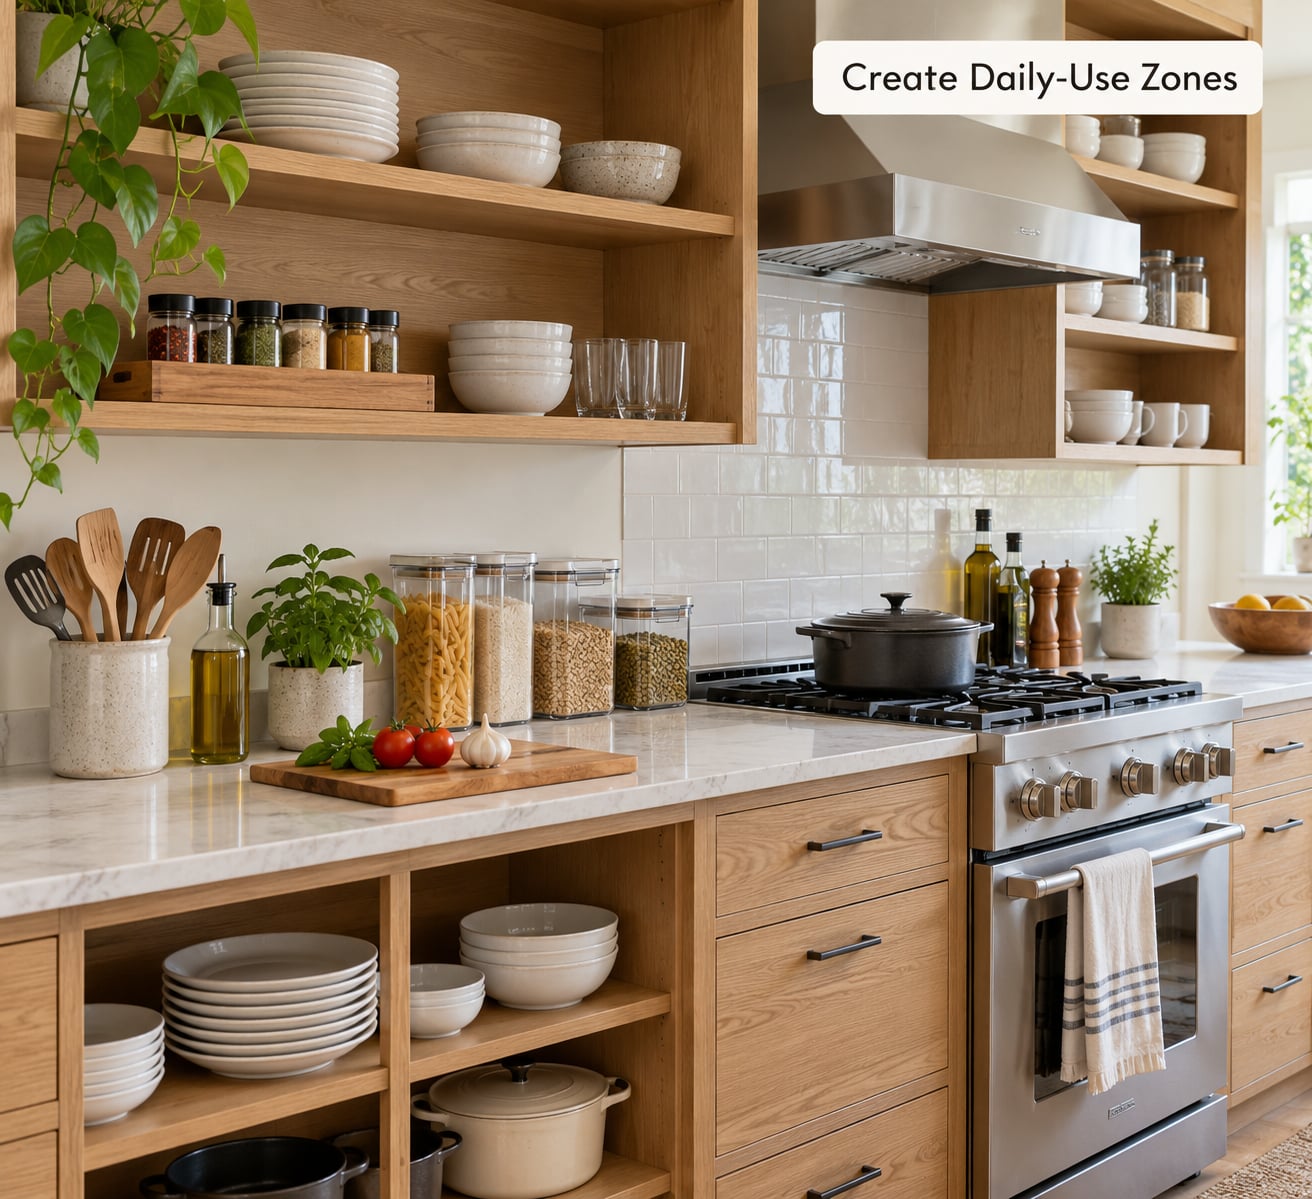
Map your actual routine rather than a generic diagram. In a family kitchen, the snack zone is a low cabinet or a pull-out bin at kid height, so the after-school grab does not involve a step stool. In a one-person apartment, the beverage zone matters more than the serving zone, because nobody is hosting.
| Zone | Typical contents | Best cabinet location | Weight rule |
|---|---|---|---|
| Cooking | Pots, pans, spatulas, tongs, ladles | Deep lower cabinet by the range | Heavy low, light high |
| Prep | Cutting boards, knives, peelers, bowls | Under the counter space near the sink | Board flat on a door rack |
| Snack and lunch | Snack bags, lunch containers, drink boxes | Low cabinet or pull-out near the door to the car | Keep light |
| Beverages | Coffee, tea, mugs, water filter | Upper cabinet or counter near the coffee spot | Light |
| Cleaning | Sponges, gloves, refill bottles, trash bags | Under the sink or beside it | Bottles low to avoid spills high |
| Dishes | Plates, bowls, glasses, cutlery | Upper cabinet nearest the dishwasher | Everyday low in the stack |
| Food storage | Containers, lids, wraps, bags | Deep lower cabinet, vertical dividers | Empty containers low |
| Special occasion | Holiday platters, wine glasses, specialty pots | Top shelf or high cabinet | Light items only overhead |
You know the zoning worked when a family meal can be started without opening a cabinet in a different part of the kitchen three times.
5. Choose Containers That Fit the Space
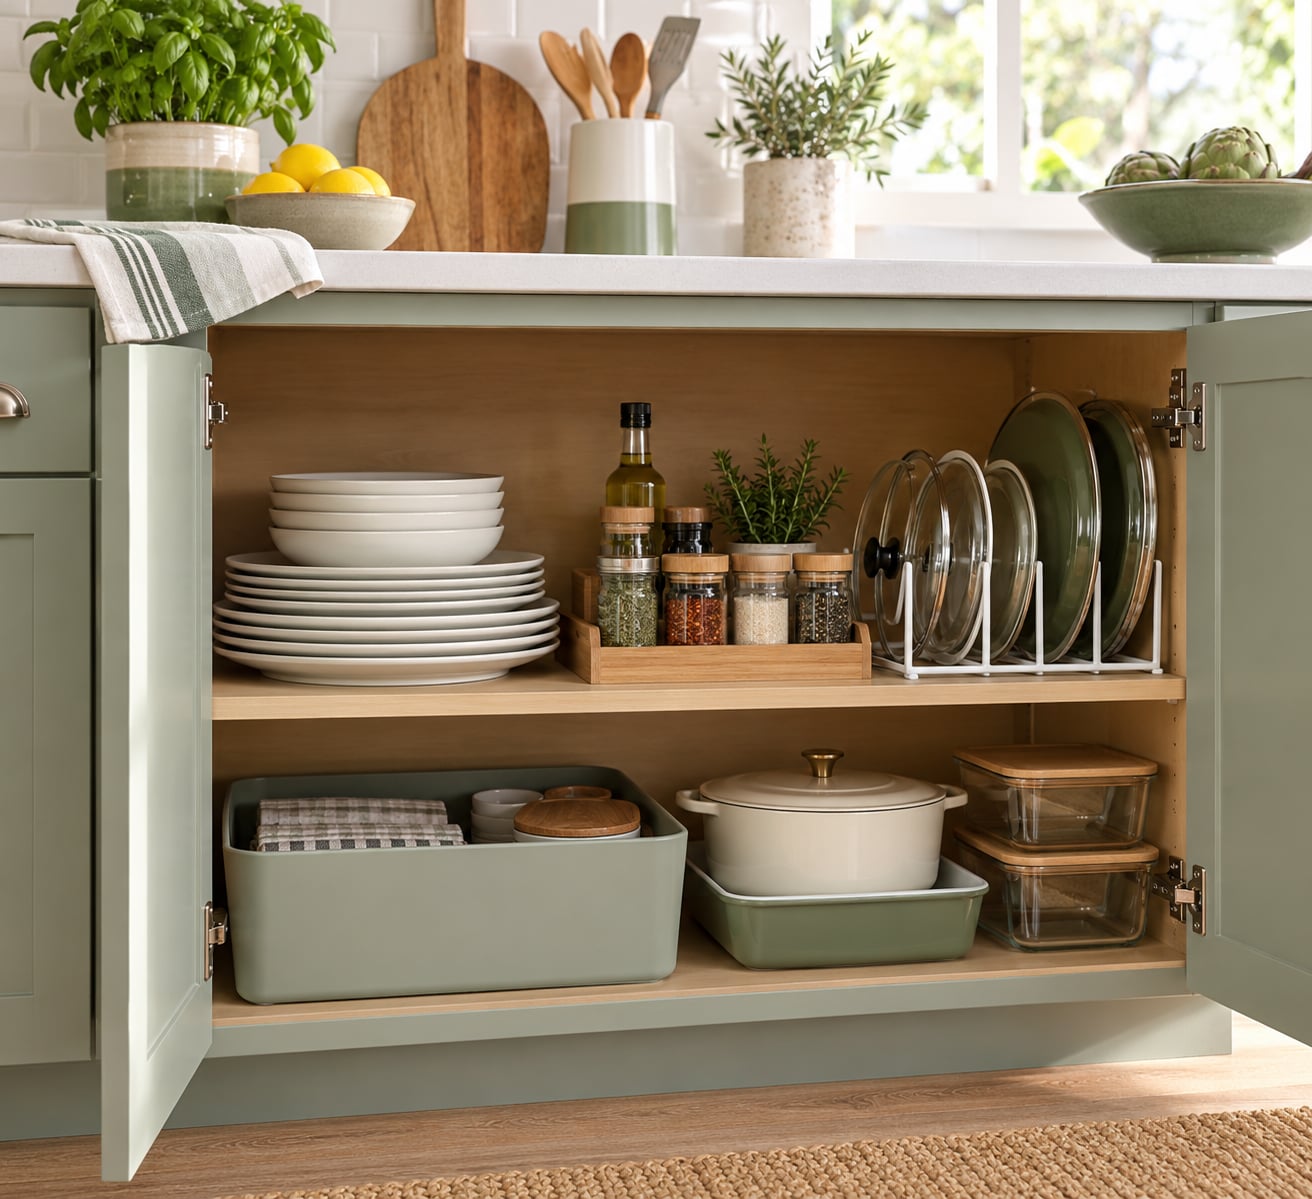
Match the container to the cabinet’s actual problem. Deep cabinet: angled wire shelves or stackable trays turn one lost back row into three visible rows. Corner cabinet: a two-tier lazy Susan or a pull-out so nothing is permanently out of sight. Flat drawer: dividers for cutlery, baking sheets, or lids. Under-sink: a tension rod for spray bottles, an over-sink organizer for the flat area, and a bin that catches leaks. Door: over-door hooks and racks for lids and cutting boards.
Some fixes are free or nearly free. A tension rod, adhesive hooks, or a shelf riser made from a piece of trim turns dead vertical space into usable space. A bookend or a rectangular container keeps lids upright, which is the solution organizing threads keep coming back to, and it costs nothing but a minute.
Buy something only when a specific, measured gap cannot be solved with what you own. The container should be shorter than the shelf gap with a finger’s width to spare, so you can actually lift it out.
You know the containers worked when you can pull any bin out one-handed without tilting the pile above it.
6. Arrange for One-Hand Access and Visibility
Put daily-use items at eye level or near the front of the shelf, and back them with a lipped bin or a small tray so nothing slides to the back. Stack only stable, lightweight things — plates, mixing bowls, storage containers with lids on. Store lids, baking sheets, cutting boards, and trays upright on a riser or in a door rack rather than flat, since vertical storage is where the real space is hiding.
Label the front edge of each bin, not the whole container, and label containers rather than individual items. A category label with one word — SNACKS, BACKUP, LIDS — is enough to send things home. Skip vague labels like MISC or OTHER, because those become the drawer where everything goes to hide.
You know the arrangement worked when you can glance at a cabinet and see every item it holds without moving anything.
7. Move Rarely Used Items Out or Up High
Relocate occasional serving pieces, specialty appliances, backup cleaning supplies, and holiday cookware to a high shelf, a garage shelf, or a labeled bin elsewhere in the house. Every item you remove from a working cabinet gives the daily-use items around it more room to breathe.
Keep heavy stock — large pots, appliances, canned goods in quantity, bottled water — on lower shelves and near the floor. Most back injuries in a reorganized kitchen come from putting a heavy stockpot on a top shelf because that was the only space left. Never store anything that gives off heat near a cabinet ceiling, keep flammables and aerosols away from the range, and store food in sealed, cool cabinets rather than a warm one, because temperature swings shorten its life.
You know the relocation worked when every cabinet you kept can answer one question: what am I supposed to grab from here?
8. Finish With a Quick Reset Plan
This is the step that decides whether the cabinets stay organized. Set a five-minute reset at the point of the week where things pile up, usually Sunday evening. Return items to their labeled homes, wipe the sink-adjacent shelf, and check that the fridge has a spot for leftovers. A daily-use cabinet should be the one you reset first, because it is the one you open dozens of times a day.
Add a weekly two-minute check of one zone and a quarterly 30-minute audit where you pull forward anything in the rare pile and apply the two-week test again. This is also how you stop items migrating back: when a zone is overloaded, move its overflow out rather than squeezing it in.
If you want to know how you’re doing at a glance, count how many items are visible from the front of each shelf. If the answer is zero in a cabinet you use daily, the arrangement is wrong, not you.
Common Mistakes
Buying organizers before emptying the cabinet. You will end up with a container shaped for a gap that no longer exists. Fix: measure and place first, buy second.
Grouping only by type. Ten cabinets of dishes means you walk across the kitchen for every plate. Fix: group by zone and frequency, so the cabinet near the stove holds what the stove needs.
Putting heavy items overhead to keep them out of sight. It looks tidy and it is a lifting hazard. Fix: heavy low, rare high, light in between.
Using tall containers in a low cabinet. They waste the vertical space they take up. Fix: pick the container height that matches the shelf gap you measured.
Labeling everything, including broad labels. Labels like MISC or OTHER become a second junk drawer. Fix: one clear category word per bin, and nothing labeled other.
Making it look neat while ignoring habits. A system that fights how your household actually cooks will collapse in a month. Fix: place items where hands reach first, and let the reset habit carry it.
One last tip: if a cabinet cannot be reset in under five minutes, it is too full or badly zoned. Take one item out and try again rather than adding storage.
Frequently Asked Questions
How do you decide where to put things in kitchen cabinets?
Decide by three things: how often you use the item, how heavy it is, and which zone you use it in. Daily items go at eye level or the front of a shelf near their zone, heavy items go on lower shelves, and rarely used items go high or out of the kitchen entirely. If you are unsure about an item, give it two weeks and see whether anyone reaches for it.
What are the 7 steps to organize kitchen cabinets?
The seven steps are: empty one cabinet, discard expired and duplicate items, sort by frequency of use, measure the cabinet and its clearance, group items into kitchen zones, choose containers that fit the measured space, and arrange daily items within easy reach. Finish with a short weekly reset so items go back where they belong.
What is the most efficient way to organize kitchen cabinets?
The most efficient method is zone-based: group items by the task they serve, then store each group in the cabinet closest to that task. Add a frequency rule on top — daily items at eye level, rare items high, heavy items low. That combination cuts how far you walk during a meal and reduces forgotten food at the back of deep shelves.
What should not be stored in kitchen cabinets?
Avoid storing heavy stockpots or appliances on high shelves, anything that gives off heat near the top of a cabinet, and food in a warm cabinet next to the range. Skip unventilated storage for flammables and aerosols, and do not keep items that expire quietly at the back of a deep shelf you cannot see. Relocate those pieces to a low shelf, a cooler spot, or out of the kitchen.
How do you organize a kitchen in zones?
Map your routine into zones first — cooking, prep, cleaning, dishes, snacks, beverages, and special occasions — then assign each zone one cabinet or group of cabinets near the relevant appliance. Keep every zone’s essentials within one step of where the work happens. Zones work best when each cabinet answers one question about what belongs in it.
How do you stop items from migrating back to the wrong cabinet?
Give every item a labeled home before you start, label the front of each bin with one clear category word, and keep overflow out instead of squeezing it in. Run a five-minute reset at the same point each week, and check one zone per week rather than all of them at once. When a cabinet cannot be reset quickly, it is too full — move something out.
Conclusion
Organizing kitchen cabinets for real life comes down to three habits: one cabinet at a time, zones that match how you cook, and a weekly reset that returns things to a labeled home. Depth, awkward corners, and forgotten food all improve once every item has a place based on use.
Start with the cabinet you open most, empty it completely, sort it by frequency, and set up one daily-use zone. Once you can see that cabinet working, apply the same method to the next one.