Hiding ugly tile in a rental bathroom comes down to one rule: cover the tile with something that peels off. Removable vinyl tile, tile decals and cut-to-fit floor mats all sit on top of the surface instead of bonding to it, so they change the look without changing the tile underneath. Most renters can finish a full bathroom wall in an afternoon.
The part people get wrong is the permission and the prep. Your lease may already forbid surface changes, and a bathroom that looks better but leaves adhesive residue or a peeled paint patch is worse than the tile you started with. Check first, test a small patch for 48 hours, then commit to one method. A single well-chosen covering beats three stacked temporary layers trying to cover each other.
I have watched this go wrong in one specific way: someone sticks vinyl over tile that still had soap film under it, and a month later the whole sheet comes down with the film still attached. Everything below follows from that. Clean the tile twice, let it dry fully, and most of the other problems disappear.
Updated for October 2026
Table of Contents
- What You Need
- Step-by-Step
- 1. Choose the best way to hide ugly tile in a rental bathroom
- 2. Confirm permission and test the surface
- 3. Clean and prepare the tile
- 4. Apply the chosen covering
- 5. Style the bathroom around the new tile finish
- Common Mistakes
- Frequently Asked Questions
- What is the easiest way to hide ugly tile in a rental bathroom?
- Can removable wallpaper be used on bathroom tile?
- How do I remove temporary tile covering without damaging the surface?
- Can I paint over tile in a rental without losing my deposit?
- What should I do if my bathroom tile is glossy or heavily stained?
- Do I need to ask my landlord before covering bathroom tile?
- Conclusion
What You Need
The exact kit depends on the method you choose, but most rental bathroom tile jobs need the same short list:
- Removable peel-and-stick vinyl tile for the main surface, plus 15% extra for cuts and mistakes
- Peel-and-stick decals or 3D gel tiles if you would rather cover a few tiles than a whole wall
- A bathroom degreaser or TSP substitute for cutting through soap scum and years of grime film
- Rubbing alcohol and clean microfiber cloths for the final wipe-down before anything adheres
- A utility knife with extra blades, a straight edge and a small square
- Painter’s tape for a free dry run of the layout
- A squeegee or a plastic scraper card for pushing out bubbles and seating the vinyl
- Clear silicone kitchen and bath caulk to seal edges against splashes
- A hairdryer for removal day and for drying damp grout quickly
- A measuring tape and a contour gauge if fixtures or outlets interrupt the field
A few jobs need more. Covering a floor rather than a wall means double-sided carpet tape instead of caulk. Covering tile that has raised texture means thicker vinyl, because thin film will print the bumps onto its own surface. And if your bathroom has a ventilation fan that does not actually vent outside, plan on extra dry time after every wet use.
The one requirement for every method is the same: the tile has to be clean, completely dry and structurally sound. If grout is crumbling or a tile is already cracked and loose, no covering will hold, and patching that first is a conversation for the landlord rather than a weekend project.
Step-by-Step
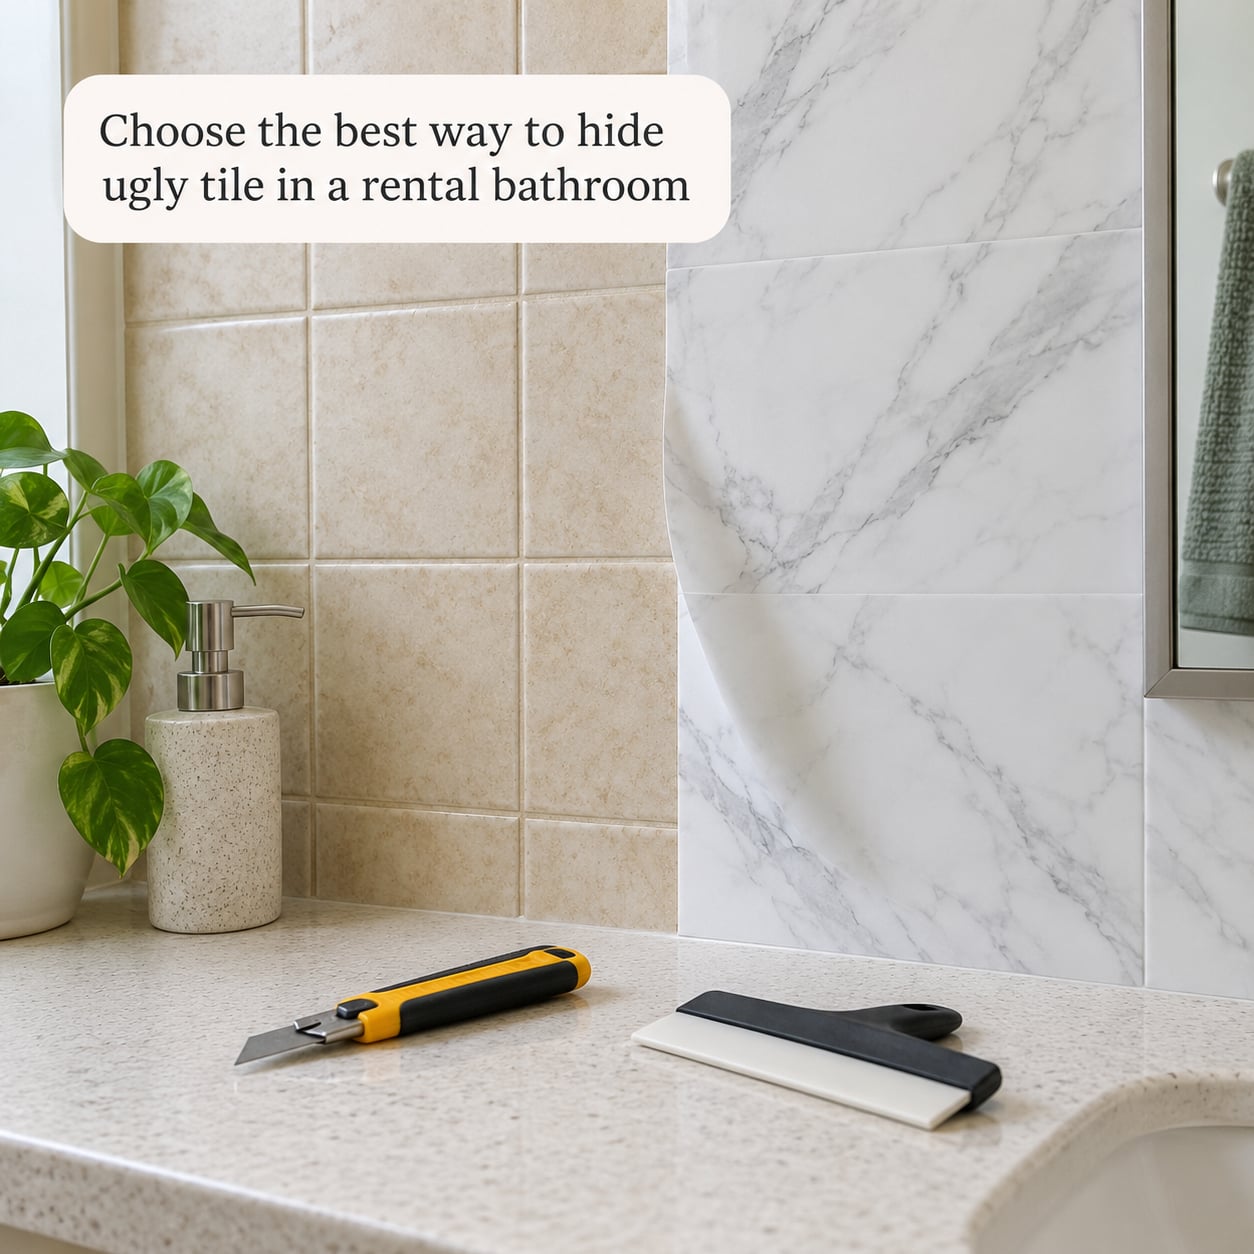
1. Choose the best way to hide ugly tile in a rental bathroom
There are five reliable options, and they differ mostly in how permanent they look and how much moisture they tolerate.
- Peel-and-stick vinyl tile. Splash-resistant, not for soaking. Easy to moderate to install, and highly deposit-safe on ceramic tile. Best on dry walls, a backsplash, or the tub surround above the water line.
- Tile decals or 3D gel tiles. Splash-resistant and the easiest install of the bunch, with equal deposit safety. Best on small accent areas, a few dated tiles, or shower floor squares.
- Waterproof vinyl panel or beadboard. Waterproof once the seams are sealed, moderate to install, and deposit-safe only if the adhesive goes on tape rather than tile. Best on lower shower walls or a backsplash behind a vanity.
- Vinyl floor mat cut to size. Wipeable but not waterproof, easy to install, and the safest option of all since removable tape does the securing. Best on a bathroom or powder room floor.
- Tension-mounted fabric or tension panels. No water tolerance at all because they are designed to stay dry, trivial to install, and zero residue since there is no adhesive involved. Best on any dry wall a shower curtain already hides.
The wet zone versus dry zone split matters more than any other decision in this project. The wet zone is anywhere water lands: inside the shower, the bottom two feet of a tub surround, the floor. The dry zone is everything above that, the vanity backsplash, the wall behind the toilet, the upper tub surround. Peel-and-stick vinyl works well in a dry zone and is a gamble in a wet one, because standing water gets behind the sheet and lifts the corners.
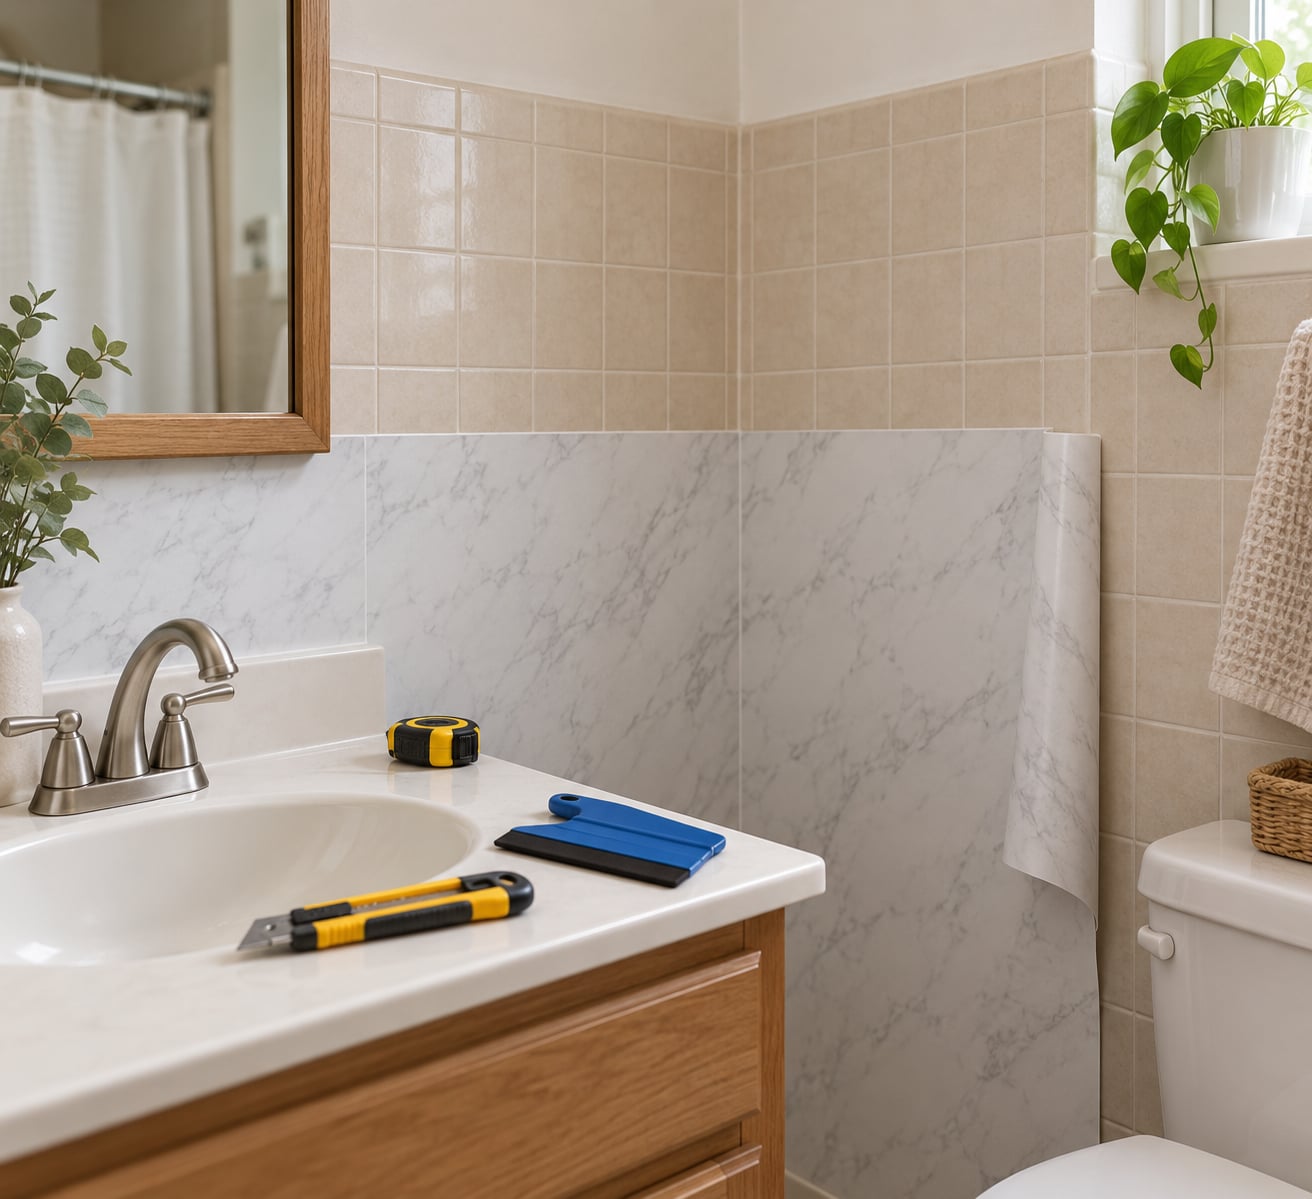
For smooth, flat ceramic, peel-and-stick vinyl tile is the best overall answer. It looks like real tile, it hides the grout grid, and it comes off cleanly when the surface beneath was properly cleaned. For textured or raised-pattern tile, go thicker or change method, because thin film will faithfully copy every bump and look worse than the tile did.
For a floor, a cut-to-fit vinyl mat beats peel-and-stick tile. It is a single sheet with no seams to fail, it does not depend on grout adhesion at all, and double-sided carpet tape lets you lift and reset it. On walls behind a vanity, where splashes are rare and the tile is usually flat, budget vinyl panels or beadboard look more deliberate than another grid of fake grout lines.
And if the ugly tile is in the shower itself, be honest about the trade-off. Waterproof vinyl panels sealed with silicone caulk are the only genuinely wet-zone option a renter can reverse, and even they need an exhaust fan running. A tension-mounted panel or a good fabric shower curtain is the zero-residue answer that never fails.
2. Confirm permission and test the surface
Read your lease before you buy anything. Standard leases usually forbid painting, wallpapering, drilling and any change to fixtures, and some specifically address adhesive on walls or tile. Where the lease is vague, ask the landlord or property manager in writing and keep the reply. A one-line email saying that removable vinyl on the tub surround is fine is worth more than a verbal yes you cannot point to later.
Then test. Pick the least visible spot, usually a lower corner or the wall behind the toilet, and apply a two-inch square of the exact product you plan to use. Leave it 48 hours, then check three things:
- Adhesion: press a corner gently. It should not lift or move.
- Staining: look at the tile and grout underneath when you peel it off. Any color transfer means that product will mark the surface.
- Residue: any tacky film left behind means you will be scrubbing at move-out.
This test also tells you what kind of tile you have. Glossy tile is harder to bond to than matte tile and wants an extra rubbing alcohol wipe right before you apply. Porous tile and unsealed grout drink the adhesive and give you a weak edge. Cracked, chipped or already loose tile is a landlord problem. Raised texture and grout lines wider than a quarter inch will telegraph straight through thin vinyl, so pick thicker material or cover single tiles and leave the grout visible.
3. Clean and prepare the tile
This step decides whether the covering lasts a week or a year. Renters report the same pattern repeatedly: coverings that peel up cleanly are the ones applied to tile that was properly degreased first. Prep is not optional.
Start with a bathroom-appropriate degreaser or a TSP substitute, diluted as the label directs. Work it into the grout lines with a stiff nylon brush, because grout is where the film hides and where the covering will fail first. Give it the dwell time the product specifies, then rinse with clean water and a microfiber cloth. Do not keep scrubbing grout with water alone, since soaking grout weakens it and gives you a crumbling edge under your new vinyl.
Wipe down any fixtures in the work area and tape plastic over the faucet, drain and tub trim. Adhesive and caulk are difficult to clean off chrome, and you will get both on them eventually.
Finish with a rubbing alcohol wipe on a fresh cloth, working across the field rather than around it. The alcohol removes the last oils that stop adhesive from grabbing. Then let the tile dry completely, which in a steamy bathroom can take several hours. Run the exhaust fan, prop the door, and put a hand on the tile. If it is even slightly cool and damp, wait. Trapping moisture under a covering is what grows mold and lifts corners.
4. Apply the chosen covering
Measure the wall from corner to corner and add 15% extra. Cut waste is the single biggest source of frustration in a small bathroom, where every miscut shows against a narrow field of tile.
Lay the sheets out on the floor in the order you will hang them and mark the top of the course with painter’s tape. This dry run is free and it tells you where the unsightly cut has to land, usually at a corner or behind a fixture rather than in the middle of the wall. Scribe the bottom edge to the tub or counter line so you are not fighting an uneven border at the end.
Cut with a fresh blade and a straight edge, changing direction several times rather than sawing through in one pass. Dull blades drag and tear the vinyl. For outlets, vents and fixtures, make a paper template, tape it in place, trace it, then cut the opening slightly undersized so the cover overlaps the edge.
Peel the backing a few inches at a time and hinge the sheet onto the wall rather than dropping the whole thing on at once. This keeps the adhesive from touching the tile before you have positioned it. Once it is up, work across the surface with a squeegee or a plastic card, pushing from the center outward. Bubbles trapped at the edge are the reason decals peel up within a week, so take your time here.
Cut around grout lines rather than bridging them if the lines are deep, and keep the vinyl slightly proud of the tile edge so water runs onto the cover rather than under it. When the field is up, run a thin bead of clear silicone caulk along the bottom and exposed edges. Let it cure for the full time printed on the tube, usually 24 hours, before anyone gets the area wet. After that, avoid heavy direct spray, which is what peels corners back in a busy rental.
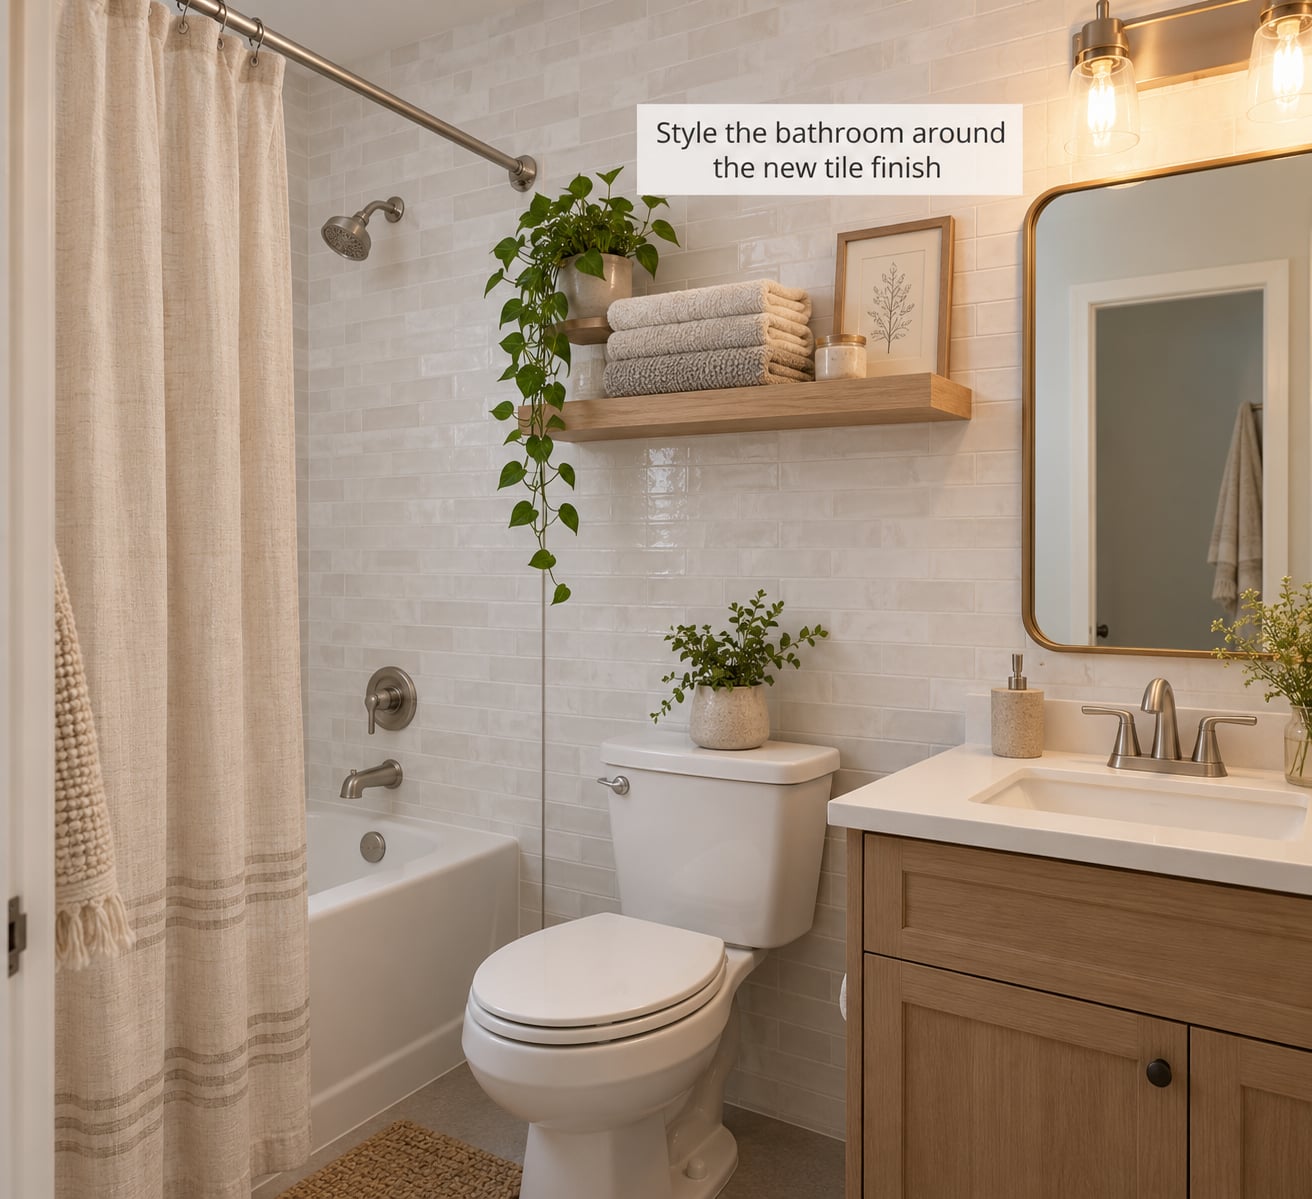
5. Style the bathroom around the new tile finish
Covered tile stops looking like a patch once the rest of the room agrees with it. Towels are the fastest lever, since a renter can swap color daily with no tools. Pick one or two colors already present in the new tile face and repeat them in the textiles.
A fabric shower curtain hung on a tension or suction rod does more work than its size suggests. It covers the ugliest stretch of the surround, moves when you want to show the new tile, and comes down at move-out with nothing left behind.
Storage on tension poles or over-the-door racks keeps counters clear without holes in the wall. For lighting, a warm bulb shifts the tone of everything in the room, including tile that looked yellow under the old cool bulb. Hardware you can twist off and swap by hand, a towel ring, a mirror frame, is a cheap change that reads as deliberate.
Keep the fan running after every shower. Mold that appears under a covering in a poorly ventilated unit is the one failure that costs you your deposit, and it is entirely preventable.
Common Mistakes
Applying over damp tile. This is the top cause of covers peeling up within weeks. The fix is simple and non-negotiable: full dry time after cleaning, plus an exhaust fan while you work. If your bathroom holds humidity, test the patch for 48 hours and check that nothing has crept underneath.
Skipping the landlord conversation. A covering the landlord dislikes is a deduction regardless of whether it damaged anything. Ask in writing before you start, describe what you plan to use, and mention it again at move-out with your removal confirmation.
Painting tile. Paint on ceramic in a rental is close to unrecoverable. It chips, it flakes, and it usually means repainting the whole wall. Paint the drywall above the tile or the vanity instead, and only with written approval.
Pulling decals off too early. Most peel-and-stick adhesive needs 72 hours to fully set. Peel at day one and you will take a layer of grout or a flake of the tile surface with you. Wait the full time on the label, and warm the wall with a hairdryer when you do eventually remove it.
Cutting freehand. Straight cuts with a fresh blade, using a paper template for anything irregular, are the difference between a professional edge and a ragged one. Take the extra fifteen minutes.
Blocking ventilation. An exhaust fan that runs during application and after every shower keeps the space dry. Leaving the door shut and the room damp is how you get mold under a covering that was supposed to help you.
Sticking removable material to drywall. This is the mistake that quietly costs deposits. Adhesive applied to drywall paint will pull that paint off when the covering is removed. Tile is a far safer backing, which is one more reason to cover tile instead of adjacent painted wall.
Whichever method you pick, follow the manufacturer’s instructions for surface prep, temperature, wet times and cure times. They vary more than people expect, and the label is written for the exact adhesive and surface you have in front of you.
Frequently Asked Questions
What is the easiest way to hide ugly tile in a rental bathroom?
For most dry-zone walls, removable peel-and-stick vinyl tile is the easiest option. It installs with no tools beyond a knife and a squeegee, it covers grout lines as well as tile, and it peels away from ceramic without residue when the surface was degreased first. For a floor, a single cut-to-fit vinyl mat secured with double-sided carpet tape is simpler still and has no seams to fail. Buy 15% extra, test one patch for 48 hours, and seal the bottom edge with silicone caulk so water runs over the covering instead of under it.
Can removable wallpaper be used on bathroom tile?
Yes, as long as you use a vinyl-faced peel-and-stick product rated for wet rooms and stay out of the true wet zone. Standard fabric or paper-backed wallpaper will bubble, mildew and release at the seams in a humid bathroom. Vinyl-faced tile stock is a better match because it wipes down and tolerates splashes. Avoid anything inside a soaking shower, seal the edges, and keep the exhaust fan running. Plain contact paper is the exception, since its adhesive leaves residue that is difficult to remove without taking the surface with it.
How do I remove temporary tile covering without damaging the surface?
Warm the covering with a hairdryer on low for a minute or two so the adhesive softens, then peel slowly at a shallow angle, parallel to the wall rather than pulling straight back. Work in small sections and keep a free hand pressing the area you have not reached yet. If residue is left behind, roll a plastic putty knife across it or use a citrus adhesive remover, then wipe with rubbing alcohol. Never use a metal scraper on glazed ceramic, and ventilate the room while using heated adhesives or solvents.
Can I paint over tile in a rental without losing my deposit?
Almost certainly not without written permission. Paint on ceramic is notoriously difficult to remove, and landlords treat it as damage because it usually means the wall needs skim coating and a full repaint before the next tenant moves in. If you want a color change, paint the drywall around the tile instead, or get approval first and use an adhesion-promoting bonding primer rated for ceramic. In most rentals the safer path is a removable covering that leaves the tile exactly as you found it.
What should I do if my bathroom tile is glossy or heavily stained?
Glossy tile needs an extra degreasing and a final rubbing alcohol wipe immediately before you apply anything, because the shine is what stops adhesive from grabbing. For staining that has soaked into grout, clean it first with a degreaser and a stiff nylon brush rather than covering over it, since a covering traps whatever is underneath. If grout is cracked or powdery, tell the landlord before you start. Deep stains that cleaning will not shift are usually better hidden behind a shower curtain or a tension-mounted panel than covered in thin vinyl.
Do I need to ask my landlord before covering bathroom tile?
Ask, and ask in writing. Most leases forbid painting, wallpapering, drilling and any change to fixtures, and covering tile with adhesive can fall under those clauses even though nothing is damaged. A short email describing exactly what you plan to use, and that it will be removed at move-out, usually gets a quick yes. Keep the reply for your move-out conversation. If your landlord says no, the removal risk disappears entirely because you never start, and you can focus on hardware, textiles, lighting and storage instead.
Conclusion
The safest order of operations is unchanged: get landlord approval in writing, test one patch for 48 hours, then choose a single method that fits your tile and your bathroom. Smooth flat tile in a dry zone takes removable vinyl tile well, a floor takes a cut-to-fit mat, and the true wet zone is better served by a fabric shower curtain or a tension-mounted panel than by anything glued down.
Clean the tile properly, let it dry completely, seal the bottom edge, and pick the method that matches your conditions rather than combining several temporary layers. That single covering, finished with coordinated towels and a warm bulb, is what turns a dated rental bathroom into a room you actually want to use, and it comes back off in an afternoon at move-out.