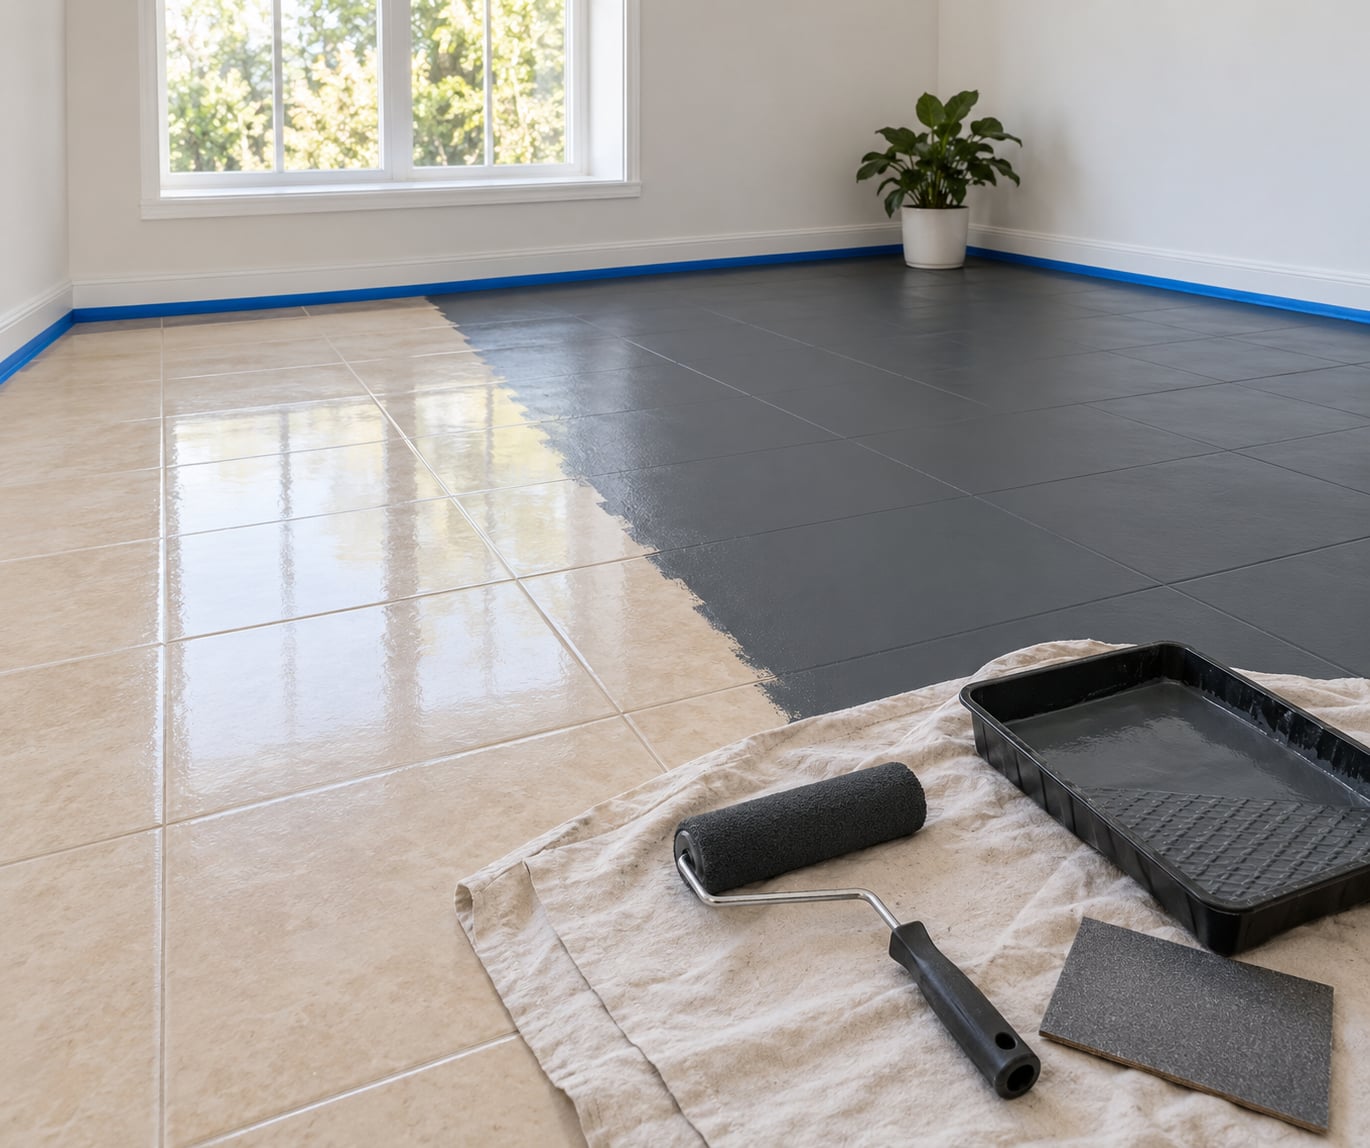
You can paint tile floors without ripping anything out. Clean and degrease the surface, scuff or sand the glossy glaze, roll on a bonding primer, apply two thin coats of floor-rated paint or a one-part epoxy coating, and seal it. The whole job takes a weekend plus a few days of curing, and it suits ceramic or porcelain tile in decent condition.
The catch is prep. Tile has a hard, glossy, low-porosity face that regular wall paint simply cannot grip, and that is why so many painted floors peel off in sheets within a year. Do the boring parts properly and the finish holds for years; skip them and you will be scraping it off with a plastic scraper in a season.
Renting changes the calculation slightly. Painting is reversible, unlike retiling, which makes it one of the few floor refreshes a tenant can do without permission from a landlord, provided you restore the original color on the way out. Check your lease anyway, and use a breathable finish so moisture under the tile can still escape.
Table of Contents
- What You Need
- Step-by-Step: How to Paint Tile Floors
- 1. Inspect and Repair the Tile
- 2. Clean and Degrease the Floor
- 3. Protect the Surrounding Area
- 4. Sand or Etch the Tile
- 5. Apply Primer
- 6. Paint the Tile Floor
- 7. Add the Final Coat and Let It Cure
- Common Mistakes and How to Fix Them
- Frequently Asked Questions
- Do you have to prime tile before painting?
- Can you paint a porcelain tile floor?
- How long does it take to paint tile floors and when can you walk on it?
- Will paint peel off tile?
- Can you paint over grout?
- Can painted tile be restored to the original surface later?
- Conclusion
What You Need
Gather everything before you start. Running out of primer halfway through a floor is a bad afternoon, because the prep you have already done collects dust again while you make a supply run.
- Tile cleaner or degreaser — a pH-neutral tile cleaner, or trisodium phosphate (TSP) mixed per the label. Soap residue is a top cause of peeling.
- Scuff pad or 220 to 400 grit sandpaper — a sanding block for flat areas, a detail sandpaper strip for edges and corners.
- Painter’s tape — for baseboards, cabinets, and door trim. Low-tack tape is kinder to old paint.
- Bonding primer — a urethane-modified adhesion primer rated for ceramic, porcelain, or tile.
- Floor-rated paint — interior enamel floor paint or a one-part epoxy floor coating.
- 3/8 inch nap roller and a 2 inch angled brush — the roller for the field, the brush for edges and around fixtures.
- Roller frame plus extension pole — kneeling on tile for three coats is brutal, and a pole saves your back.
- Drop cloth or canvas sheeting — more painter’s tape, plus knee pads.
- HEPA vacuum or a stiff broom and damp rag — sanding dust must be off the floor before primer.
- Safety gear — nitrile gloves, a particulate respirator for sanding, and safety glasses.
Optional items: a paint tray, a grout scrub brush, a small detail brush for tight corners, masking plastic for doorways, and an anti-slip additive if the floor is in a wet zone or a walk path.
Primer is the one item people argue about, so here is the rule. If the paint can says all-in-one or self-priming on tile, follow it and skip the separate primer. If it does not, use a bonding primer and let it do its job. Primer is what bonds; the topcoat is what protects. A quality floor enamel over no primer may look fine for a month and then lift in flakes at the grout lines. A user on the Fine Homebuilding forum put it more bluntly: after a proper bonding primer, almost any topcoat will stick.
One warning on materials. Natural stone, unsealed slate, and some vinyl tile absorb water and stain differently, and standard floor paint will not behave predictably on them. Stick to glazed ceramic and porcelain, or check with the paint manufacturer first.
Step-by-Step: How to Paint Tile Floors
1. Inspect and Repair the Tile
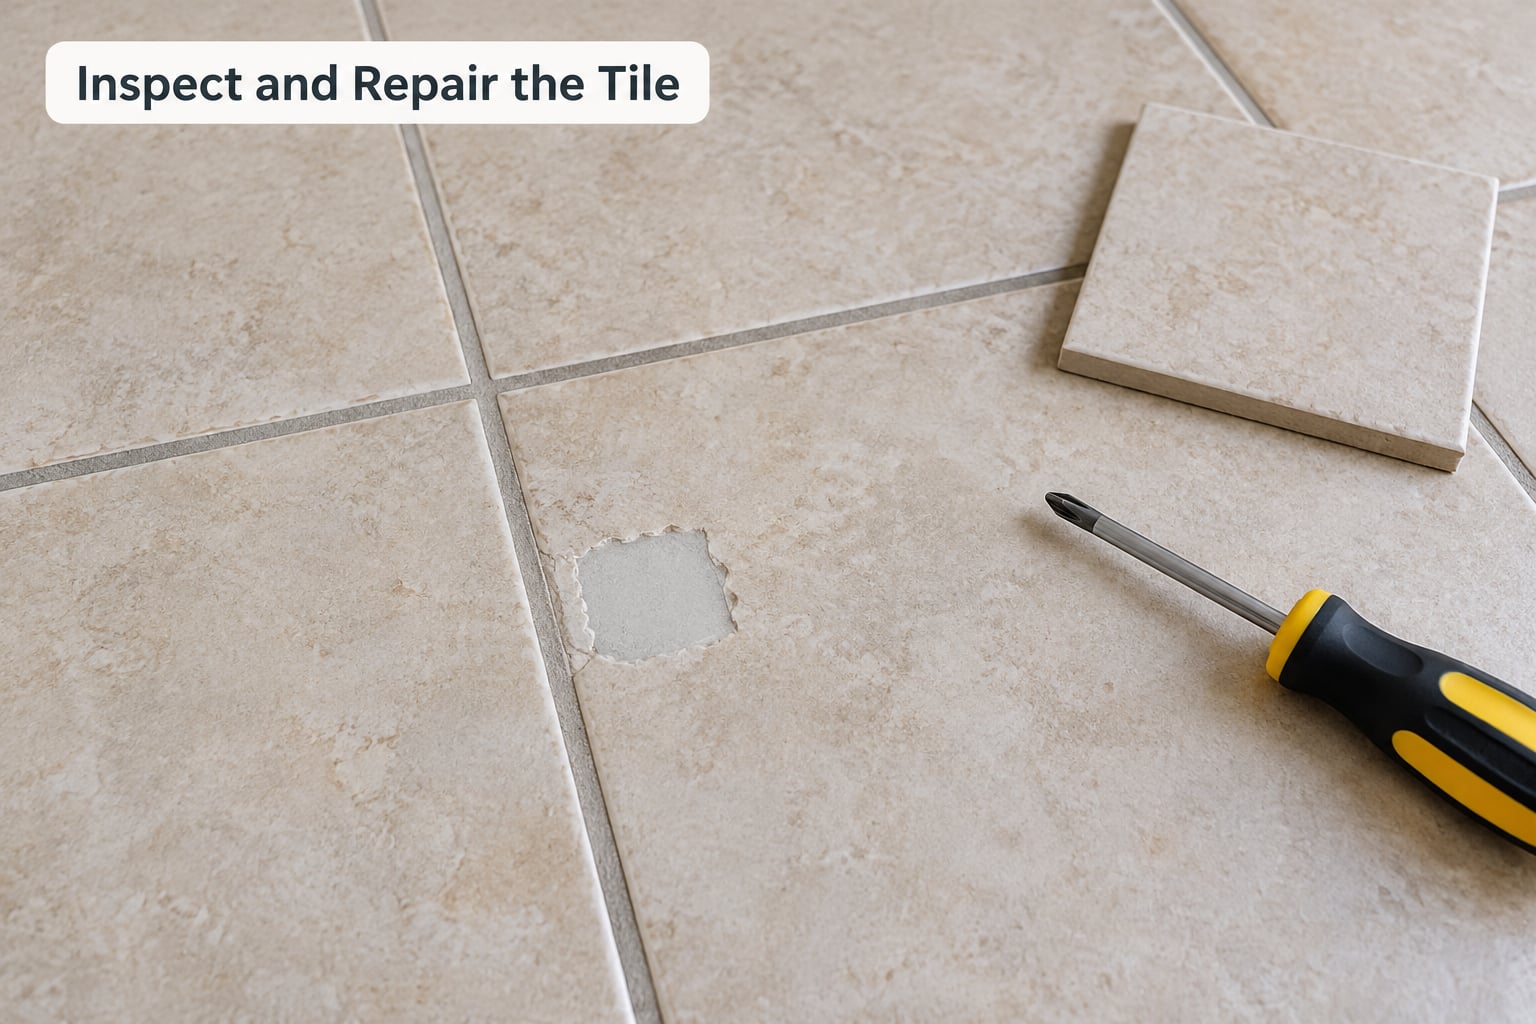
Start by walking the floor and finding what paint cannot fix. Press on each tile and listen for hollow-sounding spots, which mean the mortar bed has lost contact and the tile will move under a roller. Check that grout lines are solid, not crumbling, and look for silicone caulk around tubs, tubsides, and shower pans, since silicone repels paint and has to be cut out and replaced with paintable acrylic caulk.
Rake a loose grout line with a grout rake and refill any gaps with premixed grout, letting it cure fully. Replace any cracked or lifted tiles now, while the floor is still bare. Do not paint over a structural problem. If a good share of the tiles are cracked or the subfloor is damp, replacing the floor is the honest answer.
Checkpoint: every tile is secure, every grout line is solid, and no wax, sealer, or old coating remains that could block adhesion.
2. Clean and Degrease the Floor
Sweep first, then mop. A degreaser or TSP solution works across the field, but the real work is in the grout lines, where years of soap and hand lotion have built up. Scrub them with a stiff grout brush dipped in the same solution, and pay attention to the perimeter where the floor meets the baseboard.
After cleaning, run a clean damp cloth over a section and let it dry. If the cloth picks up a gray film, keep cleaning. Every trace of residue left behind is a spot where the coating has nothing to bond to.
Let the floor dry completely overnight if the room holds humidity. Painting over damp tile traps moisture inside the coating, and that is one of the fastest routes to a floor that peels.
Checkpoint: the floor looks dry, feels squeaky-clean to the finger, and passes the damp-cloth test.
3. Protect the Surrounding Area
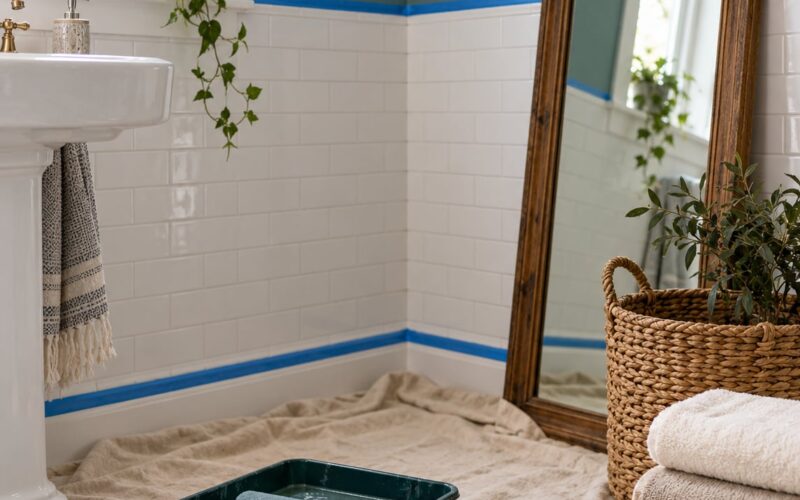
Tape the baseboards, cabinet toe kicks, and door frames. Press the tape down firmly along the top edge so paint cannot creep underneath. If you are taping to a textured or previously painted surface, score a faint line with a utility knife first, or the tape will lift the old paint when you pull it.
Cover adjacent surfaces with drop cloth or canvas, and tape plastic over doorways to cut dust and reduce drying time. Ventilate the room properly: open windows on two sides and run a fan to move air. That matters most with epoxy coatings, which carry a strong odor and a real VOC load, and with oil-based primers. If you are sanding, put on the respirator.
Block foot traffic through the work area. A doorstop across the hallway beats a sticky note.
Checkpoint: no tile is visible outside the area you intend to paint, and the room is ventilated.
4. Sand or Etch the Tile
Glossy glaze has to be broken. Sand the whole floor with a 220 to 400 grit pad or sandpaper, working in small circles with light, even pressure. You are looking for a uniform matte sheen, not grooves. Stay off the grout, since heavy pressure there crumbles soft grout lines and leaves dust you will be chasing for days.
An etching product is the alternative when you want to skip the physical work. It chemically dulls the glaze with less mess, but it needs to be rinsed thoroughly and allowed to dry. Use one product type or the other, not both. Do not skip this step on shiny tile. It is the single most common reason a painted floor fails.
Vacuum with a HEPA vacuum, then wipe with a damp cloth and let the floor dry fully.
Checkpoint: every tile looks dull and matte in raking light, with no glossy patches remaining.
5. Apply Primer
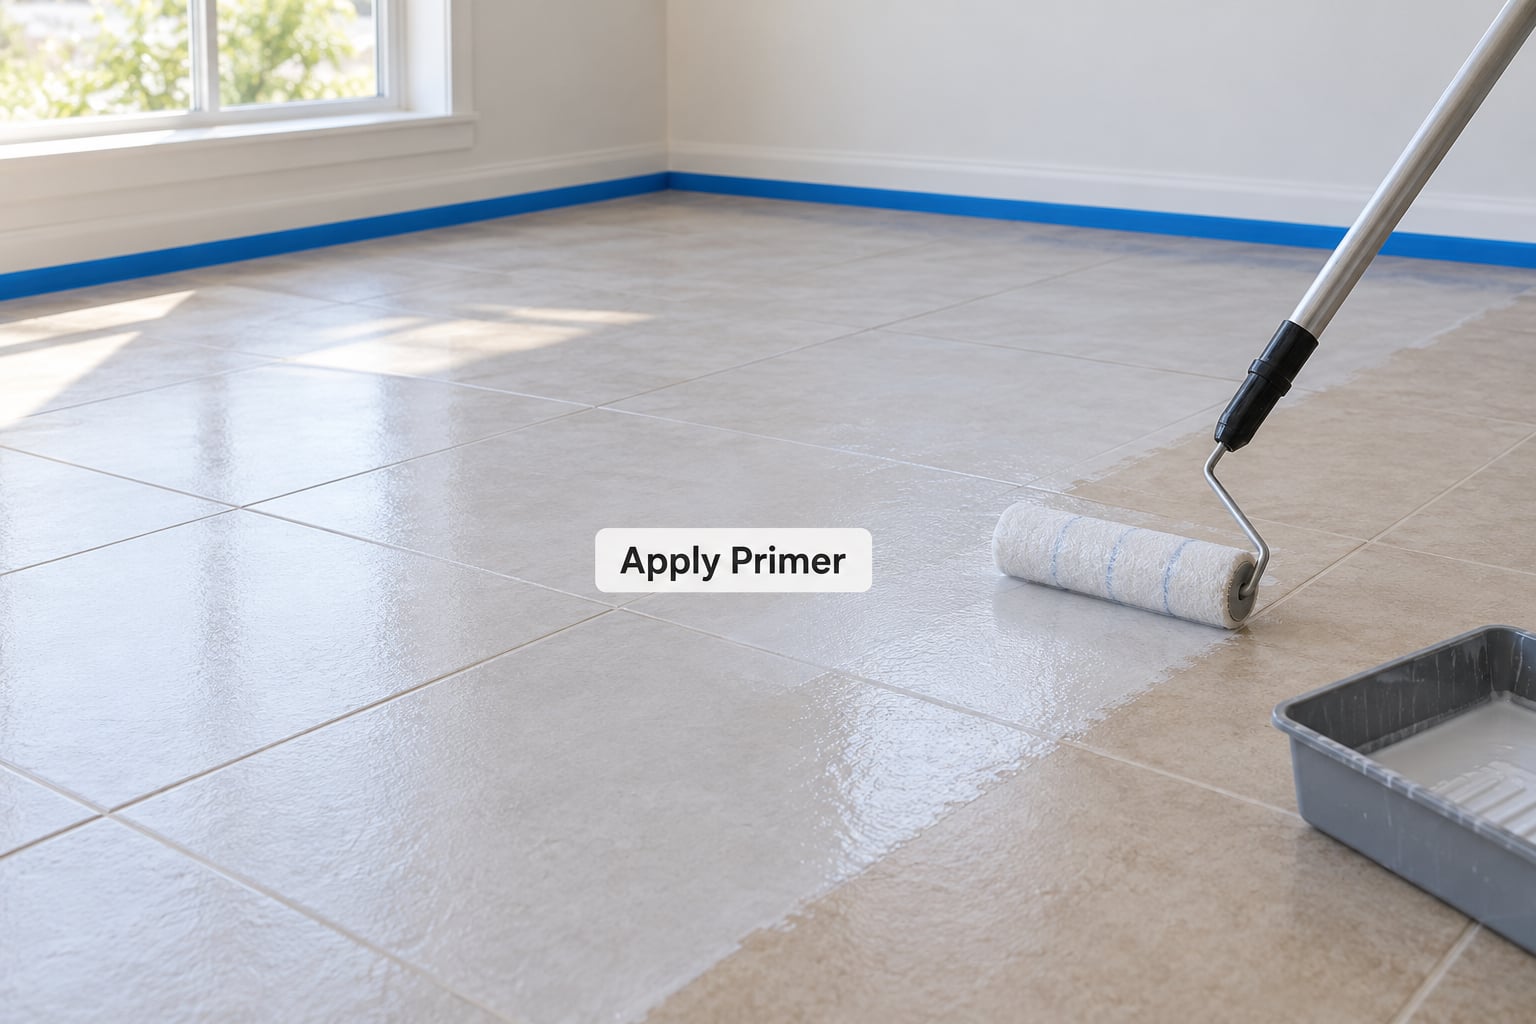
Cut in the edges with your angled brush first, then roll the field using a wet edge so you work from one corner toward the exit and never paint over a drying edge. Keep coats thin. A flooded coat pools in the grout lines, and those ridges are exactly where the coating later cracks and lifts.
Follow the manufacturer’s stated drying time before painting over primer, not a guess from the can feel. When the primer is ready, it should look uniformly matte and slightly tacky. If any part of the floor still looks glossy or wet-looking, that spot missed the primer, so apply a second pass there.
Checkpoint: the whole floor is uniformly matte, with no shiny tiles and no standing primer in the grout.
6. Paint the Tile Floor
Roll on thin coats. Load the roller lightly and offload it on the tray so you are spreading paint, not moving a puddle. One heavy coat looks worse and lasts less than two thin ones, because thick film traps solvent and cures soft underneath.
Work from the farthest corner toward the door so you always paint over dry floor rather than stepping on wet. Keep a wet edge between sections, and finish each pass at the same point so the lap marks line up. Coverage guidance varies widely by product and grout color, so follow the label: expect two coats as standard, and expect a third if dark grout is bleeding through a light color.
Respect the recoat window. Going back on too soon can lift the previous coat, and going on far too late can leave a surface the next coat cannot key into.
Checkpoint: the coat is even, thin, and free of roller lines or missed grout edges, and the stated recoat time has fully passed.
7. Add the Final Coat and Let It Cure
Apply the final coat of floor paint or one-part epoxy the same way, then roll on a clear protective topcoat if your system calls for one. Take a knee-level look across the floor in good light and touch up missed spots and brush marks while the paint is still workable.
Pull tape off slowly at a low angle before the topcoat fully hardens, or you may take a strip of baseboard paint with it.
Then be patient. Dry to the touch and fully cured are completely different milestones. Most systems want about 24 hours before foot traffic, around three days before furniture goes back, and close to a week before the floor gets wet-mopped or heavily scrubbed. Read your specific label, because humidity and a thick coat both stretch the clock. Put felt pads under every furniture leg. Moving a chair back in too soon is the most common way a good finish gets wrecked in month one.
Checkpoint: nothing heavy or wet has touched the floor for the full time listed on the can.
Common Mistakes and How to Fix Them
Painting over dirty or soapy tile. The fix: clean and scrub the grout properly, then re-wipe with a clean damp cloth. If the cloth comes back gray, you are not done.
Skipping abrasion on glossy tile. The fix: scuff or etch the entire floor until the sheen is gone. Test in a corner with light held across it; any shine left means another pass.
Using the wrong primer, or none. The fix: follow the paint can’s system. All-in-one means no separate primer; anything else needs a urethane-modified bonding primer rated for tile.
Applying thick coats. The fix: two thin coats, always. Heavy film stays soft, shows brush marks, and fails first in the grout.
Leaving grout dirty or unclipped. The fix: scrub grout lines with a stiff brush in the cleaning solution. Paint also grows over the grout a bit, so clip it down with painter’s tape as a guide on the final coat.
Pulling tape off too late. The fix: peel while the topcoat is still workable but not wet, low and slow.
Walking on the floor too soon. The fix: wait the full label time, and treat touch-dry as not ready. If you have to be in the room, lay down a breathable runner rather than plastic sheeting.
Choosing a clear topcoat that yellows. Water-based polyurethanes amber over time, and a r/paint user reported a distinct yellow shift after clear poly went over light Benjamin Moore paint. Stick to a floor-rated waterborne acrylic topcoat, and test on a small hidden patch if the base color is white or off-white.
Ignoring slip and odor. A painted floor is smoother than textured tile, and a slick floor in a wet room is a real hazard. Add an anti-slip additive rated for floors, choose satin rather than high gloss, and keep the room ventilated through application and cure.
If you already have a peeling painted floor, do not just paint over it. Sand the loose coating back to sound material, feather the edges, clean and degrease again, then prime the bare spots and recoat. Where the coating has lifted widely or the floor flexes underfoot, stripping back to clean tile and starting over beats a patch that fails again in a year.
A few tips that help adhesion: a dark color hides scuffs far better than a light one, since black shoe marks read as dirt on white and disappear on charcoal. A satin finish shows fewer scratches than gloss. And budget more time than you think, because the drying windows are not negotiable.
Frequently Asked Questions
Do you have to prime tile before painting?
Only if the product you bought does not say otherwise. All-in-one tile floor coatings and self-priming epoxies include the bonding layer, so following the can means skipping it. For any regular enamel floor paint, use a urethane-modified bonding primer rated for ceramic or porcelain. Primer provides the bond; the topcoat provides the durability. Skipping it on ordinary paint is the most common cause of peeling at the grout lines.
Can you paint a porcelain tile floor?
Yes, though porcelain is harder than ceramic to work with. It is denser and fired hotter, so it has less surface porosity and a tougher glaze, and it needs a bonding primer specified for porcelain or non-porous surfaces. The prep is the same: degrease, scuff or etch until the sheen is matte, vacuum, prime, then roll two thin coats. Natural stone and some vinyl tile behave differently, so check with the paint manufacturer before starting.
How long does it take to paint tile floors and when can you walk on it?
Expect a full weekend of hands-on work for a bathroom-sized floor: cleaning and drying the night before, then prep, primer, two coats, and a topcoat over two or three days. Then the waiting starts. Most systems ask for about 24 hours before foot traffic, roughly three days before furniture returns, and close to a week before wet mopping. Humid rooms and thick coats stretch those numbers, so always follow the label on your specific product.
Will paint peel off tile?
It can, and the reasons are almost always the same: painting over soap residue, skipping abrasion on the glossy glaze, using the wrong primer, applying thick coats, or walking on the floor before it cured. Do the prep properly and a painted floor can hold for years. Realistic expectation: it is a refresh, not a permanent replacement. High-traffic entryways and kitchens may need touch-ups every year or two, while low-traffic rooms can go much longer.
Can you paint over grout?
Yes, and most painted floors do. Paint covers grout as part of the coat, which is fine unless you want to keep the grid visible. If you would rather keep the lines, tape each grout line before the final coat and peel while the topcoat is still slightly workable. Deep or stained grout can bleed a discolored halo through a thin first coat, so a second coat is the fix. Never leave thick paint pooled in the joints, since that is where cracking starts.
Can painted tile be restored to the original surface later?
Yes, though it takes real effort. Sand the coating back thoroughly or use a floor-safe paint remover, then scrub off the residue with a tile-safe cleaner. Expect to spend most of a weekend on a bathroom-sized floor, and expect the glaze to look matte afterward, since abrasion is unavoidable. If you are renting, this is the part to plan for before you start, and it is a good reason to test a small hidden patch first.
Conclusion
If you take one thing from this guide, make it the first step: clean the floor properly and abrade the glaze until it is uniformly matte. That is what everything else sits on. Then pick a paint system and follow it exactly, including the primer step and every drying window on the label.
Before you commit a whole weekend, find a spot the eye rarely reaches, behind the dryer or in a closet corner, and run the complete system on it. Leave it for a few days, scuff it with a shoe, and wipe it with a damp cloth. That patch tells you more than any product description will. If it holds, you know how to paint tile floors well enough to do the rest of the room, and you already know what color you are living with.