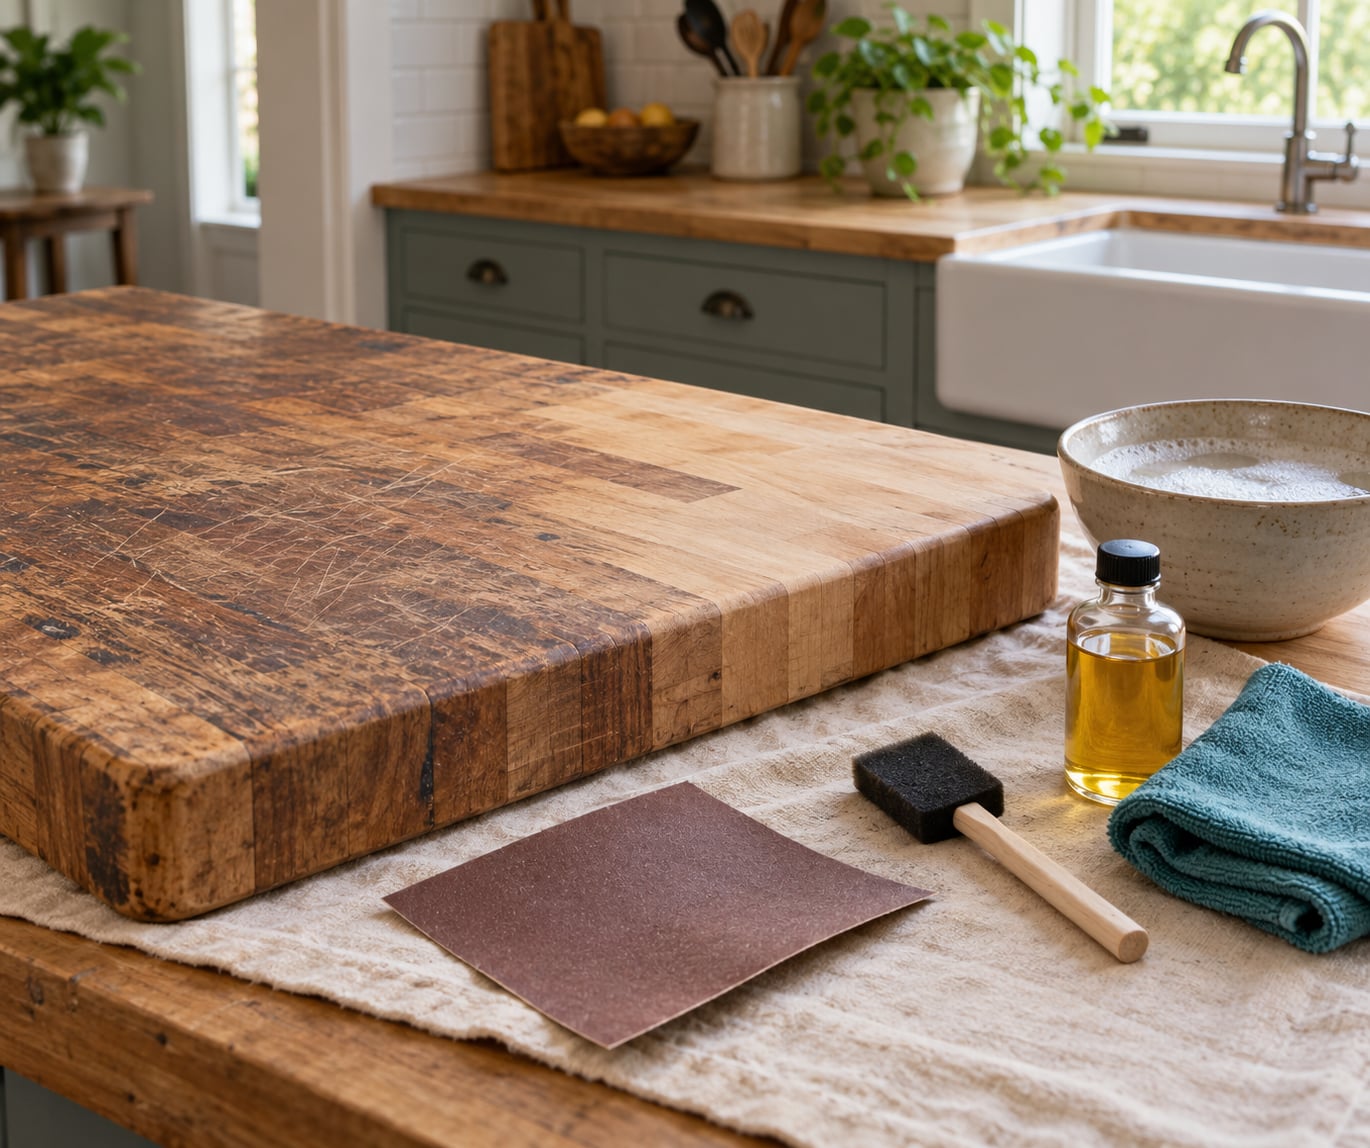
A dull, stained butcher block counter does not have to be replaced. Most of the worn look comes from a dirty, dried-out finish and a few hundred tiny knife marks, and how to make a butcher block counter look new is mostly a matter of cleaning it well, sanding back only what needs it, and putting fresh oil into the wood.
Start by cleaning and oiling it. Only move to sanding if the counter is still dull, blotchy, or covered in scratches after a good wash and a fresh coat of oil. Most counters in a busy kitchen come back from that first weekend of work.
Budget an afternoon for the clean-and-oil route, or a full weekend if sanding is involved, since each coat of finish needs dry time. The tools are ordinary, the material cost is small, and you can do the whole job in place without pulling the counter off the cabinets.
There are two things worth sorting out before you start. First, know whether the counter is solid wood or a veneer over particleboard, because a veneer is only a few millimeters thick and one careless pass with an orbital sander can cut through to the core. Second, know whether it is a food prep surface where people cut directly on the wood, since that changes which finishes are appropriate.
Table of Contents
- What You Need to Make a Butcher Block Counter Look New
- Step-by-Step: How to Make a Butcher Block Counter Look New
- Assess the Counter and Identify the Problem
- Clean the Surface Thoroughly
- Treat Stains and Discolored Areas
- Sand the Counter to Remove Wear
- Repair Minor Cracks and Chips
- Condition and Re-oil the Wood
- Maintain the New-Looking Finish
- Common Mistakes That Ruin a Butcher Block Counter
- Frequently Asked Questions
- Can a butcher block countertop be refinished without removing it?
- How often does a butcher block counter need to be re-oiled?
- What is the best finish for a butcher block countertop?
- Can you stain an IKEA Karlby or other veneer butcher block?
- How do you fix water stains and raised grain on a butcher block?
- How long does a DIY butcher block refinishing project take?
- Conclusion
What You Need to Make a Butcher Block Counter Look New
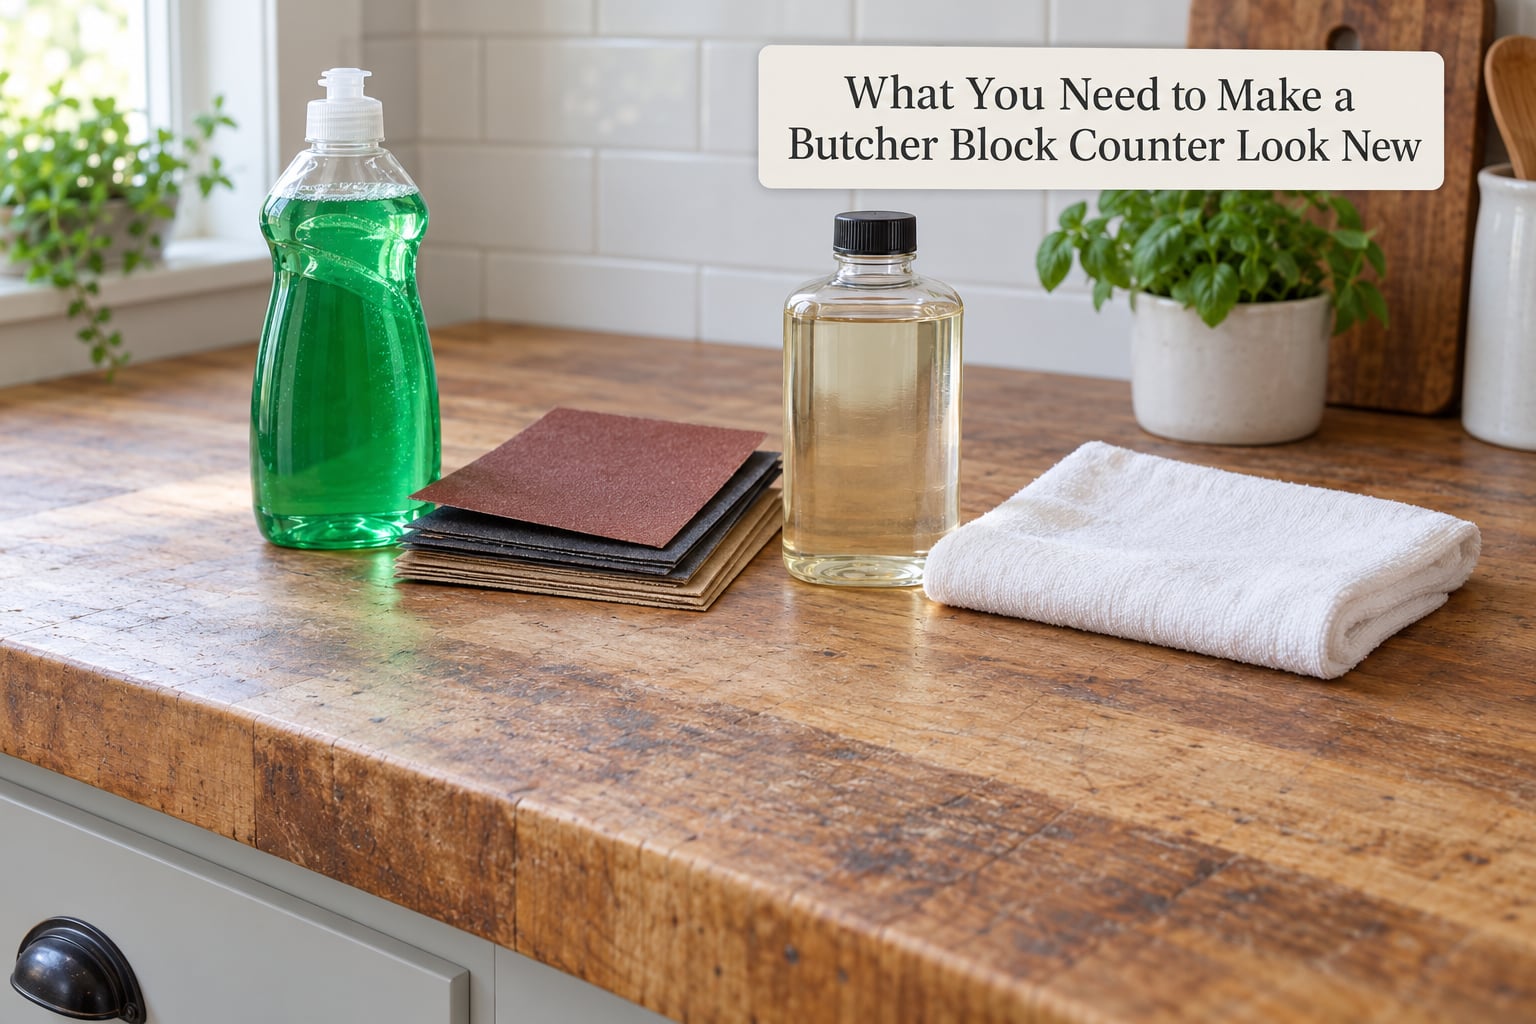
Start with the cleaning kit, because every job needs it. Mild dish soap, warm water, two soft cloths, and a bowl or bucket for mixing cleaning solutions.
- Mild dish soap for the initial wash
- Non-abrasive sponge or nylon scrub pad
- Two or three lint-free cloths, plus old rags for oily work
- Baking soda for mild stain work and deodorizing
- Hydrogen peroxide for darker set-in stains
- Food-grade mineral oil or a butcher block conditioner
- Foam brush or clean bristle brush for spreading oil
- Razor scraper or plastic card for lifting dried residue
Add the sanding gear only if you get past cleaning. This is where the dust control matters, because an orbital sander with a vacuum attachment keeps most of the grit out of your kitchen, and it is the single upgrade that makes indoor sanding bearable.
- Random orbital sander with a dust bag or vacuum attachment
- Abrasives in 80, 120, 180, and 220 grit, plus 320 grit for final smoothing
- Detail sander or sanding sponge for edges and tight corners
- Tack cloth for wiping dust between sanding and finishing
- Shop vac, or a plastic sheeting-and-fan setup if you sand by hand
- Masking tape and plastic sheeting to protect cabinets, walls, and the sink
Finally, gather the repair materials. Wood glue and a plastic scraper handle small lifted edges, cyanoacrylate glue closes hairline splits, and color-matched wood filler or beeswax fills nail holes and chips. Keep a paper towel within reach; fresh oil and glue both grab fast.
Step-by-Step: How to Make a Butcher Block Counter Look New
Assess the Counter and Identify the Problem
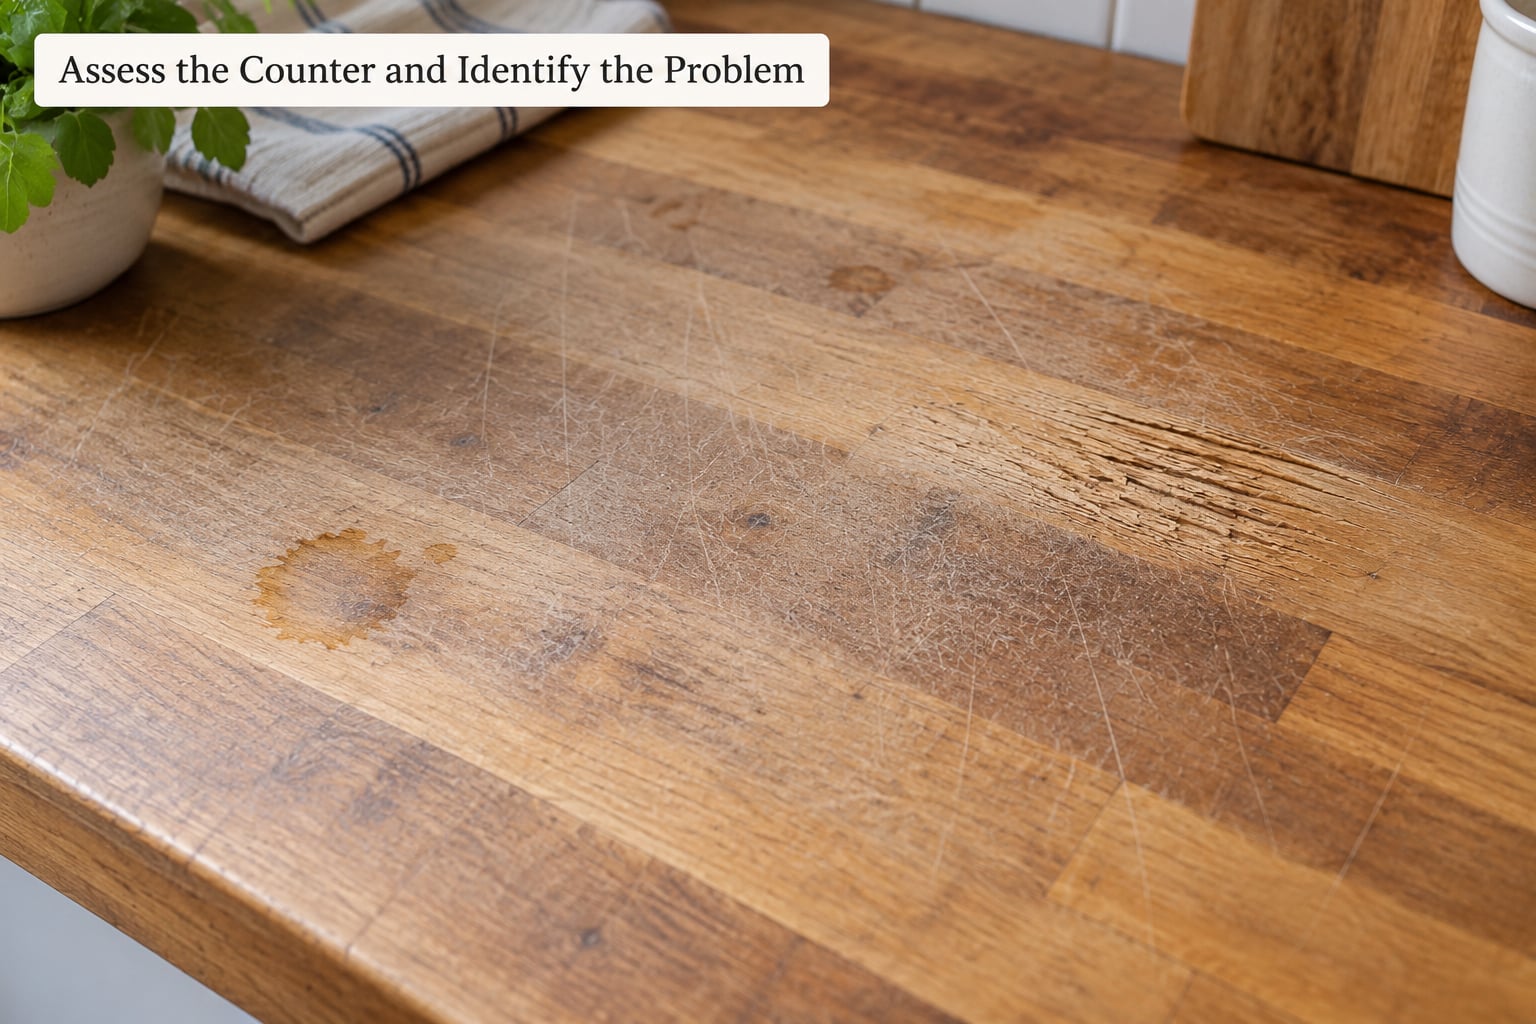
Diagnosis first, because the least aggressive method that works is the one you want. If the surface only looks tired, go straight to cleaning and oiling. Sanding is a fallback, not a starting move.
- Surface grime: a sticky or filmy feel, dark corners, smells like old oil. Fix with soap and water.
- Dryness and dullness: pale, chalky patches that soak up water instantly. Fix with oil, no sanding.
- Scratches: fine cut marks, lighter than the wood, mostly across the working zone. Fix with sanding or a scratch-specific oil product.
- Stains: darker patches with no texture change, from wine, coffee, or turmeric. Fix with targeted stain removal.
- Raised grain: the surface feels furry or bumpy after water exposure. Fix with one pass of 180 grit, then oil.
- Deep checking: cracks that go into the wood, not just the finish, sometimes with a black line. These need a repair decision, not a polish.
To check whether you have solid wood or veneer, look at the end grain or an unfinished edge. Solid blocks show growth rings and continuous grain lines running the length of the strip. Veneer shows a thin dark layer, sometimes a particleboard core, and usually a repeating grain pattern across modules.
Also run a fingernail across a worn spot. If the mark catches and the wood feels soft or crumbly, the block itself is compromised and a cabinetry professional is a better call than a weekend of sanding.
Clean the Surface Thoroughly
Wash the counter with warm water and a few drops of mild dish soap, working in sections with a non-abrasive sponge. Wipe, rinse, and dry each section before moving on, because trapped moisture under a finish is what causes the blotching people try to fix later.
For sticky or filmy areas, let the soapy water sit for a few minutes, then lift the grime with a plastic scraper held at a shallow angle. Never dig with a metal blade, which scratches the surface and leaves burrs that make sanding harder.
Follow up with a wipe of diluted vinegar or a baking soda paste for stubborn film. A tablespoon of baking soda mixed with enough water to make a paste, spread and left for a few minutes, then scrubbed gently, handles most residues without touching the wood.
Dry with a towel, then fan it with a box fan or hair dryer on cool until the wood feels room temperature and completely dry to the touch. This step matters more than people expect. Any water left in the wood will push the oil out later and leave pale blotches that look exactly like a bad finish job.
Treat Stains and Discolored Areas
Match the treatment to the stain, starting with the mildest thing that could work. Many kitchen stains sit near the surface and come out with gentle abrasion, no chemicals at all.
- Light surface stains: a paste of coarse salt and lemon juice, or salt and warm water, worked in with a cloth and left for a few minutes. Lemon works on lighter woods; on walnut or cherry it can darken the patch.
- Grease and cooking film: repeat the soap wash, then finish with a cloth dampened with a little dish soap and water. One more rinse wipe stops a film from reappearing a day later.
- Dark or set-in stains: a few percent hydrogen peroxide applied with a cotton swab, blot, and rinse. Test a hidden corner first, since peroxide lightens wood and can leave a halo on darker species.
- Very dark stains: a wood-safe commercial stain remover used exactly as labeled, then a full rinse and dry.
Skip bleach. It strips the finish, attacks wood, and leaves a bleached ring that is very hard to blend out. Skip ammonia and oven cleaners too; they do the same kind of damage in a smaller bottle.
If a stain still shows after a couple of tries, it has gone into the wood rather than sitting on it. That is the point to sand, not to keep scrubbing, and one grit of sanding will usually remove what chemistry could not.
Sand the Counter to Remove Wear
Sand only the areas that need it when you can, since each pass removes wood you cannot put back. Sanding the whole block evenly looks better in the end, but spot sanding on a counter with one bad zone saves hours and a millimeter of thickness.
Mask cabinets, walls, and the sink first, then start with 80 or 120 grit to knock down a film-forming finish or deep scratches. Work with the grain, not in circles, and let the sander do the work rather than leaning on it. On veneer, keep the first pass to 120 grit and check often by wiping your hand over the surface; a soft, fuzzy feel means you have reached bare wood.
Move up through 180 and 220 grit, and 320 if you want extra smoothness. Skip grits only when you are confident. Rushing the progression is how people end up with visible swirl marks that need another full pass to fix.
Vacuum between grits and wipe with a damp cloth, then a tack cloth, before the next grit goes on. Dust left behind under an oil finish is what creates those tiny dark specks that never sand out.
Never sand the full thickness of the block by chasing a low spot down to the high wood beside it. Use a block wrapped in sandpaper, called a slurpy, and level gently, or accept a slight unevenness that oil will mostly hide. Deep hollows in solid wood need an installer, not a sander.
Repair Minor Cracks and Chips
Small problems have small fixes. A lifted edge along a glue joint needs pressure and glue, not sanding. Lifted grain that snags a cloth is sanded level once the glue dries.
For hairline splits and small chips, clean the gap, work a thin line of wood glue or cyanoacrylate into it, clamp or tape the pieces closed, and let it cure fully before sanding the seam flat with fine grit. For nail holes and small dents, press in color-matched wood filler with a putty knife, let it dry hard, then level it with 180 grit and a sanding pad.
For a chip on an exposed edge, a strip of hardwood glued and clamped over the missing corner is stronger and looks better than filler alone. Sand the added strip down until it flows into the original edge.
Stop and call a cabinetry or furniture professional when the crack runs across several strips, when a glue line between modules is opening up, when the block is visibly warping, or when the wood is soft and crumbly. Those repairs are structural, and a bad DIY fix there shows up later as a countertop failure.
Condition and Re-oil the Wood
This is the step that actually makes the counter look new. Wood that has been sanded, and wood that has simply gone dry, both drink oil.
Apply food-grade mineral oil or a butcher block conditioner in thin coats with a foam brush or lint-free cloth, following the grain. Keep a wet edge and wipe off what the wood will not absorb after 15 to 20 minutes, because pooled oil stays tacky and eventually goes rancid.
Let it dry overnight, then repeat for a second coat. Wood keeps absorbing after the surface looks finished, so two or three thin coats beat one heavy one every time. Buff the final coat with a clean dry cloth once it is fully dry to the touch, and the surface should look warm and even with a low sheen rather than a wet gloss.
If you want a color change rather than a clean-up, use a gel stain instead of oil. Sand to 180 grit, apply a pre-stain wood conditioner on maple, birch, and cherry to prevent blotching, then work the gel stain on and wipe it back within the product window. Seal with a finish approved for food contact once the stain has cured.
Polyurethane is the tough option people ask about most, and the honest answer is that it is a film, not an oil. It resists water and stains better, but scratches show white instead of dark, it yellows over time, and most oil-based versions are not rated for cutting directly on the surface. Use it where nobody slices food on the wood, such as a bar top or a desk surface, and follow the cure time on the label rather than the dry-to-the-touch time.
Finish both faces and both ends if the counter is installed and unattached to a wall. Sealing only the top leaves moisture moving through the underside, which is how an otherwise sound block starts to cup.
Maintain the New-Looking Finish
Put the block on a routine and it stays looking new. Wipe spills as they happen, especially water, oil, and wine, and wash with warm soapy water rather than leaving a dirty pan sitting on the surface overnight.
Dry after every use, stand boards and trays upright so air moves around them, and never let a dishrack pool water against the wood. Use a trivet under hot cookware, since oil finishes darken in rings and a hot pot can lift a spot outright.
Re-oil when water stops beading and the wood starts to look pale, usually every few months in a busy kitchen. Some woodworkers follow a simple habit known as the Rule of Seven: oil it daily for the first week, weekly for the second, monthly for the third, twice a year after that, then once a year. The exact schedule matters less than the habit of noticing the change before it looks dull.
Keep a small bottle of the same oil you used under the sink and touch it up the moment a spot looks thirsty. A two-minute wipe now saves a full sanding project later.
Common Mistakes That Ruin a Butcher Block Counter
Soaking the block. Running water across the counter is fine. Leaving it wet, or putting a soaked cutting board on the surface overnight, is what raises the grain and drives water into cracks. Wipe it dry and you avoid most of the problem.
Using bleach or harsh chemicals. They strip the finish, lighten the wood unevenly, and leave a halo you will be sanding out for months. Soap, baking soda, and a careful rinse handle almost everything a kitchen produces.
Sanding with no dust plan. Indoor sanding without a vacuum attachment, plastic sheeting, and a fan will coat your cabinets, the sink, and the floor in fine dust that takes days to clean. Set up protection before you fire up the sander, not after.
Sanding too hard or too flat. Pressing down on an orbital sander thins the block quickly, and chasing one low spot down to meet the high wood next to it takes the whole surface thinner. Let the sander travel.
Applying too much oil. A soaked surface stays sticky, attracts dust, and can go rancid. Thin coats, wiped off before they soak in, every time.
Skipping the dry step. Oil applied over damp wood pushes the water out later and leaves pale blotches. Give the block time to reach room temperature and feel dry, then oil.
Expecting one treatment to fix deep damage. A dark stain that has gone into the wood, a structural crack, or a warped block will not come back with a scrub and a coat of oil. Sanding has a limit, and past it the counter needs a professional.
Painting or staining over an unknown finish. If you do not know what is already on the wood, adhesion is a coin flip. Paint and stain also trap whatever old finish was underneath, and a bad adhesion failure shows up months later as peeling.
Frequently Asked Questions
Can a butcher block countertop be refinished without removing it?
Yes. Most counters can be done in place. Tape off the cabinets, protect the sink and walls, and sand with an orbital sander that has a vacuum attachment. The seams and edges take longer by hand, but nothing about the job requires pulling the counter off the base cabinets unless it is warped or badly cracked.
How often does a butcher block counter need to be re-oiled?
Every few months in a busy kitchen, or sooner if the wood starts to look pale and water stops beading. A common habit is the Rule of Seven: daily for the first week, weekly for the second, monthly for the third, then twice a year and once a year. Wiping on a thin coat the moment a spot looks dry beats scheduling it and letting the whole surface fade first.
What is the best finish for a butcher block countertop?
Food-grade mineral oil or a butcher block conditioner is the safest and most repairable choice for a surface where food is cut directly on it. Tung oil and similar polymerizing oils dry harder and take more water. Polyurethane gives the best stain resistance but forms a film that shows scratches and yellows, so it suits areas that are not used for cutting.
Can you stain an IKEA Karlby or other veneer butcher block?
Yes, with care. Veneer is thin, often only a few millimeters, so sand gently by hand with 120 to 220 grit and check constantly for the softer, lighter core underneath. Orbital sanders are risky here. Most people skip the stain entirely and just clean and oil the surface, which is much harder to ruin.
How do you fix water stains and raised grain on a butcher block?
Let the surface dry completely, then take the fuzzy raised grain down with one pass of 180 grit in the direction of the grain. Follow with 220 grit, then oil the whole surface evenly so the repaired area matches the rest. Blotchy water marks usually disappear once the wood is dry and re-oiled.
How long does a DIY butcher block refinishing project take?
Plan on an afternoon for cleaning, stain work and oiling, plus overnight drying between coats. Add a full weekend if you are sanding and sealing the whole counter, since each coat of finish needs dry time and a long cure before the counter can take heavy use.
Conclusion
Wash it, dry it fully, and give it two thin coats of oil. That is the whole job for most counters, and it is the cheapest way to make a butcher block counter look new again.
Only reach for the sander when the counter is still dull and scratched after cleaning and oiling, and start on a hidden corner so you know how much wood you are giving up. If the wood is soft, warped, or cracking across several strips, call a cabinetry professional before you start.