To reupholster a dining chair seat, you unscrew or unhook the seat from the frame, pull off the old fabric and staples, then staple new fabric over fresh padding working from the center of the seat outward. A first-timer usually needs two to three hours per chair, most of it spent pulling staples. No sewing machine is required if you leave the backrest alone.
That last part matters more than anything else. Plenty of beginners read a tutorial promising an easy afternoon, then get halfway through and find out the backrest needs a sewn cover with welt cord. Seat only, nothing sewn, genuinely is a beginner’s job.
Here is what a real project looks like. One r/upholstery user counted 850 staples pulled from four dining chairs, which is about what a padded seat hides. You will also spend real time checking the frame before cutting anything, and the fabric itself needs a 3 to 4 inch overhang on every side. Add dust cover fabric to your shopping list or you will be hunting for a scrap of black cloth at the end.
- Time: 2 to 3 hours for a first seat, about 90 minutes once you have done one.
- Skill level: beginner, if you are patient and throw away the first attempt at a corner.
- Sewing: none, as long as the seat lifts off the frame and the backrest stays as it is.
- Materials: upholstery fabric, foam, 1/2 inch batting, staples, and a piece of black dust-cover fabric.
- Yield: one finished seat, or a matching set if you work through them in a batch.
Table of Contents
- What You Need
- Tools
- Materials
- Before You Buy Fabric
- Step-by-Step: How to Reupholster a Dining Chair Seat
- 1. Inspect the Chair and Remove the Old Seat Cover
- 2. Clean and Repair the Seat Base
- 3. Measure and Cut the New Fabric and Padding
- 4. Attach the Fabric and Finish the Edges
- 5. Reattach the Seat and Inspect the Result
- Common Mistakes
- Frequently Asked Questions
- Do I need a sewing machine to reupholster a dining chair seat?
- What is the best fabric for reupholstering dining chairs?
- How long does reupholstering a dining chair seat take?
- Can I reupholster a chair without removing the old fabric?
- How much fabric do I need for one dining chair seat?
- How do I reupholster a dining chair that doesn’t come apart?
- Conclusion
What You Need
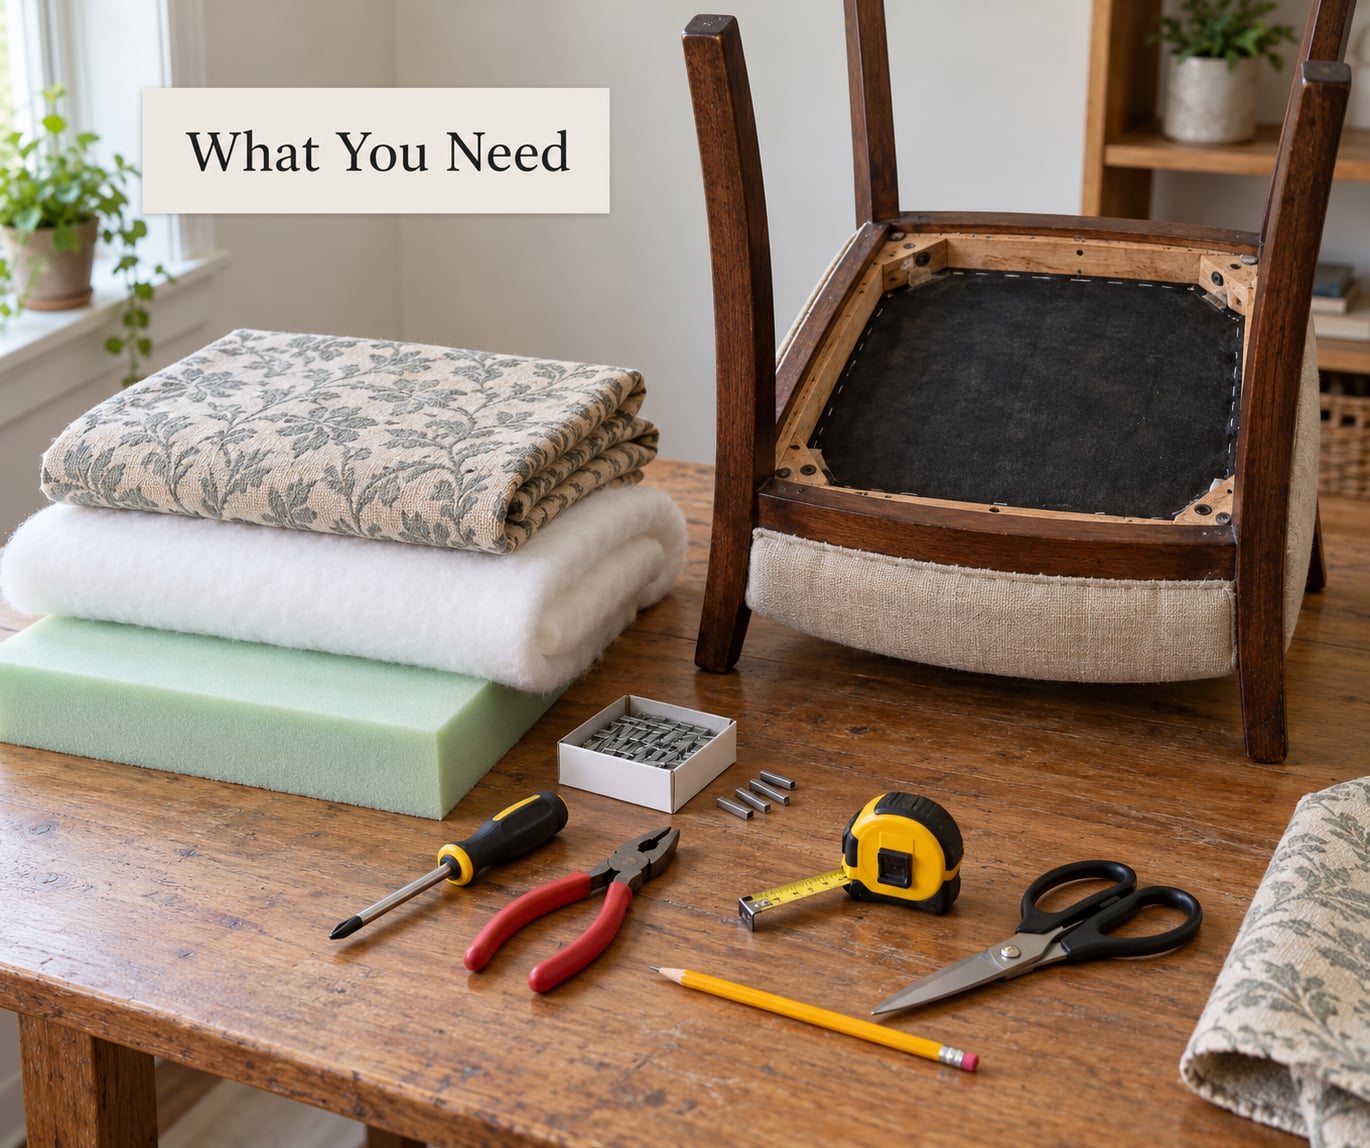
Grab everything before you turn the chair over, because stopping halfway through for a missing tool is how a two-hour job becomes an evening. The tool list is short and most households already own half of it.
Tools
| Tool | What it does | Notes |
|---|---|---|
| Staple gun | Attaches batting, fabric and the dust cover | A light manual gun is fine; an electric one saves your hand on a six-chair set |
| Flathead screwdriver | Pries up old staples and lifts stuck fabric | A wide flat blade works better than a narrow one |
| Needle-nose pliers | Pulls staples the screwdriver cannot lift | Essential; bent or missing jaws are the usual failure |
| Phillips screwdriver or drill | Removes the seat mounting screws | Keep the screws in a bowl, not on the floor |
| Upholstery shears or sharp scissors | Cuts fabric and batting | Dull blades chew batting into fuzz |
| Measuring tape and a marking pen | Sets the fabric outline | Chalk works on plywood; a pen works on fabric |
| Serrated bread knife or jigsaw | Cuts foam | A serrated blade leaves a clean edge instead of tearing the cell structure |
| Hammer | Sets proud staples flush | Also your fastest tool for the demolition phase |
| Phone or camera | Records how the seat was assembled | Ten seconds of video saves you guessing later |
Materials
Check the fabric width before you commit to a yardage. Bolt-width upholstery sold around 54 inches runs the full length of the seat in one drop, so 2 to 3 yards is plenty. Fabric sold by the half yard is usually only 27 to 29 inches wide, which is narrower than most seats once you add the overhang, and you will need closer to 3 yards to cover the same area.
- Upholstery fabric: at least 3 to 4 inches wider and deeper than the seat base on every side. Plan on 2 to 3 yards for one standard seat.
- Foam: high-density foam in the same thickness as what came out, usually 2 to 2.6 inches on a dining seat. Cheap furniture foam crumbles within a couple of years.
- Batting: 1/2 inch polyester batting, the thin white layer between foam and fabric. Two layers give a fuller, softer result.
- Staples: 3/8 inch or 5/16 inch upholstery staples. Anything longer risks punching through the far side of the seat base.
- Dust-cover fabric: a piece of plain black non-woven or breathable upholstery fabric for the underside, cut about 1 inch smaller than the base.
- Spray adhesive: optional, for bonding batting or a light mist of foam to the base.
Before You Buy Fabric
Remove the old cover first, then shop. The old fabric piece is your pattern, and it tells you the exact finished size, how the original was stapled and how much overhang the builder used. Experienced upholsterers keep the old piece every time for this reason.
If you plan to reupholster a whole set, buy all the fabric at once and cut every seat from the same spot in the bolt. Prints drift along the length, and seats cut from different parts of the roll will not match.
Step-by-Step: How to Reupholster a Dining Chair Seat
Learning how to reupholster a dining chair seat comes down to five stages: take it apart, fix what is underneath, cut new material, staple it on from the middle out, and put it back. The stages are simple. The one detail that decides whether the seat looks professional is the order you staple in, which is why it gets its own section below.
1. Inspect the Chair and Remove the Old Seat Cover
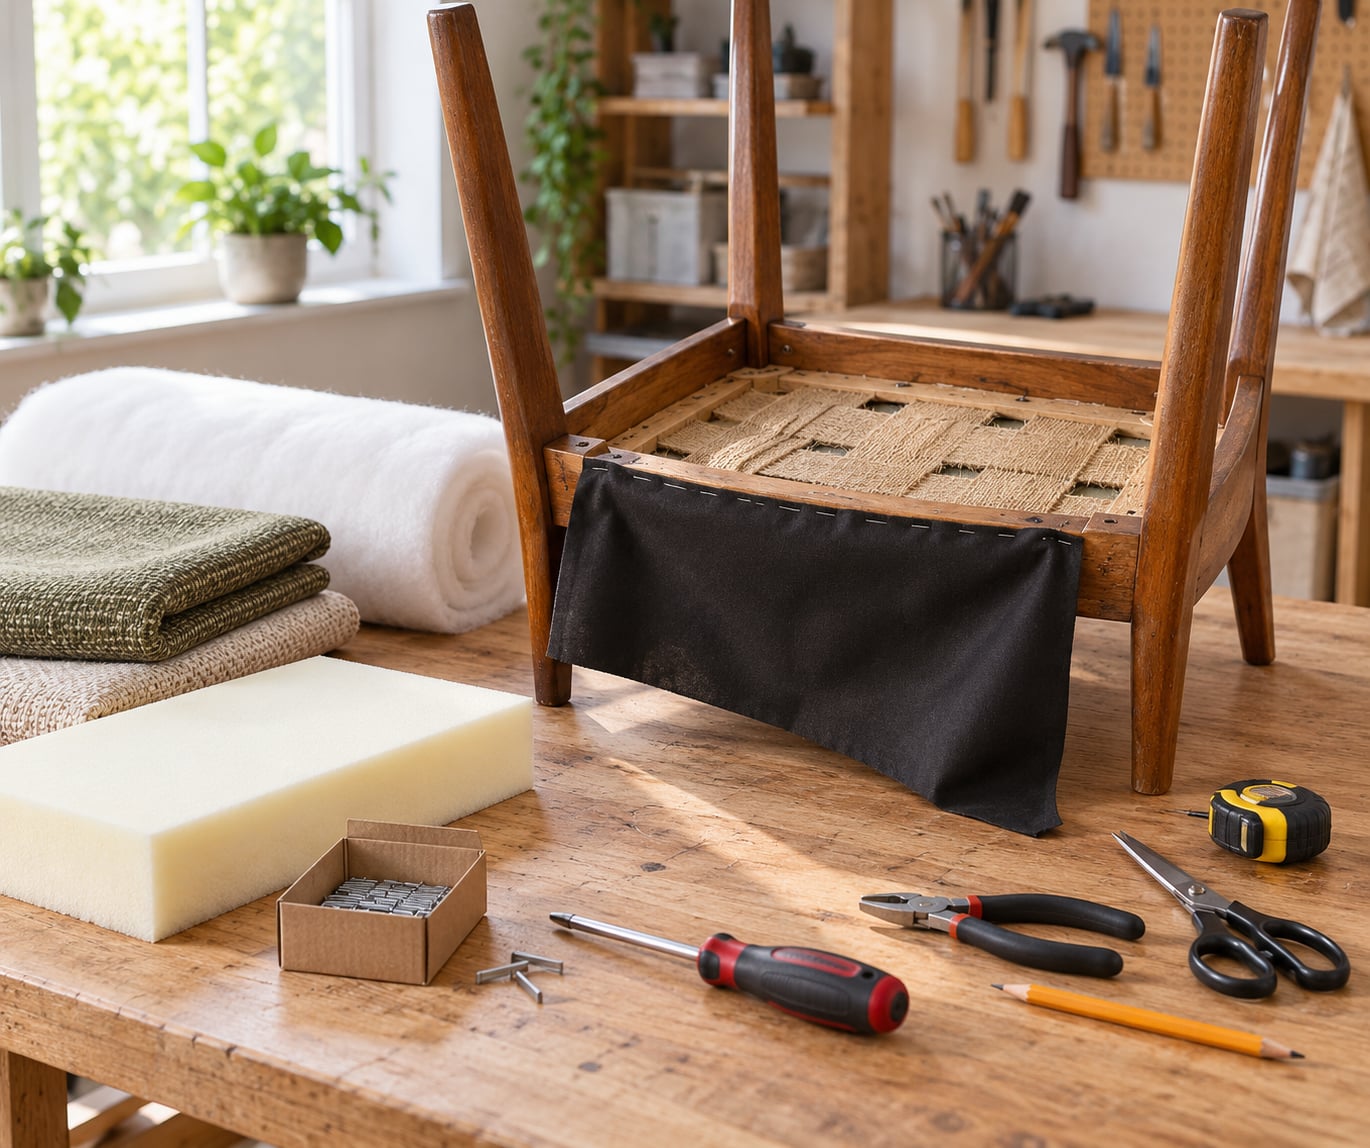
Flip the chair over and find how the seat is held on. Most dining chairs attach with four screws through corner blocks or a wooden rail, and a few use bolts, brackets or hooks. Count the fasteners, photograph them, and put them in a bowl.
Then start at the underside and work upward. Pull the dust cover off first, then pry every staple you can reach with the flat screwdriver and follow with the pliers. That flathead-and-pliers pairing is the whole technique once you accept there are far more staples in there than you expect. Beginners on r/upholstery generally describe the seat as fairly straightforward, with the backrest being where projects go wrong.
Old fabric tears more often than people anticipate, especially at the corners where it has been folded and stapled for years. If it rips, do not panic. Trace the seat base itself onto the new fabric, add your 3 to 4 inch allowance, and carry on.
Keep the old fabric if it comes off in one piece. Lay it on the new fabric to confirm sizing before you cut anything.
2. Clean and Repair the Seat Base
Scrape off dried adhesive with the flat screwdriver and wipe the plywood down. Old glue under the batting is the reason new covers pucker a year later, so take it down to bare wood.
Now check what is underneath, because this decides whether the chair is worth saving. Press down hard on each corner and the middle of the base. If the plywood feels soft, cracked or hollow, replace the base panel before adding foam. Check the webbing or springs: sagging webbing that stretches more than an inch under your hand needs replacing, and rusted springs mean a full seat rebuild.
Tighten any loose joints while the seat is off the frame, since you now have clear access to every screw. Many thrifty decorators take this window to sand and stain or paint the legs too, which is far easier with the seat detached.
Flip the seat over and tap the frame firmly. A solid knock and no movement means you can go ahead.
3. Measure and Cut the New Fabric and Padding
Measure the seat base width and depth, then add 3 to 4 inches on every side for the wrap and the staples underneath. A 16 by 17 inch seat base needs roughly 22 by 23 inches of fabric, and about 2 to 3 yards is the practical purchase.
Mark the grain line before cutting. Upholstery woven along the grain stretches less across the width than along the length, so running it wrong way round gives you a seat that sags in the middle no matter how many staples you use. Lay the piece out, square the corners, and cut in one clean pass rather than several small snips.
Cut the foam next. The old foam makes an exact template, so trace it onto the new block and cut with a serrated knife in long strokes, letting the blade do the work instead of pressing down. A jigsaw with a fine blade works too. Test-fit before cutting — foam that is a hair too tight will bow the plywood.
Shape the batting by cutting it 4 to 5 inches larger than the foam on all sides. The extra length gives you enough material to pull the batting down over the edge and staple it flat, which is what hides the foam and the staples in one move.
4. Attach the Fabric and Finish the Edges
Staple in rounds from the center outward, and this is the part that separates a neat seat from a wrinkled one. Pulling fabric from the edge inward bunches it in the middle, which no amount of extra tension will fix.
- Round 1: place one staple at the exact center of the seat, then one at the center of each of the four sides. Five staples, all roughly hand-width apart.
- Round 2: work outward toward the corners, adding a staple about every 2 inches along each line. Four lines means roughly a dozen more staples.
- Round 3: fill in between the staples from round 2, again about every 2 inches. Now the tension is spread evenly across the whole surface.
- Round 4: staple along the outer edge of the seat base, just inside the plywood edge, keeping the same 2 inch spacing and the same pull.
- Round 5: fold the corners and staple them last.
Before stapling, center your fabric on the seat base and staple the batting down first, trimming the excess and folding the corners so nothing hangs over the edge. Mist the batting with spray adhesive if you want it to stay put. Then center the fabric on top of the batting and start round 1.
For the corners, pull the excess fabric taut, press the crease down with your thumb, fold one flap underneath the other, and staple through both layers about half an inch from the edge. Work all four corners the same way so the crease lands in the same place on every one. Trim the leftover fabric flush with the staples once all four corners are secure.
Finish with a piece of black dust-cover fabric pulled snug across the underside and stapled around the perimeter. This is what hides the webbing and keeps dust out, and beginners check it first, so make it neat.
Tap any proud staples flush with a hammer. A staple standing up will cut into the first person who sits there.
5. Reattach the Seat and Inspect the Result
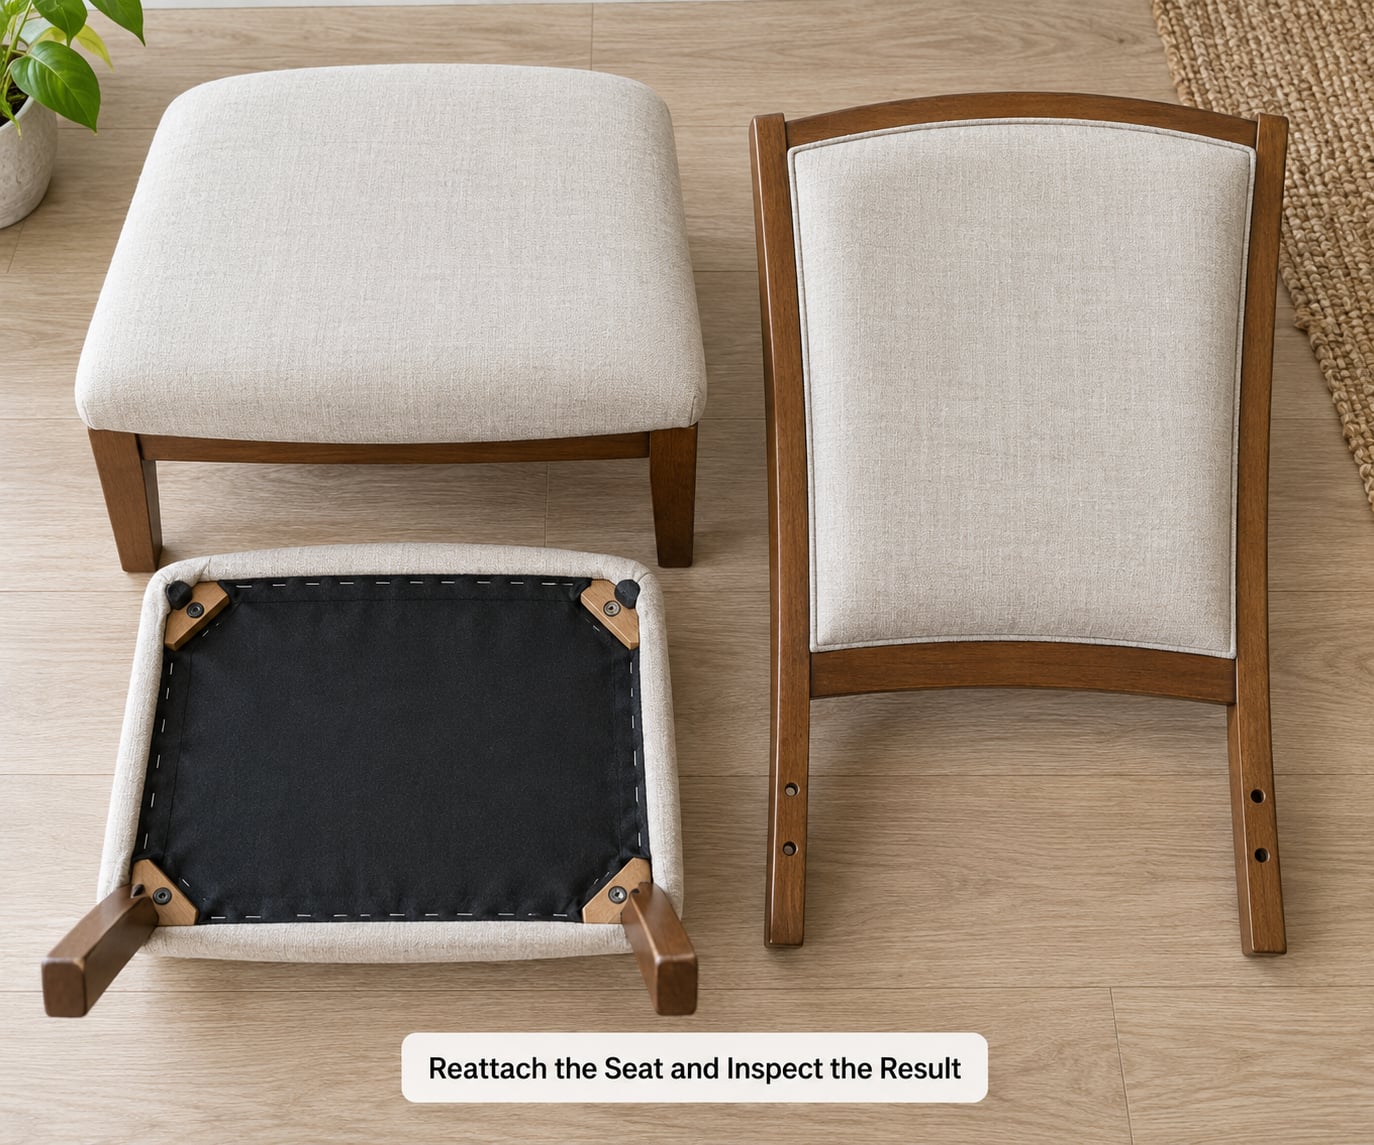
Line the seat back up with its mounting holes and run the screws back in by hand before you use the driver. Over-tightening strips the soft head of a screw in thin wood and turns a two-minute job into a stripped hole and a new seat base.
Sit in the chair. Push down on each corner in turn and listen for creaking. A small amount of give in the middle is normal foam compression; a hollow feeling or a rock under one corner means something is loose underneath, and now is the moment to fix it rather than living with it.
Spot-clean the fabric with a damp cloth and let it dry fully before anyone sits on it. Check the seam alignment against the chair back so the pattern runs continuously, and if you refinished the frame, give the paint or stain a full cure first.
Signs the job needs another pass: fabric still loose after a week of use, a corner crease that keeps unrolling, or staples backing out. Pull them, retighten the tension, and add a second staple next to the original.
Common Mistakes
Nearly every bad seat comes from one of six habits, and each has a straightforward fix once you know what you are looking at.
- Cutting the fabric too small. Three inches per side is the working minimum, and four gives you room to correct a crooked cut. Fix: you cannot add fabric back, so measure twice and cut once.
- Stapling from the edge inward. This bunches the middle and creates diagonal wrinkles no amount of pulling will flatten. Fix: pull every staple out, reset with one in the center, and work outward in five rounds.
- Ignoring the condition underneath. Sagging webbing, soft plywood or rusted springs look fine until you have stapled fresh fabric over them. Fix: press and flex the bare base before any fabric gets cut.
- Corners folded by eye. Each one ends up with a crease in a different place and the seat looks homemade. Fix: crease firmly with a thumb first, fold one flap under the other, and staple through both layers in the same spot on all four corners.
- Using too many staples, or too long. 3/8 inch or 5/16 inch upholstery staples are right; longer ones punch through the plywood. Fix: one staple every 2 inches is plenty, and set any proud staple flush with a hammer.
- Letting the batting bunch up. Cut batting with 4 to 5 inches of overhang, pull it taut before stapling, and trim the excess only after the corners are folded.
A seventh issue worth naming: patterns that drift across a set of seats. Cut every seat from the same section of the fabric bolt and mark a reference point on the underside of each seat base before you staple. It takes five seconds and it is the difference between a set that looks bought together and one that looks assembled.
Frequently Asked Questions
Do I need a sewing machine to reupholster a dining chair seat?
No, not for the seat alone. Stapling covers everything from foam and batting to the dust cover, so a staple gun, a screwdriver and pliers are enough. A sewing machine only comes into play if you reupholster the backrest or add welt piping around a removable cushion. Experienced upholsterers usually tell beginners to do the seat and leave the back alone for that reason.
What is the best fabric for reupholstering dining chairs?
For a family eat-in kitchen, wipeable vinyl in a mid or dark tone survives spills, dog hair and daily wiping. Performance polyester is the softest option that still handles scrubbing, and it hides stains better than a pale print. Wool suits a formal dining room but needs more care. Avoid silk and anything loosely woven, since both stretch and snag on staples.
How long does reupholstering a dining chair seat take?
Allow two to three hours for your first seat, most of it spent pulling staples. Every chair after that is faster, usually 60 to 90 minutes, because you already know where the fasteners hide and how the fabric folds. A set of four is realistically a full weekend. Rushing the stapling rounds to save twenty minutes is what produces wrinkled fabric.
Can I reupholster a chair without removing the old fabric?
Yes, using an overlay method, and it works well when the existing fabric is intact and tightly stapled. Pull one staple near a back corner, lift the fabric slightly, slide the new fabric underneath, then staple along the same line. Expect to lose around half an inch of seat height, and keep in mind you cannot correct stains or old foam underneath.
How much fabric do I need for one dining chair seat?
Measure the seat base, then add 3 to 4 inches on every side for the wrap and the staples. A 16 by 17 inch seat base needs roughly 22 by 23 inches of cut fabric, and 2 to 3 yards is the sensible amount to buy. Check the bolt width first, since 54 inch fabric runs the full length and 27 to 29 inch fabric takes more yardage.
How do I reupholster a dining chair that doesn’t come apart?
Remove the dust cover from the underside, then cut the old fabric along its staple line with a utility knife. Leave the staples in place and use them as your new attachment points, cutting the new fabric generously so it reaches all of them. Save the dust cover to staple back on at the end. This is slower and the corners are less forgiving, but it avoids taking on structural work.
Conclusion
Start by flipping one chair over and removing its old cover. Photograph the seat, pull the staples, and press the bare base before you buy a single yard of fabric. That fifteen-minute assessment tells you whether this chair is a good candidate at all, and it hands you the exact pattern you need.
Once the base is clean and solid, the rest of how to reupholster a dining chair seat is repetition: cut with a generous allowance, staple from the center outward in five rounds, and fold the corners the same way on all four sides. Get the first one right and the rest of the set is assembly-line work.
Take on the seat, leave the backrest to someone with a sewing machine, and your set will look new for a fraction of replacing it.