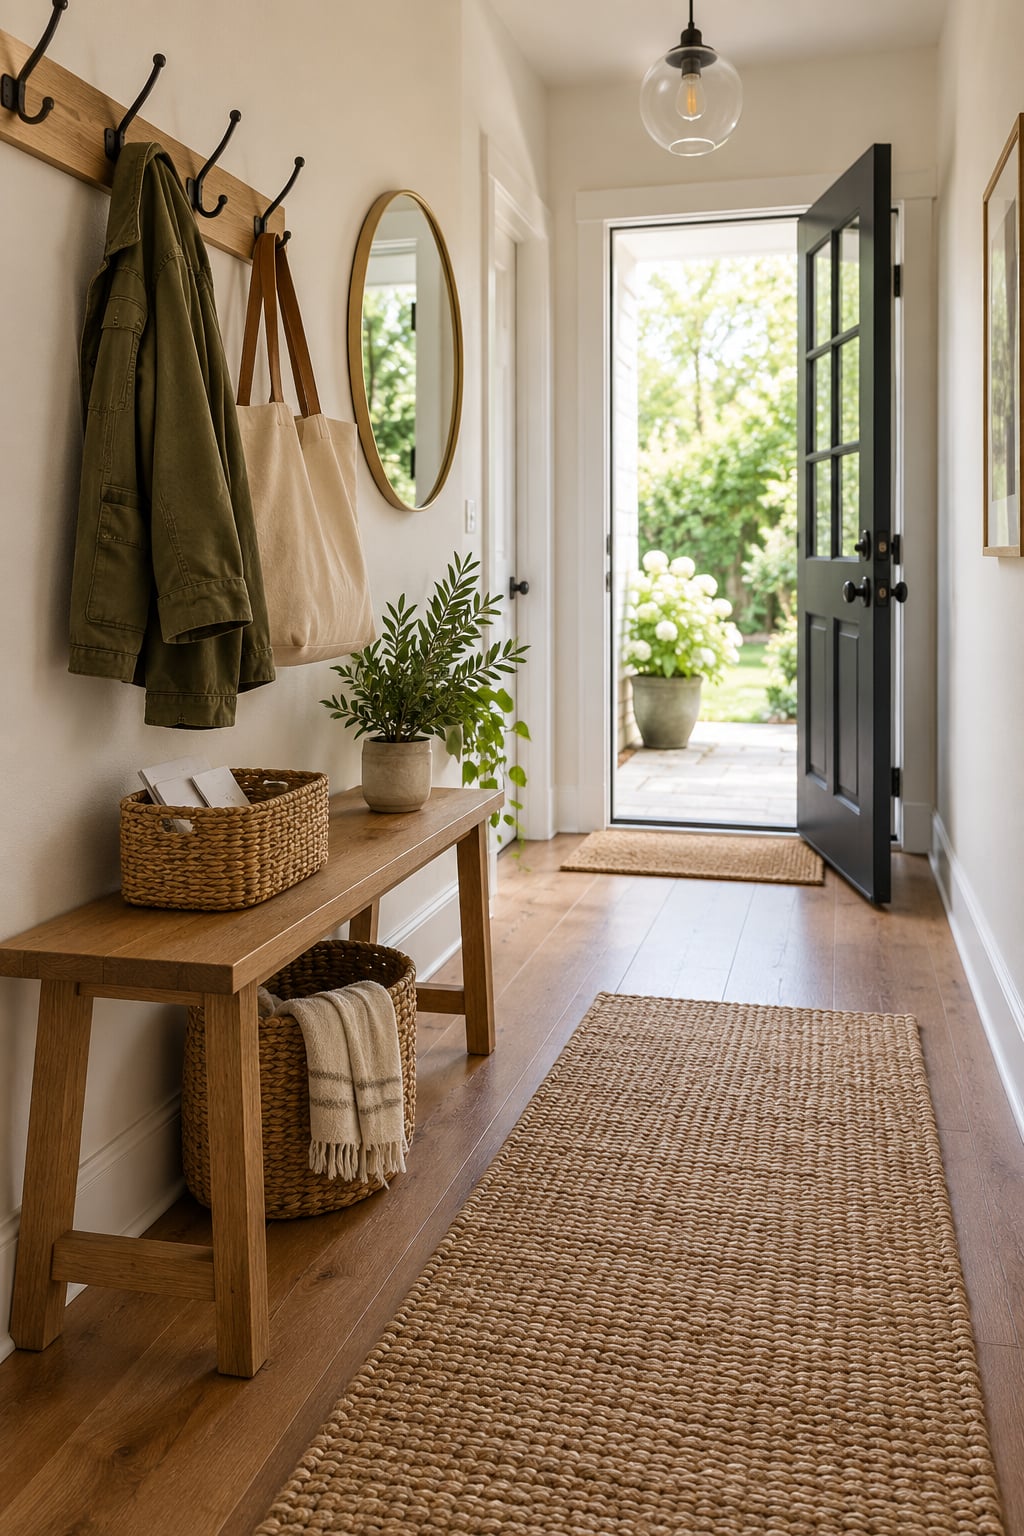
An entryway drop zone is a small landing area near your door where everything you carry in and out of the house gets one assigned home: keys and mail on a tray, coats and bags on hooks, shoes in a cubby or a bench, and one basket for the loose odds and ends. Learning how to make an entryway drop zone takes about a Saturday for a basic version, and it removes the daily hunt for keys and the backpacks stepped over on the way to the kitchen.
Most drop zones I’ve seen online look great in a photo and collapse into a junk pile by week three. The difference is almost never the furniture. It’s whether every item in your house has a specific spot, and whether that spot is reachable by the people who actually use it, kids included.
This guide walks through the whole build, from measuring the wall to the fifteen-minute weekly reset that keeps it working. I’ve split the hardware into what a renter can do with adhesive strips and what a homeowner can drill into studs, so you can stop reading at the part that applies to you.
Table of Contents
- What You Need
- Step 1: Measure and Plan the Drop Zone
- Step 2: Choose a Catchall for Small Items
- Step 3: Add Vertical Storage
- Step 4: Create a Place for Shoes and Bags
- Step 5: Style the Finished Drop Zone
- Step 6: Test the Layout and Adjust
- Drop Zone Components at a Glance
- Common Mistakes
- Frequently Asked Questions
- What is the best way to make a drop zone in a small entryway?
- Can I create an entryway drop zone without drilling into the walls?
- What should I put in an entryway drop zone?
- How can I keep an entryway drop zone from becoming cluttered?
- Where should a drop zone go in a narrow entryway?
- What is an affordable way to organize an entryway?
- Conclusion
What You Need
Nothing here is exotic. The list is short because a drop zone is mostly a layout decision, not a shopping trip.
If you can drill:
- A tape measure and a pencil
- A stud finder
- A level
- A drill and a bit sized to your anchors
- A hook rail, or individual hooks with mounting screws
- Birch ply or MDF for cubbies and a bench, if you are building
- 1×2 common board for a face frame around the cubbies
- Wood glue, caulk, primer and paint if you are making a paneled wall
- Shelves no deeper than 12 to 14 inches
If you cannot drill (renters, adhesive limits):
- Command strips rated for weight, used strictly within their stated limits
- Adhesive wall hooks with a metal mounting plate
- An over-the-door organizer with at least two pockets and a flat back panel
- A tension rod fitted with S-hooks and a small fabric bin
- A narrow folding shoe rack or an over-the-door boot caddy
- A removable floor mat or runner for shoes
Soft goods worth buying once: a catchall tray, a mail sorter or wall file pocket, one basket per person, and a bench pad if you are putting a bench there. These are the pieces people replace most often because they get handled hardest.
Step 1: Measure and Plan the Drop Zone
Measure before you buy anything, and write the numbers down. You need three of them: total wall width, wall height, and the depth you can give up without pinching the walking path.
Then open and close the front door while you stand in the doorway. The door swing and the path everyone takes when they come in are the two things a drop zone must never block. Most narrow hallways have a usable band of wall around 12 to 18 inches deep along one side, and that band is where a shallow bench or a slim cabinet belongs.
Check stud locations and mark them in pencil. A hook rail needs solid backing, and a row of screws into drywall alone will pull out the first heavy winter coat. If your wall is short or interrupted by a window, work around it rather than centering everything on it.
Also decide where your family actually comes through the house. If the garage or side door gets used twice as often as the front door, build the drop zone there. A beautiful system by the front door that nobody touches is just furniture.
Step 2: Choose a Catchall for Small Items
Start with the smallest items, because they are what gets lost. Keys, mail, sunglasses, a dog leash, a mask, a charging cable.
Put the catchall on the side of the door you use most, at hand height, somewhere you can reach it without turning around. A shallow tray on a narrow console catches keys and lets you see them; a bowl or dish is softer and better if you also drop in rings and coins. Wall pockets work well in rentals and take up no shelf space at all.
Add a small hook or clip for the things that do not stack: keys on a ring, a lanyard for the dog leash, a strap clip for the mail you want to remember. One idea that works well is a wall-mounted mail sorter with labeled categories such as action needed, file, shred and coupons, mounted at adult eye level directly above the catchall so paper never lands on the floor.
Step 3: Add Vertical Storage
Wall space is the most underused resource in most entryways, and hooks are the cheapest way to claim it. Use a single continuous hook rail rather than a row of mismatched hooks; it looks intentional and it spreads the weight across more fasteners.
Mount the adult row at roughly 60 to 66 inches off the floor, spaced 6 to 8 inches between hooks so coats do not overlap and crush each other. Reserve one or two lower hooks at around 36 to 40 inches for kids’ coats, hats and lunchboxes. Labeling those lower hooks with a name or a small sticker is what makes children use them without being asked.
Give every person their own hook position, left to right, and do not reassign. My rule is one hook per person for coats, plus a shared overflow hook for guests.
In a rental, skip the rail and use adhesive hooks, or hang an over-the-door organizer on the back of the door itself. A tension rod with S-hooks and a narrow bin under it works in a hallway with zero usable wall, and it comes apart in a minute when you move out.
Step 4: Create a Place for Shoes and Bags
Shoes are the most cited storage problem in entryways, and for good reason: they are bulky, they go on the floor, and everyone takes them off in the same spot.
Size cubbies for what you actually carry. Adult shoes need roughly 12 to 14 inches of height and 12 inches of depth. A backpack needs about 12 inches wide and 14 inches deep. If you build cubbies at 9 inches tall, adult shoes will sit in the hallway anyway.
When wall or floor space is tight, buy the solution instead of building it. A slim shoe cabinet with flip-out doors holds far more than an open shoe rack while taking up only about 8 to 10 inches of depth. Closed storage also wins on appearance: open shelving in an entryway collects dust and shows every stray sock, which is why most people who try open shelving end up replacing it with doors.
Keep floor space clear by putting shoes in a slim cabinet, a boot tray inside the closet, or an over-the-door caddy. A shallow bench works if you want to sit, but choose one with storage underneath so it earns its footprint. If you are converting an unused closet, cut shelf depth down to about 18 inches instead of the standard 24; the extra clearance is more useful than the deeper shelf, and you can fit a laundry basket on the floor below.
Step 5: Style the Finished Drop Zone
Function first, then finish. A drop zone that looks good survives; one that only works gets ignored once the novelty wears off.
Pick a paint color for the paneled wall or the back of the cubbies before you install anything, and buy the primer and paint in the same batch. If you are building a face frame, fill gaps with caulk and sand the joints; the finish quality is what separates a built-in from something that reads as flat-pack furniture.
Then layer the soft parts. Match baskets to the people who use them, put a bench pad on the bench, hang one piece of art or a mirror to fill the wall above the hooks, and run a narrow runner in front of the bench to catch grit and define the space.
Lighting matters more than people expect. A single warm bulb or a small picture light over the hooks makes a narrow hallway feel finished, and it helps you see what is on the shelf at night.
Step 6: Test the Layout and Adjust
Live with it for two weeks before you add anything else. Walk in the door the way you really do, arms full, and notice what has nowhere to go. That item is the gap your next purchase needs to fill, not a bigger basket.
Reset anything out of reach for a kid or a tall adult. Then set a fifteen-minute weekly reset: empty the catchall, deal with the mail, wipe the bench, and put everything back. This is the step that decides whether the drop zone still works in month six, and skipping it is why so many entryways turn back into a pile.
Keep the system small. Four storage types handle almost everything: hooks, a shoe solution, one catchall, and one basket per person. Every extra category you add is another thing that can go wrong.
Drop Zone Components at a Glance
| Component | What it stores | Typical footprint | Renter-friendly |
|---|---|---|---|
| Hook rail | Coats, hats, tote bags, backpacks | Wall only, about 6 in deep | Adhesive hooks instead |
| Slim shoe cabinet | Shoes, boots, small outdoor gear | 8 to 10 in deep, up to 40 in wide | Yes, as a free-standing unit |
| Storage bench with doors | Shoes and gear behind doors | About 12 to 18 in deep | Only as a movable bench |
| Open cubbies | One basket per person, lunchboxes | 12 to 14 in deep per cubby | Rarely, needs fixing to wall |
| Slim console table | Catchall tray, mail, keys | 10 to 14 in deep | Yes |
| Over-the-door organizer | Mail, leashes, light jackets | Uses the door, no floor | Yes |
| Tension rod with S-hooks | Umbrellas, hats, leashes | Under 6 in, ceiling to floor | Yes, fully reversible |
Common Mistakes
Overfilling the zone. Too many categories and the drop zone becomes the place clutter goes to live. Fix it by cutting to four storage types and one basket per person.
Blocking the door or the walking path. Open the door and walk the route before you install anything. Anything that narrows the path below comfortable walking width belongs somewhere else.
Buying bins that are too big. A basket deeper than the space behind your door will not fit once the door is closed. Measure the open cavity, then subtract an inch for clearance.
Mounting into drywall with no stud behind it. One heavy coat on a loose hook comes down with the anchor and a chunk of paint. Use a stud finder, or switch to adhesive hooks rated well above the weight you need.
Using open shelving as the only storage. It looks untidy within days and gathers dust. If you want cubbies, add doors, a valance, or baskets to hide the contents.
Ignoring how your family really moves. If kids cannot reach their hook or the bench sits where the door swings, items land on the floor within days. Assign positions, label them, and adjust after two weeks.
One more worth naming: many people build at the front door when the family actually enters through the garage or a side door. Follow the traffic, not the architecture.
Frequently Asked Questions
What is the best way to make a drop zone in a small entryway?
Start with vertical space: a continuous hook rail above a slim shoe cabinet no more than 10 inches deep. Add a narrow console or wall pocket for keys and mail, one basket per person, and a small runner. Skip the bench if floor space is tight, since a bench is the piece that eats a narrow hallway. Keep it to four storage types.
Can I create an entryway drop zone without drilling into the walls?
Yes. Use adhesive hooks rated above the weight you need, an over-the-door organizer for mail and light jackets, a tension rod with S-hooks for umbrellas and leashes, and a slim console as a free-standing catchall station. Weight limits matter: follow the strip manufacturer’s stated limit and re-stick every few months.
What should I put in an entryway drop zone?
Five categories cover nearly everything: keys and small items in a tray, mail in a sorter or wall file, coats and bags on hooks, shoes in a cabinet or cubby, and one basket per person for hats, gloves or sports gear. A mirror and a light finish the wall. Anything beyond that list usually creates a category nobody maintains.
How can I keep an entryway drop zone from becoming cluttered?
Assign every hook and cubby to a named person, label them, and keep the number of storage types low. Empty the catchall weekly and deal with mail during that same fifteen minutes. If something has no home after two weeks of testing, the answer is to buy the missing piece rather than add another basket.
Where should a drop zone go in a narrow entryway?
On the first solid wall you pass, on one side only, so the walking path stays clear on the other. Open the door fully and mark its swing on the floor before choosing the spot. If the entry is too narrow for a bench, use a slim cabinet or over-the-door storage and keep the floor empty.
What is an affordable way to organize an entryway?
Repaint one wall in a color you already own, then buy a hook rail, one slim shoe cabinet and a set of baskets. Adhesive hooks and a tension rod handle most rental situations cheaply. DIY only saves real money if you already own tools; otherwise a ready-made cabinet usually costs less than the plywood and the Saturday it takes to build one.
Conclusion
Start by measuring. Get the wall width, the wall height, the depth you can give up, and the swing of the door, then write down which door your family actually uses twice a day. Everything after that is a layout decision, not a shopping one.
Now you know how to make an entryway drop zone: hooks at two heights, one catchall, one shoe solution, one basket per person, and a fifteen-minute reset that keeps it alive. Build it around the routine you already have, not the one you wish you had.