Most people searching how to deglosser work on wood furniture want one of two things: whether a deglosser can replace sanding, and how to use one if it can. On furniture with a sound but shiny finish, yes — a deglosser kills the sheen and you can skip most of the sanding. On peeling paint, bare veneer, or a piece you want to stain, no, and that distinction matters more than any brand name.
A deglosser, sold as liquid sandpaper or gloss-off, is a wipe-on chemical prep solution. It softens and dulls an existing paint, varnish, lacquer or polyurethane finish so new paint or primer can actually grip it. It does not remove a finish down to bare wood, and it does not level a defect. Those are separate jobs with separate tools.
The honest version of the advice you will find online: deglosser works best on flat, glossy, well-adhered paint, and it struggles anywhere the surface is already broken. A whole afternoon of wiping can save a weekend of sanding on a dresser. On a chair base that is flaking, it saves nothing, because you are going to strip or sand that anyway.
Table of Contents
- What You Need to Degloss Wood Furniture
- How to Degloss Wood Furniture: Step by Step
- Step 1: Identify the Existing Finish
- Step 2: Test the Finish in a Hidden Area
- Step 3: Strip the Old Finish
- Step 4: Sand the Bare Wood
- Step 5: Clean and Apply the New Finish
- Common Mistakes
- Frequently Asked Questions
- Can you use deglosser on a finished wood table?
- Is a chemical furniture stripper better than sanding?
- How do I know when all the old finish is gone?
- What grit sandpaper should I use after removing furniture finish?
- Can I deglosser painted furniture without damaging it?
- How long should furniture dry after deglossing before painting?
What You Need to Degloss Wood Furniture
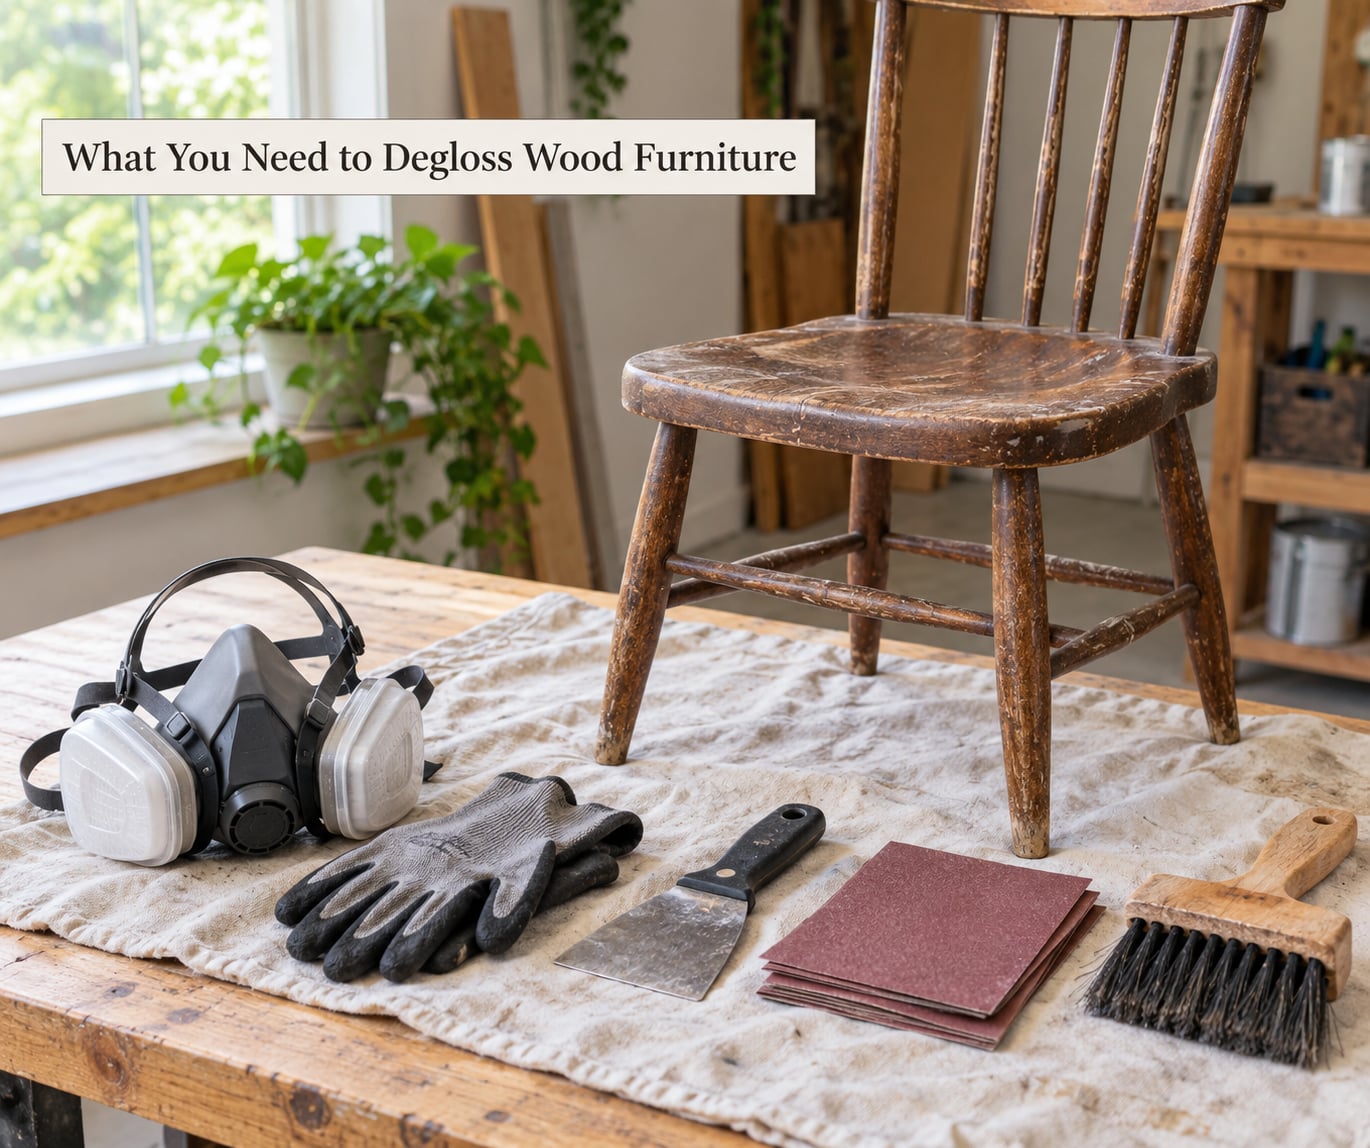
Gather everything before the piece is stripped, because halfway through a chemical strip you do not want to be hunting for goggles.
- Protective gear: chemical-resistant gloves, chemical splash goggles, and a respirator with cartridges if you will be working in a small room or using a solvent-based stripper.
- Ventilation setup: an open window with a fan blowing outward, or a garage door. Cross-fan air moving from a window toward an open door clears fumes far better than a single fan in the corner.
- Drop cloths and newspaper: more coverage than you think you need. Stripper runs.
- Scrapers: a putty knife for flat panels and a plastic scraper for profiled edges. Steel gouges veneer and soft wood; plastic flexes instead.
- Brushes or pads: a cheap natural-bristle brush for crevices and a soft abrasive pad or fine steel wool for scuffing dull, satin-like film.
- Sandpaper: 120 to 220 grit for the first leveling pass, then finer grits as you move toward finishing. A sanding block keeps pressure even.
- Tack cloths and clean rags: tack cloth for dust, cotton or microfiber rags for wiping on deglosser. Keep them separate.
- Cleaning supplies: a degreaser or trisodium phosphate substitute, warm water, a soft sponge, and a mild dish soap for the first pass.
- Materials for finishing: your chosen stain, paint or clear topcoat, plus the primer that matches it.
One rule before you start: do not dilute chemical stripper or deglosser with water unless the label tells you to. People on Hometalk who thinned Krud Kutter Gloss-Off reported it losing its strength and needing several passes to do the work one full-strength pass would have handled.
How to Degloss Wood Furniture: Step by Step
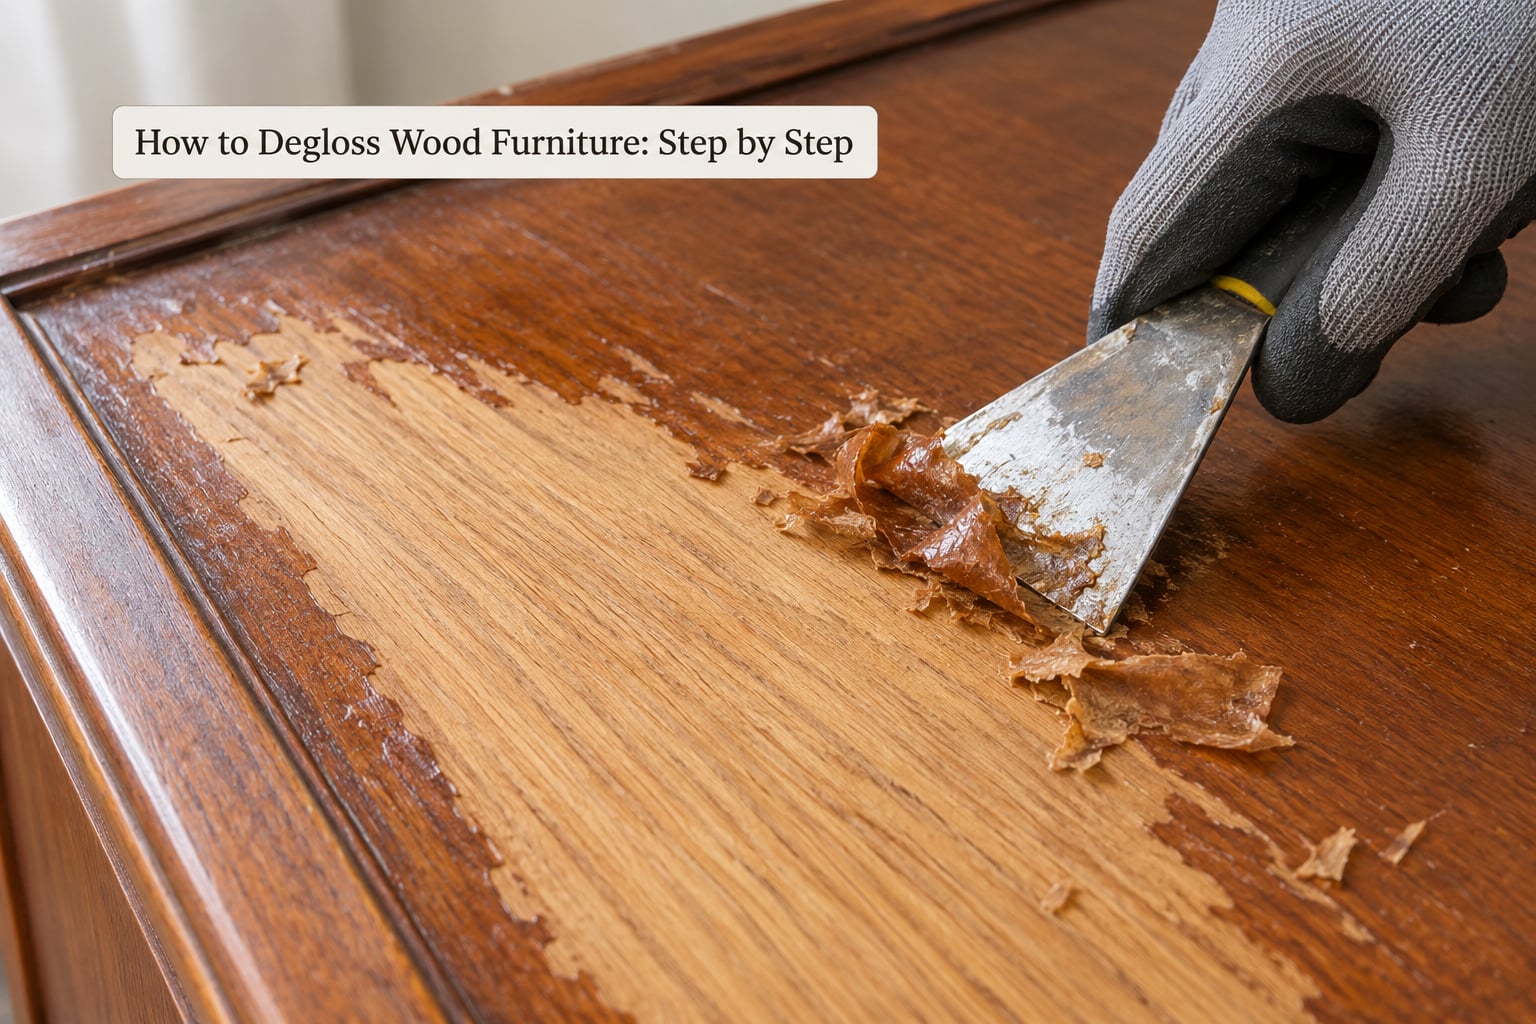
Work in this order: identify the finish, test the remover, strip, sand, then seal. Skipping the first two is how people end up with a patchy panel and a ruined drawer front.
Step 1: Identify the Existing Finish
What is on the piece decides everything that follows, so spend five minutes on it. Look at the sheen, the colour, and where the piece has sat.
- Glossy paint in a colour, often semi-gloss or gloss enamel, is the easiest case. If it feels smooth and the colour is solid, that is most likely what you have.
- Varnish or polyurethane is clear and amber-tinted, often with a slightly plastic feel and visible brush or spray texture. Factory-catalyzed finishes on modern flat-pack furniture behave the same way but are far harder to penetrate.
- Lacquer is thin, smooth and often slightly orange-peeled. It shaves off under a blade, which is a useful tell.
- Shellac is the most fragile old finish. It shows water rings, darkens with alcohol, and dissolves fast in most strippers. Old piano and antique finishes are frequently shellac.
- Wax leaves a waxy, patchy film that will not take paint over it and is best removed with a dedicated wax and polish remover.
- Bare or waxed pine and MDF show open grain or a raw particle texture. Deglosser does nothing here; you are already at the wood.
Location tells you a lot. A dining table carries hand grease and often a wax or oil topcoat over the varnish. Dressers and nightstands from the 1980s and 1990s are often lacquer over a factory primer. Kitchen cabinets carry grease and often a factory-catalyzed topcoat, which wants a bonding primer more than anything else.
Step 2: Test the Finish in a Hidden Area
Test where nobody will see it: under a drawer, the back of a leg, inside a drawer box, or the underside of a back panel. Choose a spot about the size of a coin to a two-dollar coin.
Apply the remover as the label directs, wait the stated dwell time, and scrape with a plastic scraper. Then read the result honestly.
Good removal means the coating lifts in a soft sheet or curls at the scrape line, and the material underneath is wood or a factory primer rather than raw filler. Failure looks different: the remover beads up and evaporates, the coating barely softens, the surface turns chalky and pasty, or you break through into a thin dark veneer layer. Any of those and you stop and pick a different method.
Do the test in two places if the piece is valuable or veneered. Veneer failure announces itself late, and it is not reversible with glue.
Step 3: Strip the Old Finish
There are two routes here, and picking the right one is most of the job.
Chemical stripping suits thick built-up coatings, wax, multiple layers, or furniture with profiles and carving you would rather not sand. Paint the remover on generously with a flat brush or synthetic pad, working in even passes. Keep it wet and keep it moving. Scrape after the label dwell time, not before; scraping early just smears softened coating around.
Scrape with the grain on flat panels. Work into inside corners and carved detail with a toothbrush or stiff bristle brush, then wipe with a clean rag before the residue dries hard. Remove stripper with a scraper, a second damp rag if the label calls for it, and a light rinse for water-based products. Many no-rinse formulas simply need a thorough wipe-down with a clean damp cloth.
Mechanical abrasion suits sound, thin coatings and any surface where stripper is not penetrating. Sanding is slower and dustier, but it gives you a flat, even result and it will not surprise you halfway through a panel.
The low-mess middle road is what most people actually want. Clean and degrease the piece, then use a deglosser or liquid sandpaper on paint that is sound but glossy. Wipe it on with a saturated lint-free cloth in firm circular motion, let it dry for the time on the label, and wipe off the haze. That is a degloss, not a strip: it dulls the surface and leaves the coating intact. Finish with a light scuff of 150 to 220 grit on dull, shiny areas and go straight to a bonding primer.
When you are done, spread solvent-based rags flat outdoors to dry fully before disposal. Wadded-up rags holding solvents can self-heat. Water-based rags need no such caution, but check the label either way.
Step 4: Sand the Bare Wood
Sanding only matters once the finish is actually gone. If you deglossed instead of stripping, you are smoothing a surface, not cutting one.
Start at 120 grit on stubborn residue and move up through 150, 180 and 220 as the surface evens out. Follow the grain. Cross-grain strokes show up as scratch marks that a satin finish will highlight and a glossy finish will magnify.
Use a sanding block on flat panels so pressure stays even, and your fingertips on mouldings, spindles and legs. Wrap sandpaper around a pencil or a dowel to reach tight corners. Keep edges crisp: rounding every corner with your palm is the most common way a restoration turns sloppy.
Watch the veneer. If you break through a thin layer and see a continuous, differently-coloured grain running with the surface, stop immediately. Real veneer is a sliced leaf, so its grain flows continuously; particle board or MDF underneath shows a raw, coarse texture, and the repair is a filler and a primer rather than more sanding.
Dust off with a tack cloth or a damp cloth between grits. Skipping this grinds debris into the next pass and leaves a gritty surface that shows badly under any finish. You are ready when the surface is uniformly dull to the touch, with no glossy patches, no visible scratch pattern and no cool spots.
Step 5: Clean and Apply the New Finish
Wipe with a tack cloth to pull the sanding dust out of the grain, then do one more pass with a clean cloth dampened with water if you are about to stain.
On bare softwood such as pine or MDF, a wood conditioner or pre-stain sealer is worth the extra step. It equalises absorption so one coat of stain does not turn blotchy. Skip it on hardwood and on sealed veneer.
Choose the finish for how the piece gets used. A dining table gets a hard-wax oil or a water-based polyurethane rated for furniture use. A dresser takes an alkyd or lacquer in low sheen, and semi-gloss scuffs less than gloss while still wiping clean. Kitchen cabinets need the toughest coating you are willing to live with. Exterior teak and other outdoor furniture needs a UV-resistant penetrating finish rather than a film.
Apply thin coats. One heavy coat runs, sags in mouldings and dries soft. Brush or roll a fair coat, follow the label cure time, scuff lightly between coats with 220 to 320 grit or a fine pad, then remove dust with a tack cloth again. Finish in dust-free conditions and give the piece the full cure time the label specifies before setting anything on it. Heavy use after two hours can print into a finish that is still soft underneath.
Common Mistakes
- Skipping the test patch. You find out the finish is lacquer when a whole side panel goes soft. Test first, always.
- Diluting the remover to save product. Weaker solution means more passes and more time. Use it full strength as directed.
- No ventilation. Fumes accumulate fast in a closed room and the job gets unpleasant and unsafe quickly.
- Sanding before the remover is ready. Dwell time is chemistry. Scraping a surface that has not activated wastes the product and spreads the mess.
- Leaving stripper residue to dry. That haze is sticky and will defeat primer adhesion. Wipe it off while it is still workable.
- Wrong grit, or too much grit. One coarse pass, then fine. A whole piece done at 80 grit looks like sandpaper after paint, and it is not fixable.
- Sanding through veneer. Stop when the grain changes character, and fill rather than press on.
- Thick coats, or painting over a gloss surface because deglosser skipped a spot. Thin coats, and check the sheen under raking light before you prime.
If paint peels off within a few weeks, the shine was not fully removed, the surface was greasy, or no bonding primer went on. Those three account for nearly every adhesion failure I have seen on furniture paint projects.
Frequently Asked Questions
Can you use deglosser on a finished wood table?
Yes, on a dining table with sound varnish or polyurethane, a deglosser is usually enough preparation. Clean and degrease it first, since hand oils and wax are the main reason paint fails there. Wipe the deglosser on in circular motion, give it the label dwell time, wipe off the haze, then follow with a bonding primer. If the finish is already crazing or lifting at the edges, strip or sand instead.
Is a chemical furniture stripper better than sanding?
Stripper wins on profiles, spindles, carvings and anything with layered built-up finish, because it reaches where a sanding pad cannot and makes no dust. Sanding wins on flat panels with a thin, sound coating, because it is faster and leaves a more even surface. Many people use both: strip the heavy areas, sand the flats. A deglosser sits between them for sound gloss paint.
How do I know when all the old finish is gone?
Run a fingernail or a coin lightly across the surface. If it slides with no catch and the surface looks dull and even rather than glossy or patchy, the finish is gone. A clean, sharp scrape line and no resistance at the edges are the better signs. Glossy spots mean residue. If the tool gouges the wood, you have gone far enough.
What grit sandpaper should I use after removing furniture finish?
Start at 120 grit to knock down stubborn residue, then move through 150, 180 and 220 for a smooth surface ready for finish. Between the final pass and a stain or topcoat, a light pass with 320 grit helps smooth raised grain. Always sand with the grain, and use a block on flat panels so pressure stays even.
Can I deglosser painted furniture without damaging it?
On paint that is adhered and sound, yes. On paint that is already peeling, chipping or flaking, no, because the deglosser softens the loose layer and you will spread the damage. Test a hidden spot first. Keep the cloth moving in firm circular motion rather than resting in one place, and never let a wet deglosser sit on bare wood, veneer or MDF, because it will burn a dull spot into it.
How long should furniture dry after deglossing before painting?
Follow the product label, which commonly asks for ten to fifteen minutes of drying before you prime or paint. The surface should look completely matte with no wet or tacky patches. If it still has a haze, wipe it off with a clean damp cloth and give it a few more minutes. Painting over that haze is one of the most common reasons furniture paint peels later.
Start with the test patch and the finish ID, not with the deglosser. Those ten minutes decide whether the rest of the project is an afternoon or a weekend, and they cost almost nothing compared with discovering a veneered panel halfway through.