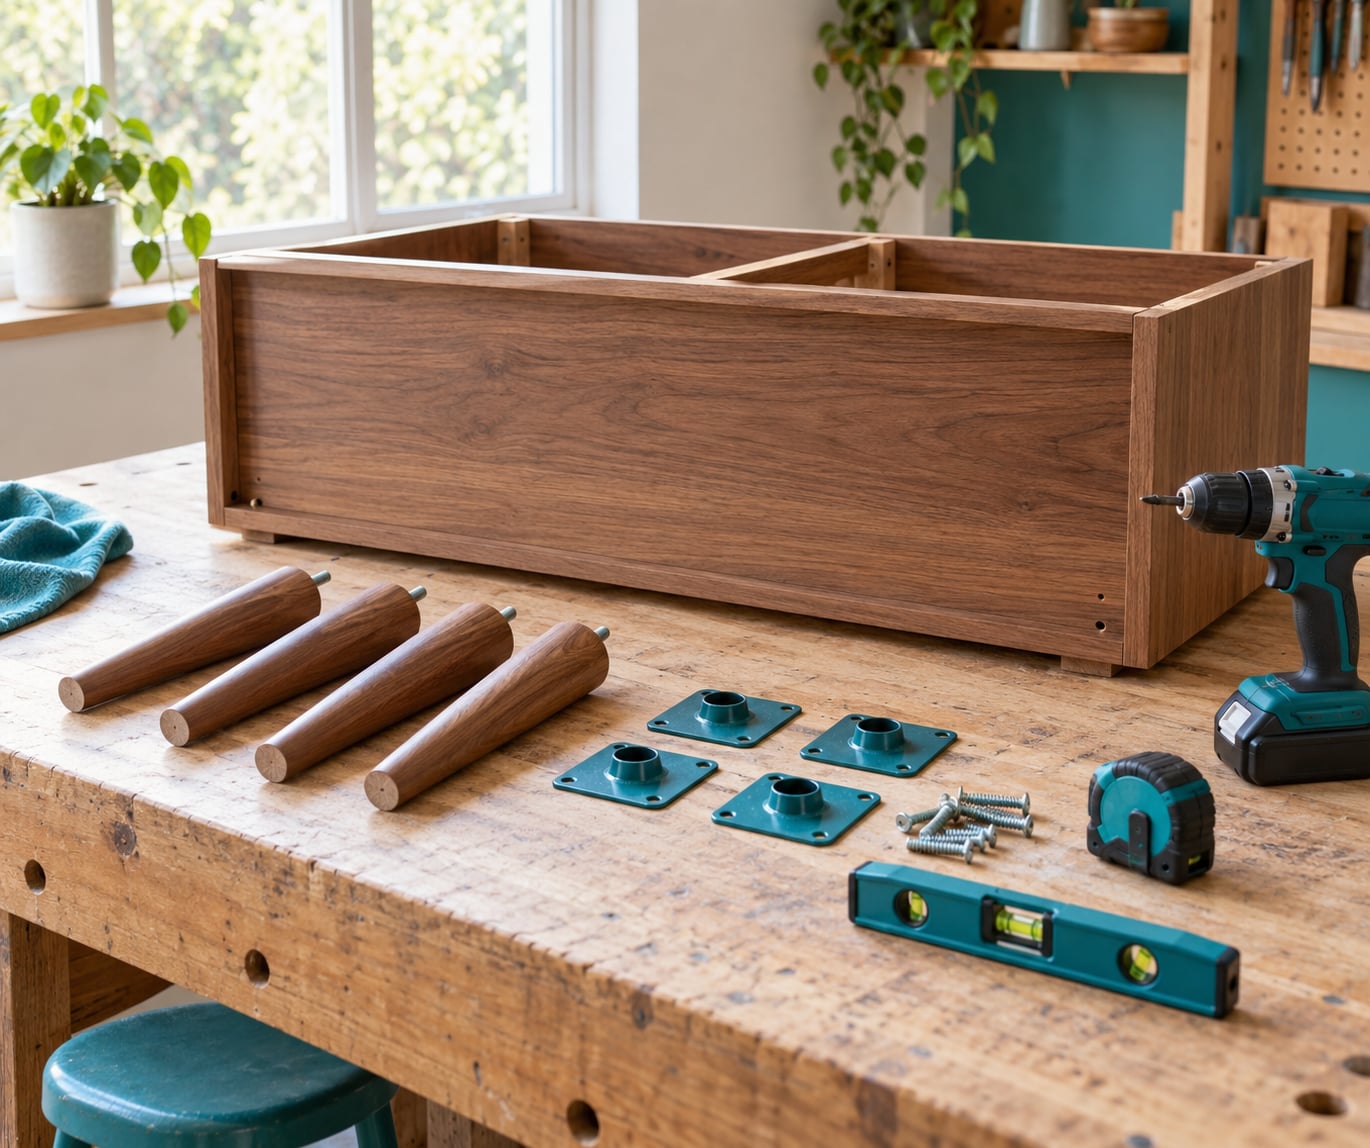
To add legs to a dresser, you reinforce the bottom base with solid wood so the new legs have a real anchor point, then screw mounting plates to that wood and thread the legs into them. Skip the reinforcement and the screws chew straight through particle board, which is the single most common way this project fails.
Budget a weekend. The drilling is easy; the awkward part is turning a heavy dresser upside down without cracking it or losing your grip on it.
Table of Contents
- What You Need
- How to Add Legs to a Dresser Step by Step
- Step 1: Measure the Dresser and Choose the Right Legs
- Step 2: Decide How the Legs Will Attach
- Step 3: Mark and Prepare the Mounting Points
- Step 4: Attach the Legs
- Step 5: Check Stability and Finish the Project
- Common Mistakes
- Frequently Asked Questions
- How do I know what size legs to buy for a dresser?
- Can I add legs to a dresser with a particle-board or hollow base?
- Should I use screws or wood glue to attach dresser legs?
- How do I keep the dresser stable after adding tall legs?
- Can I add legs to a dresser without drilling into it?
- What type of legs are best for a heavy dresser?
What You Need
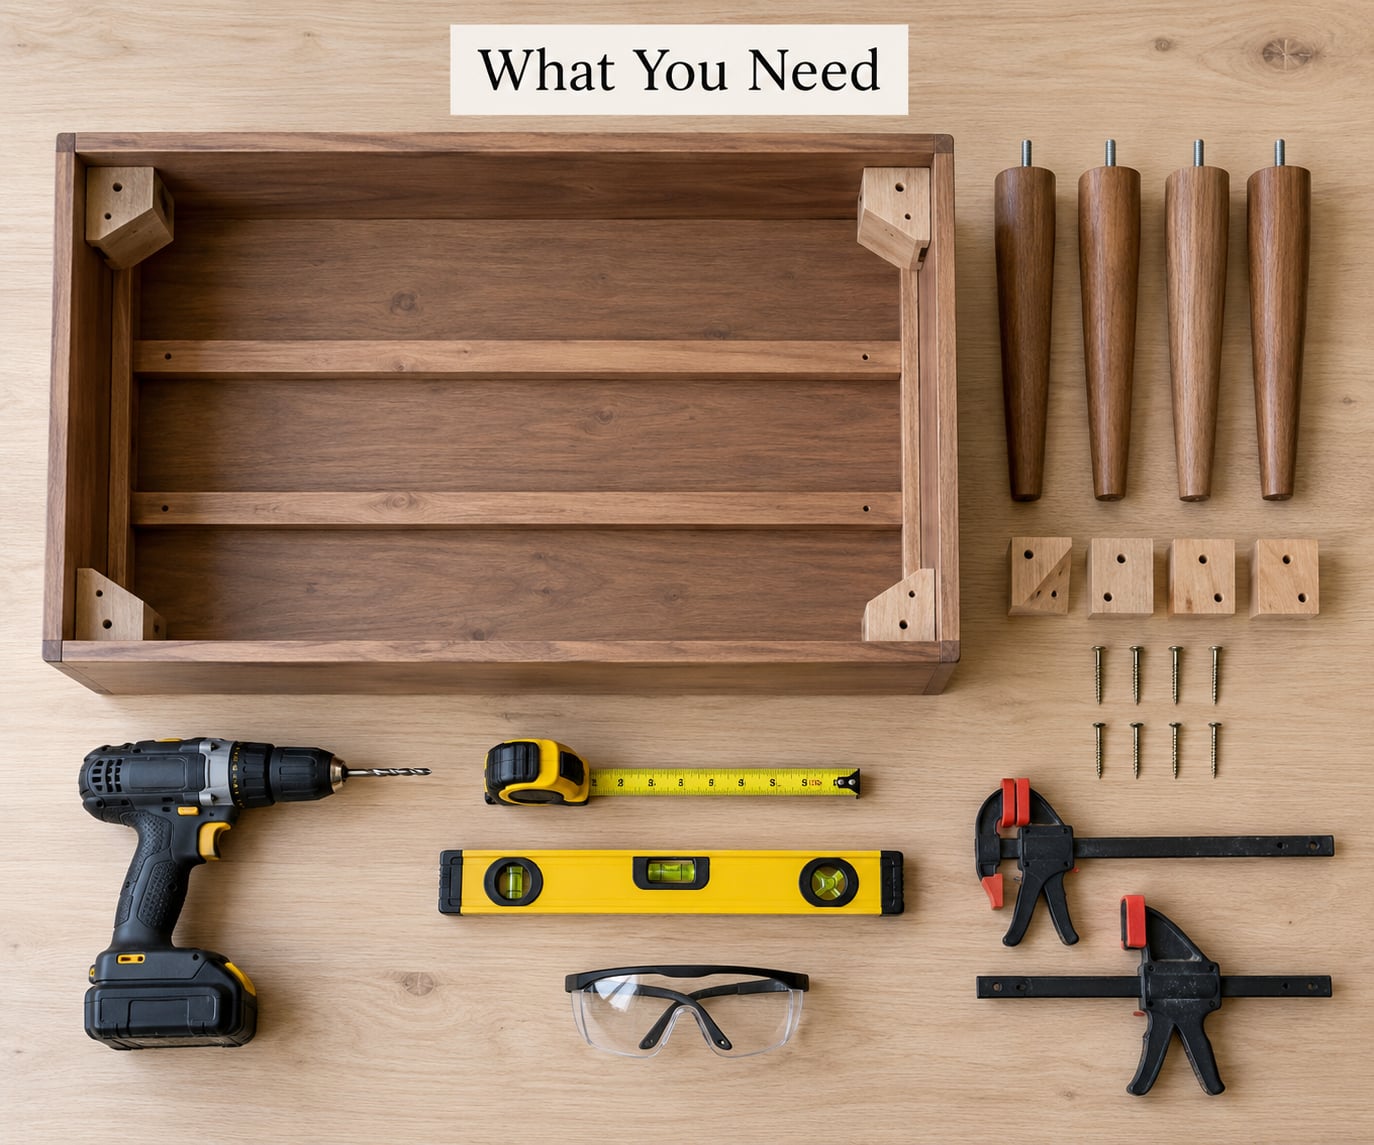
- Legs in the style and height you want, sold in sets of four with matching hardware
- Mounting plates, either straight top plates for square legs or angled plates for splayed and mid-century styles
- Support wood, ideally a 2×4 or a 1×6 board cut to fit across the dresser bottom, plus 2×2 corner blocks
- Wood glue and structural screws (1-1/4 inch screws for plates into softwood, longer screws or hanger bolts if the leg runs through the plate)
- Drill with pilot bits slightly smaller than your screw shank, plus a countersink or depth-stop bit
- Tape measure, level, stud finder and a pencil or marking knife
- Clamps, safety glasses, ear protection and a pair of work gloves
- Finishing supplies if the legs arrive raw: stain, paint or a clear sealer, plus a tack cloth
Before you buy anything, turn the dresser over and look at what you have to work with. A solid wood or hardwood-ply bottom with a rail across the front is the easy case. A recessed toe kick or plinth needs to come off first, which is usually four or five screws and a gentle pry with a rubber mallet. A hollow carcass with nothing but two side panels and a back means you are building a base frame, not attaching to one.
Some dressers already have pre-drilled holes in the underside from the factory. If you find them, measure the spacing between them and buy legs with a matching bolt pattern. That single check saves an afternoon.
How to Add Legs to a Dresser Step by Step
Step 1: Measure the Dresser and Choose the Right Legs
Measure the height of the underside from the floor-facing surface to the top of the case, and measure the width and depth of the bottom edge. Most people underestimate the depth, and a leg that looks right from the front can sit past the edge of the case, which makes the dresser tip.
Measure the leg stock too. Most wooden furniture legs run 1-3/4 inch square at the top, and plates are sized to match. If you plan to cut a 2×4 into legs yourself, square it down first.
For height, 6 inches gives clearance for a basket or a slim robot vacuum, 8 inches fits taller bins, and 12 inches is a full step up visually but needs longer hardware and a deeper base frame to stay rigid. Buy the leg height before you cut any wood, because the base you build has to match.
Checkpoint: you should be holding legs whose top width matches your plate, at the height you want the finished dresser to sit.
Step 2: Decide How the Legs Will Attach
There are three ways this gets done, and the choice depends mostly on how much solid wood sits under the mounting point.
Top plate with screws is the simplest. You screw a flat plate to the underside or the side of the base and screw the leg into the plate. It works on any base that has real wood behind it.
Angled plate does the same job but lets the leg splay outward, so you get a mid-century angle without cutting angled mortises yourself. Screwed legs on a hollow carcass can pivot, so plate plus blocking matters here.
Hanger bolt is the strongest option and the one most beginners get wrong. The bolt has a machine-threaded top half and a plain wood-dowel bottom half. You drill a matching hole in the top of the leg, screw the dowel half into that hole, then drop the threaded half down through the plate hole and screw the plate to the dresser. Tie a strip of tape on the bolt as you thread it, and use it as a depth gauge so you never bottom out and split the leg.
Adhesive-only attachment is not a real option for a dresser holding clothes. Glue can be part of a joint, never the whole joint.
Checkpoint: hold the leg up to the base and confirm the hardware will reach solid wood, not an empty cavity.
Step 3: Mark and Prepare the Mounting Points
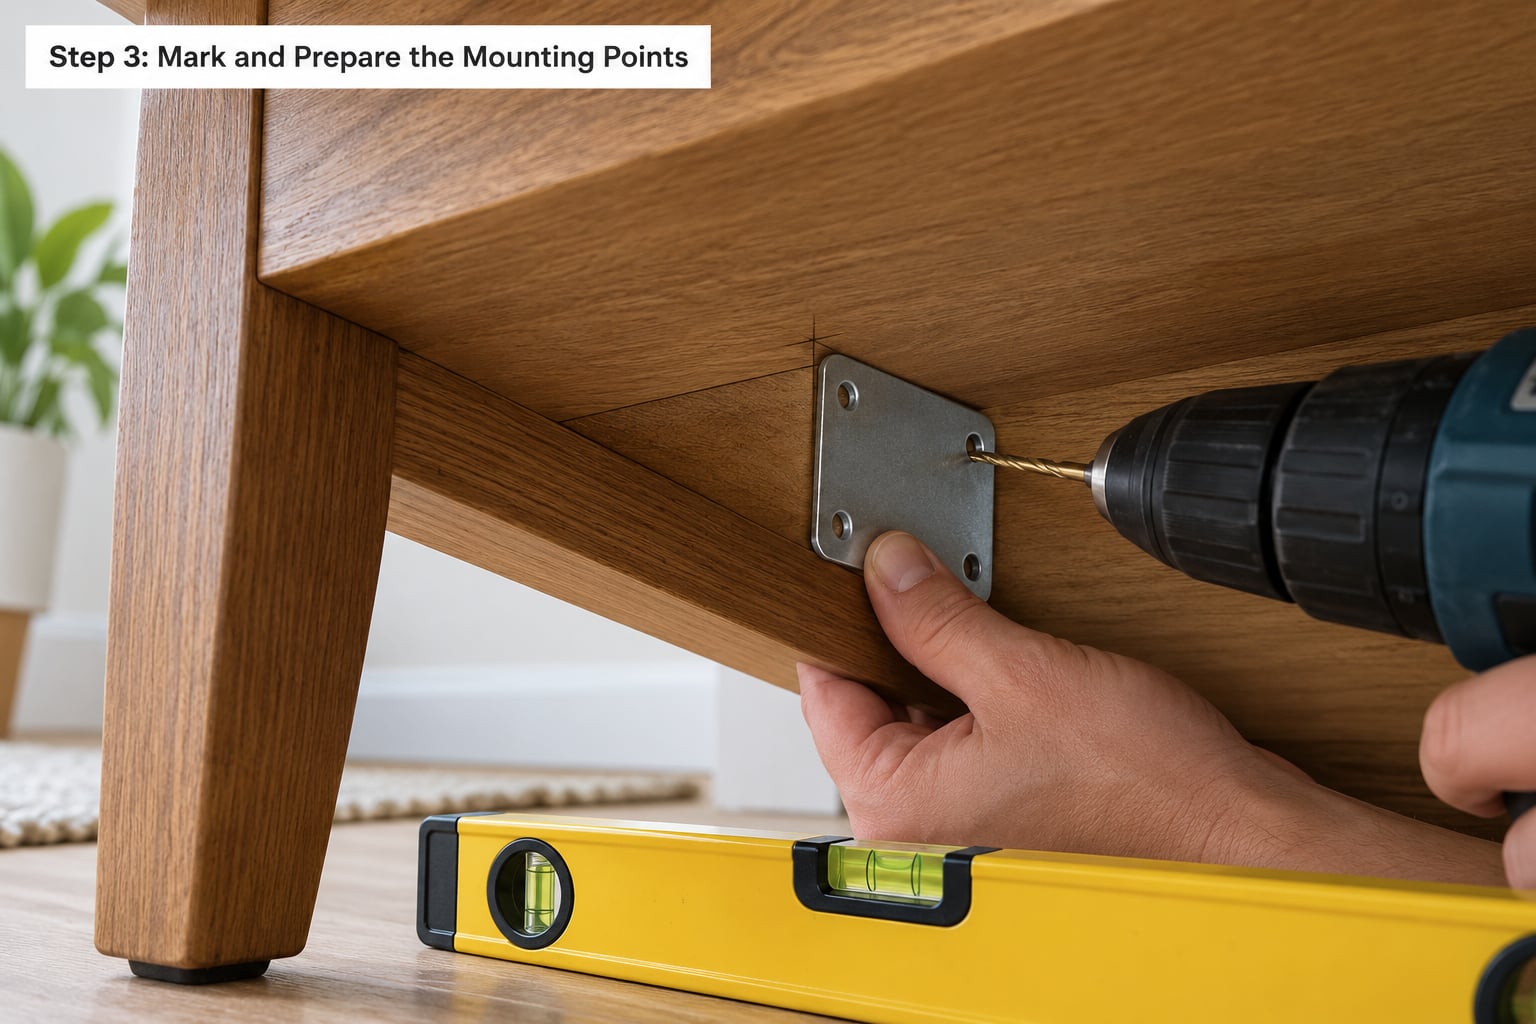
Lay the dresser on its back on a blanket or on towels so the top edge never touches concrete. Measure in from each side by the same amount on all four corners, which is usually 2 to 4 inches, and mark with a pencil or a sharpie that will not bleed if you nick the finish.
If the base is thin particle board, stop here and build the frame. Screw a 2×4 across the bottom of the case into the side panels, then add 2×2 blocks at each corner and screw the plates to the blocks. Wood glue plus a pocket hole or two, using a Kreg jig, makes the frame rigid. On a flat-pack dresser like an IKEA MALM, that same 2×4-and-blocking frame is the answer that comes up again and again.
Drill pilot holes for every screw. The bit should be a hair smaller than the screw shank, and stop at the depth the screw will cover plus a quarter inch. Hole number one is the depth stop, and the rest match it. Over-drilling is how you put a hole straight through the top of the case.
Checkpoint: each pilot hole should be clean, straight and shallow enough that a screw driven into it stops without bottoming out.
Step 4: Attach the Legs
Hold the plate against the mark and drive the screws straight in. Two screws per plate on a small dresser, three on a wide solid wood one, spaced as far apart as the plate allows. Keep the drill at a right angle to the surface, because a screw driven on a slant torques the plate and twists the leg.
Stop driving when the screw head sits flush. Over-torquing into particle board crushes it and the screw loses its grip the first time you move the dresser.
For hanger bolts, screw the dowel half into the leg first, then thread the machine half through the plate by hand until it stops, then snug it with a wrench. For plate-and-screw legs, drive the leg screws until the leg is tight against the plate, then add a second pass the next day. Wood moves slightly as it settles, and a second tightening pass takes up that slack.
If your hardware came with a glue-up option and you are attaching a wooden leg directly to wood, a thin film of wood glue on the joint adds holding power. Give any adhesive at least 24 hours before the dresser takes weight.
Checkpoint: every leg sits flush against its plate with no visible gap and no slop when you wiggle it by hand.
Step 5: Check Stability and Finish the Project
Stand the dresser up on a level floor and set your level on the top. Read it front to back and side to side, then adjust. Most floors are not flat, so an adjustable leveling foot on one corner is sometimes the whole fix.
Push hard on the top corner in four directions. Any movement means a leg is not seated or a plate is riding on a void. Add blocking behind it and repeat the test.
Finish the legs before you set the dresser back in place. Sand to 220 grit, seal end grain first because it drinks finish, then stain or paint, and a thin coat of clear sealer on top if the legs will be scuffed by shoes or baskets. Paint the legs and leave the dresser body alone if the tones do not match.
Finally, re-attach the anti-tip strap to a stud with the dresser in its final position. A raised dresser tips more easily than one sitting low, and this is the single cheapest safety upgrade in the whole project.
Checkpoint: level top, no rock under load, anchor strap screwed into a stud.
Common Mistakes
Legs of unequal length. Cheap legs vary by a fraction of an inch. Sort your set by hand before installing and use the longest four. Flip an upside-down leg if a hair of wobble remains.
Screws too long for the mounting point. A 2 inch screw driven into a 3/4 inch panel comes out the top. Buy screws that stop 1/4 inch short of the far side, or use a plate with a stop.
Screwing into thin or hollow panels. This is the failure everybody warns about. If a screw feels spongy or the plate rocks, there is nothing behind it. Cut that section out and replace it with a 2×4 or a 2×2 block before you try again.
No pilot holes in particle board. Particle board edges split and crumble. Drill first, always, with a bit matched to the shank.
Attaching to the wrong location. Plates drilled into a spot that misses the case rail are the reason a finished dresser rocks. Mark and check the rail position before you drill, not after.
Relying on adhesive alone. Wood glue on its own will let a loaded dresser shear off its legs. Glue supports; screws or bolts carry the load.
Skipping reinforcement on a heavy dresser. A solid wood six-drawer frame carries a lot more load than particle board. The heavier and wider the case, the more corner blocking it needs before you start.
A few safety notes. Flip the dresser with two people or tip it onto a blanket rather than hoisting it. Keep the anti-tip strap installed until the new legs are on and the dresser is in its final spot, and unload the drawers before you turn anything over.
Frequently Asked Questions
How do I know what size legs to buy for a dresser?
Most furniture legs are 1-3/4 inch square at the top, which matches standard mounting plates. Measure the width and depth of the dresser bottom and choose a plate that fits within those edges, then measure the height you want the finished piece to sit. Common heights are 6, 8 and 12 inches. If the dresser has factory-drilled holes, match the spacing between them and your existing hardware will likely fit.
Can I add legs to a dresser with a particle-board or hollow base?
Yes, but you have to build a base frame first. Screw a 2×4 across the bottom into the side panels, add 2×2 corner blocks, then mount the plates to that wood. Particle board will not hold screws on its own, and a plate screwed into an empty cavity is what makes a leg wobble. Glue plus screws or a pocket hole joint keeps the frame rigid.
Should I use screws or wood glue to attach dresser legs?
Use screws or hanger bolts to carry the load, and treat glue as extra insurance. Screws resist the twisting and pulling forces a loaded dresser creates, which glue alone cannot handle. A thin film of wood glue on a plate-to-wood joint adds holding power, so use both where the parts are solid wood. Let any adhesive cure for at least 24 hours before the dresser takes weight.
How do I keep the dresser stable after adding tall legs?
Height adds leverage, so stability depends on the base and the anchor. Build a full frame with corner blocks, keep the legs well inside the edges of the case, and check the dresser with a level on a flat floor. Reinstall the anti-tip strap into a stud with the piece in its final position. Push hard on each corner; any movement means a leg is not seated or a plate is over a void.
Can I add legs to a dresser without drilling into it?
Adhesive-only attachment is possible with construction adhesive and a surface plate, but I would not put a loaded dresser on it. Without a screw or bolt through solid wood, the joint depends entirely on glue holding a shear load, and that is exactly the load a dresser creates. If the finish matters more than the height, look for low-profile adhesive pads or trim designed for flush mounting instead.
What type of legs are best for a heavy dresser?
Thick turned or tapered wooden legs on a hanger bolt give the strongest result, because the bolt passes through the plate into solid wood rather than just into a flat surface. Avoid thin metal hairpin legs on a wide solid wood case unless the base is reinforced, since they flex under a heavy load. Whatever the style, weight is handled by the base frame and the anchor strap.
Start by flipping the dresser over and looking at the bottom. Whether that base is solid wood or a hollow particle board carcass decides everything else about the job.
Measure the height you want, buy four legs and one set of plates to match, then build a frame if the underside has nothing to screw into. Everything after that is short and predictable, and the dresser ends up looking like it cost far more than the parts did.