A dresser fits in a car when its narrowest side is smaller than the cargo opening and the piece can sit flat or close to flat against folded rear seats. Most thrifted six-drawer dressers will not pass through a sedan trunk opening; a hatchback, wagon, SUV or minivan usually works, and anything taller than its cargo bay belongs in a pickup bed or a rented van. Here is how to transport a dresser in a car without damaging the furniture or your interior trim.
Budget about 20 minutes to prep and load, plus the drive itself. The loading is the awkward part, not the driving. Get a second person for anything solid wood or antique, and lay down a drop cloth before the dresser ever reaches the car.
Table of Contents
- What You Need
- Step-by-Step: How to Transport a Dresser in a Car
- 1. Measure the Dresser and Your Vehicle
- 2. Empty, Remove, and Protect the Dresser
- 3. Lift and Position the Dresser Safely
- 4. Secure the Dresser and Check the Drive
- 5. Use a Safer Alternative When It Will Not Fit
- Common Mistakes
- Frequently Asked Questions
- Can I transport a dresser in the back seat of my car?
- How should a dresser be positioned in a car?
- Can I put a dresser on the roof of my car?
- Do I need to remove the drawers before moving a dresser?
- What is the safest way to secure a dresser in a vehicle?
- How do I transport an antique dresser without damaging it?
- Conclusion
What You Need
Gather these before you touch the dresser. Most people discover halfway through the lift that they are short one strap.
- Moving blankets — two or three for the piece, plus a scrap one for the car interior
- Corner and edge protectors or foam pads for the top corners and drawer fronts
- Stretch wrap or plastic wrap to hold the blankets against the case so they do not slide off in transit
- Two ratchet straps, 10 to 20 feet each, rated well above the weight you are moving
- Zip ties for the drawers, or small straps if you do not have ties
- Work gloves with grip, because splinters and drawer edges catch hands
- Phillips and flat screwdrivers for hardware, and a tape measure
- Painter’s tape and a marker to label drawers, shelves and hardware bags
- A drop cloth or blanket for the floor at both ends of the move
- A second person for anything over roughly 75 pounds, or any piece with glass, inlay or a hand-painted finish
Most cars have cargo anchor points built in — metal loops or rings in the cargo floor, behind the rear seat, or on the side walls near the wheel wells. If yours has none, buy a short piece of cargo strap with a loop or hook before you commit to a load.
Step-by-Step: How to Transport a Dresser in a Car
1. Measure the Dresser and Your Vehicle
Measure before you lift. You need four numbers: dresser width, dresser height, dresser depth, and the weight if you can estimate it. Then measure the cargo opening at its narrowest point, the interior width between the wheel arches, and the usable length with the rear seats folded flat.
The rule of thumb is simple: the smallest dimension of the dresser should be a few inches narrower than the cargo opening, and the interior needs enough length for the dresser plus the room your hands need to push it in. A dresser that measures well on paper can still fail on the hinge path into the opening, so check the route from the door to the cargo bay.
Vehicle by vehicle, here is what usually works:
- Sedan trunk: only small three-drawer chests or narrow nightstands. A wide dresser will not clear the trunk opening, and forcing it damages the lid hinges or the trim.
- Hatchback: the widest opening of any passenger car and usually the easiest fit for a thrifted six-drawer with the rear seats down.
- Wagon: nearly as good as a hatchback for width, slightly less ceiling height, so tall mirrors or a raised top need checking.
- SUV: a tall, square opening that suits full-height dressers. Watch the rear seatbelt anchors, which often cut into the load width.
- Minivan: the most interior length with the seats folded, though the loading lip is higher, so plan the lift carefully.
- Pickup bed: the honest answer for anything heavy. Strap to the bed rails, and if the load or strap protrudes past the rear, flag requirements vary by state.
- Roof rack: only with a real, load-rated rack bolted to factory points. A bare roof with rope through the windows is not a transport plan.
2. Empty, Remove, and Protect the Dresser
Take everything out, including the small stuff people leave behind — pens, costume jewelry, that one drawer that always catches. Empty drawers weigh less and cannot swing.
Pull the drawers out entirely. Most sit on wood or metal runners and lift straight up once you support the front; some tilt out like an open oven. Take a photo of the runner hardware before you pull anything so you can put it back the right way round.
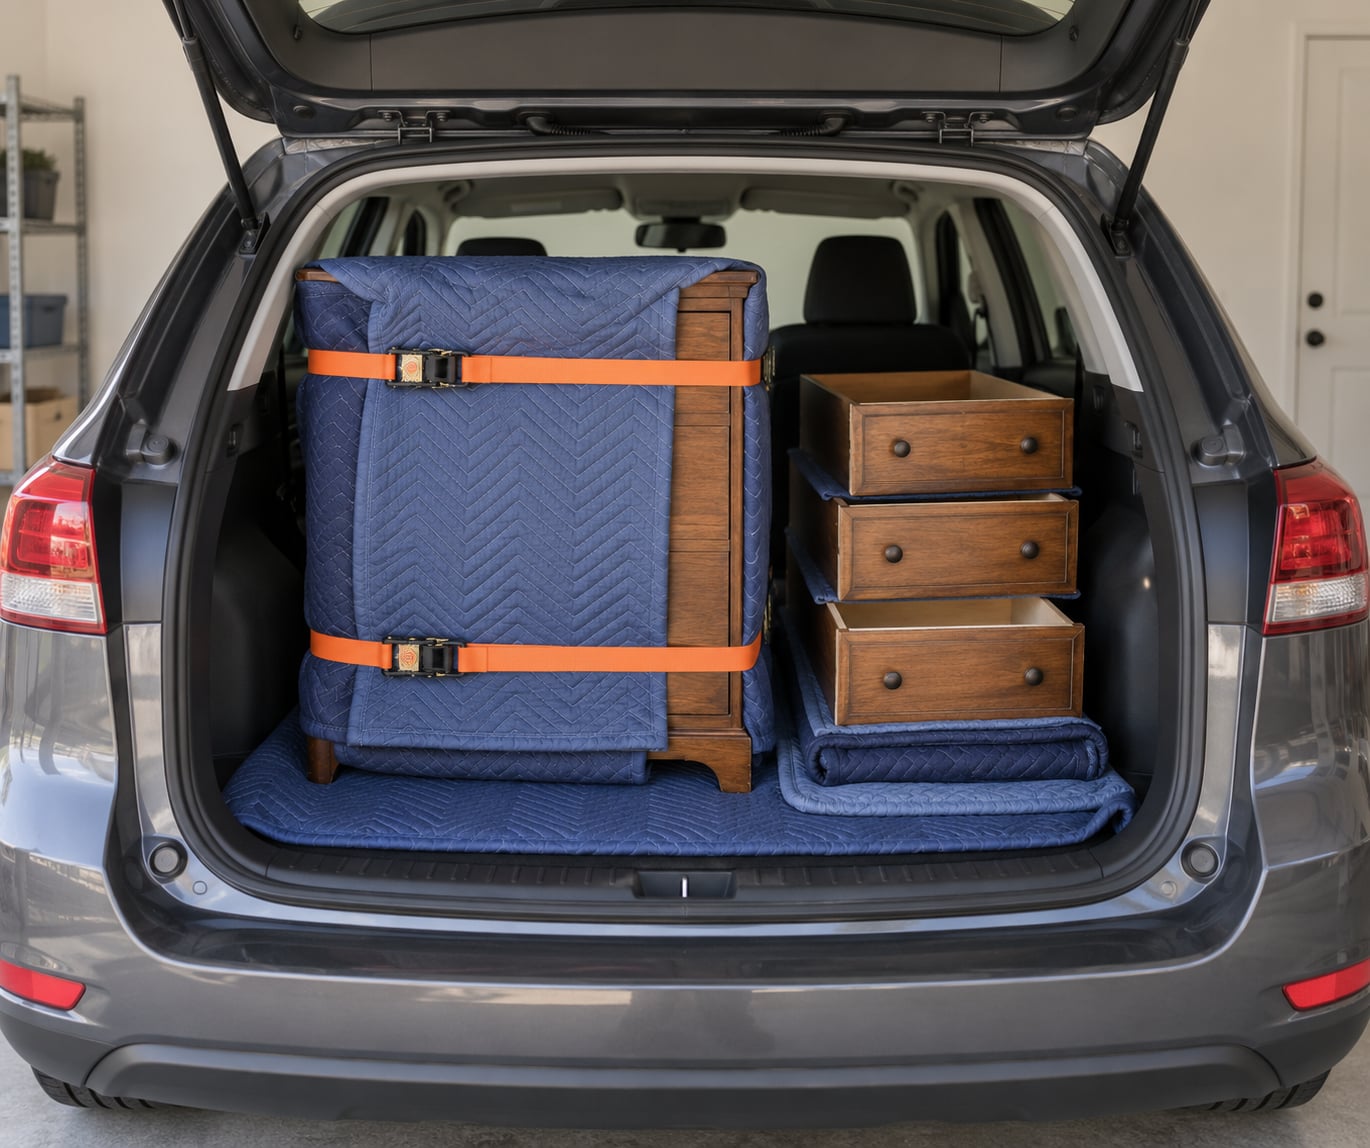
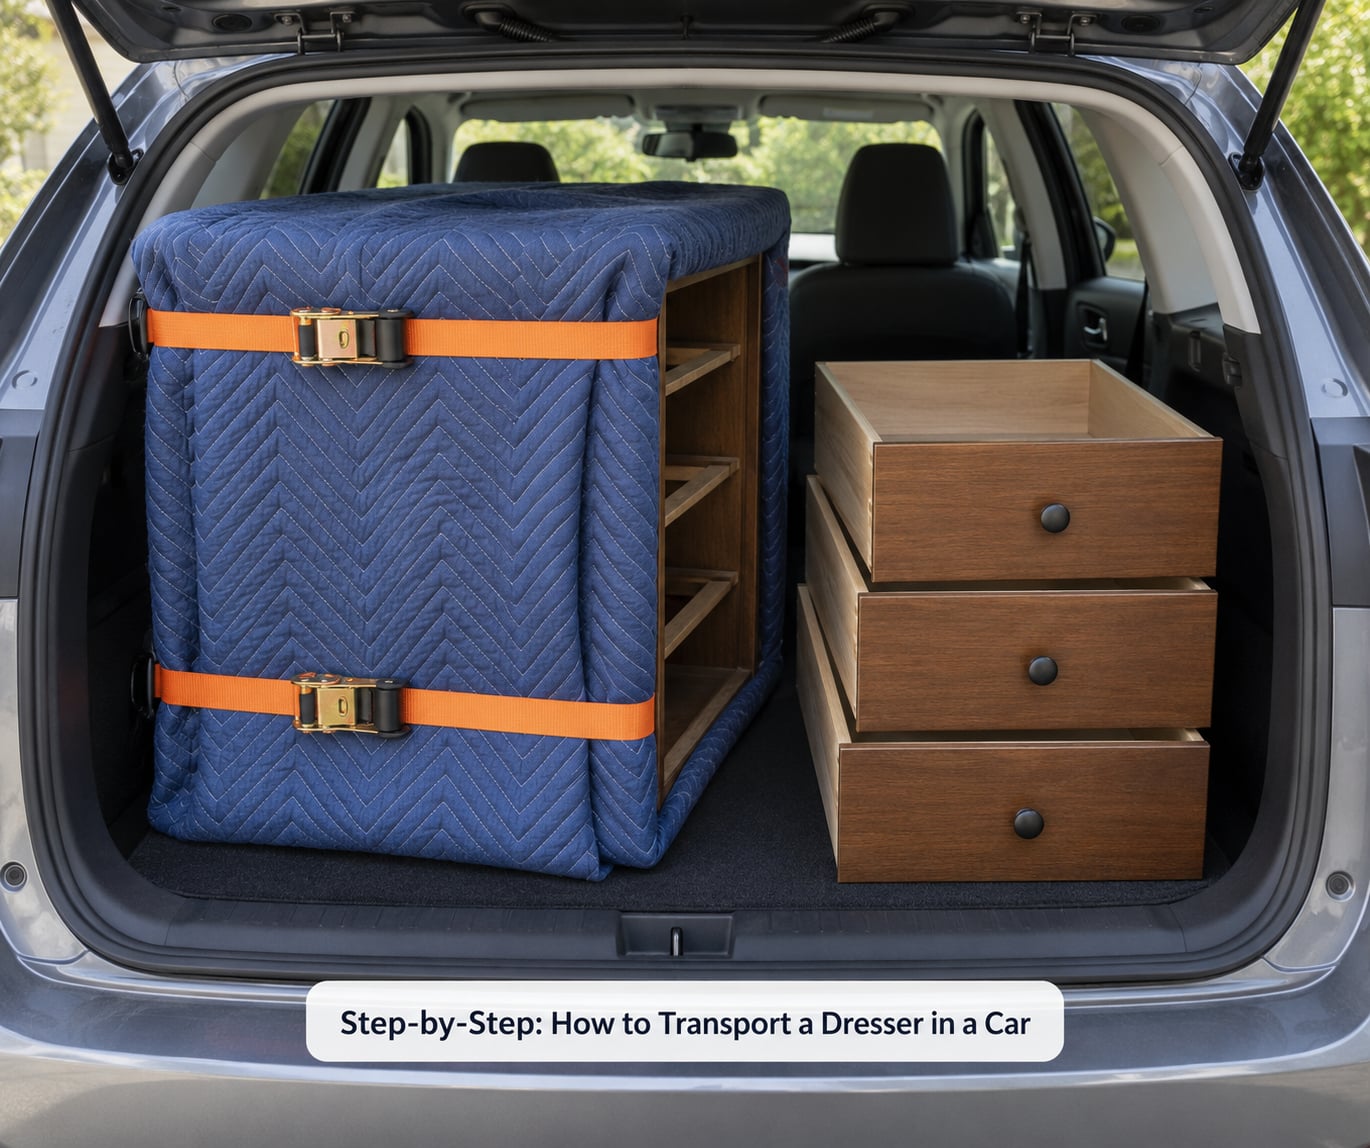
Wrap each drawer front in a moving blanket and tape the blanket closed. Wrap the dresser case in a second blanket, adding a third layer over the top and the four top corners, then stretch wrap the whole thing so the blankets stay put. Pad drawer fronts hardest — they are the part that gets kicked, scraped and dented by door frames and seat belts.
Bag the knobs and screws with the shelf they came from and tape the bag inside the removed drawer. You will not guess correctly at reassembly without labels.
3. Lift and Position the Dresser Safely
Two people means one person on each end, both gripping the case at its base where the frame meets the feet, never the drawers and never the top. Squat, keep your back straight, lift with your legs, and walk in small sideways steps without twisting.
Keep the dresser upright whenever the path allows. Laying a tall case on its side puts the weight on the frame joints that were built to hold it standing, and flat on its back can bow the top panel. Upright is stable and predictable.
For thresholds, doorways and hard floors, use furniture sliders and push rather than drag. For stairs or a raised trunk lip, a hand truck with the strap, or a four-wheel furniture dolly, does the work your back would otherwise do. Protect the floor at the base of any stair or doorway you will be climbing.
4. Secure the Dresser and Check the Drive
This is the step people skip, and it is the one that turns a dresser into a projectile during a hard stop. Position the dresser before you secure it: pushed forward and up against the seat backs or the front of the cargo area, weight low and slightly forward, so the hardest stop drives it into the seat rather than into the doors.
Attach at least two ratchet straps to rated anchor points, and restrain on two axes. One strap forward and one strap sideways beats two straps in the same direction, because the second one stops movement the first cannot. Ratchet them snug, then back the ratchet off half a turn — straps tighter than that crush softwood and dent finished panels over a longer drive.
Strap or zip tie the drawers separately, and never let them ride loose inside the carcass where a single stop can send them flying. Check the dresser’s stability by pushing the top in several directions; if anything moves more than about an inch, tighten it before you close anything up.
Then look at your visibility. If the dresser blocks your rear window, side mirrors, or your view of the passenger-side mirror when you check the blind spot, this setup is wrong. Rear visibility matters more than the convenience of one more dresser. Slow down, add extra following distance, take corners gently, and give yourself twice the normal stopping room.
Never drive with a load that is not restrained, and never drive with a hatch or trunk propped open while the furniture sits unsecured behind it. If the load has to be flagged because it extends past the vehicle, the flagging and lighting rules differ by state — check yours before you pull out.
5. Use a Safer Alternative When It Will Not Fit
If the measurements say no, stop there. People in moving forums keep repeating the same regret in different words: they bought a beautiful dresser, tried to force it into a sedan, and left it behind. Squeezing it in rarely ends with the dresser at home and often ends with a torn door frame.
Your realistic options:
- Hourly truck or cargo van rental. Home improvement stores and moving companies rent pickup trucks and vans by the hour, often the same day, which solves the short-notice problem that stops people from following through on a Marketplace find.
- A pickup bed, if you have access to one. Two ratchet straps and forty minutes of driving solves more dresser problems than any other single answer.
- Task apps and local delivery services. A two-person crew with a dolly will move one piece short-notice. Price goes up for stairs and for antique pieces.
- Ask the seller. ReStore, Goodwill and estate sellers sometimes have a local mover on call or can hold a piece while you arrange transport.
- Donation pickup. If the dresser is already a donation, a scheduled pickup removes the transport problem entirely.
Common Mistakes
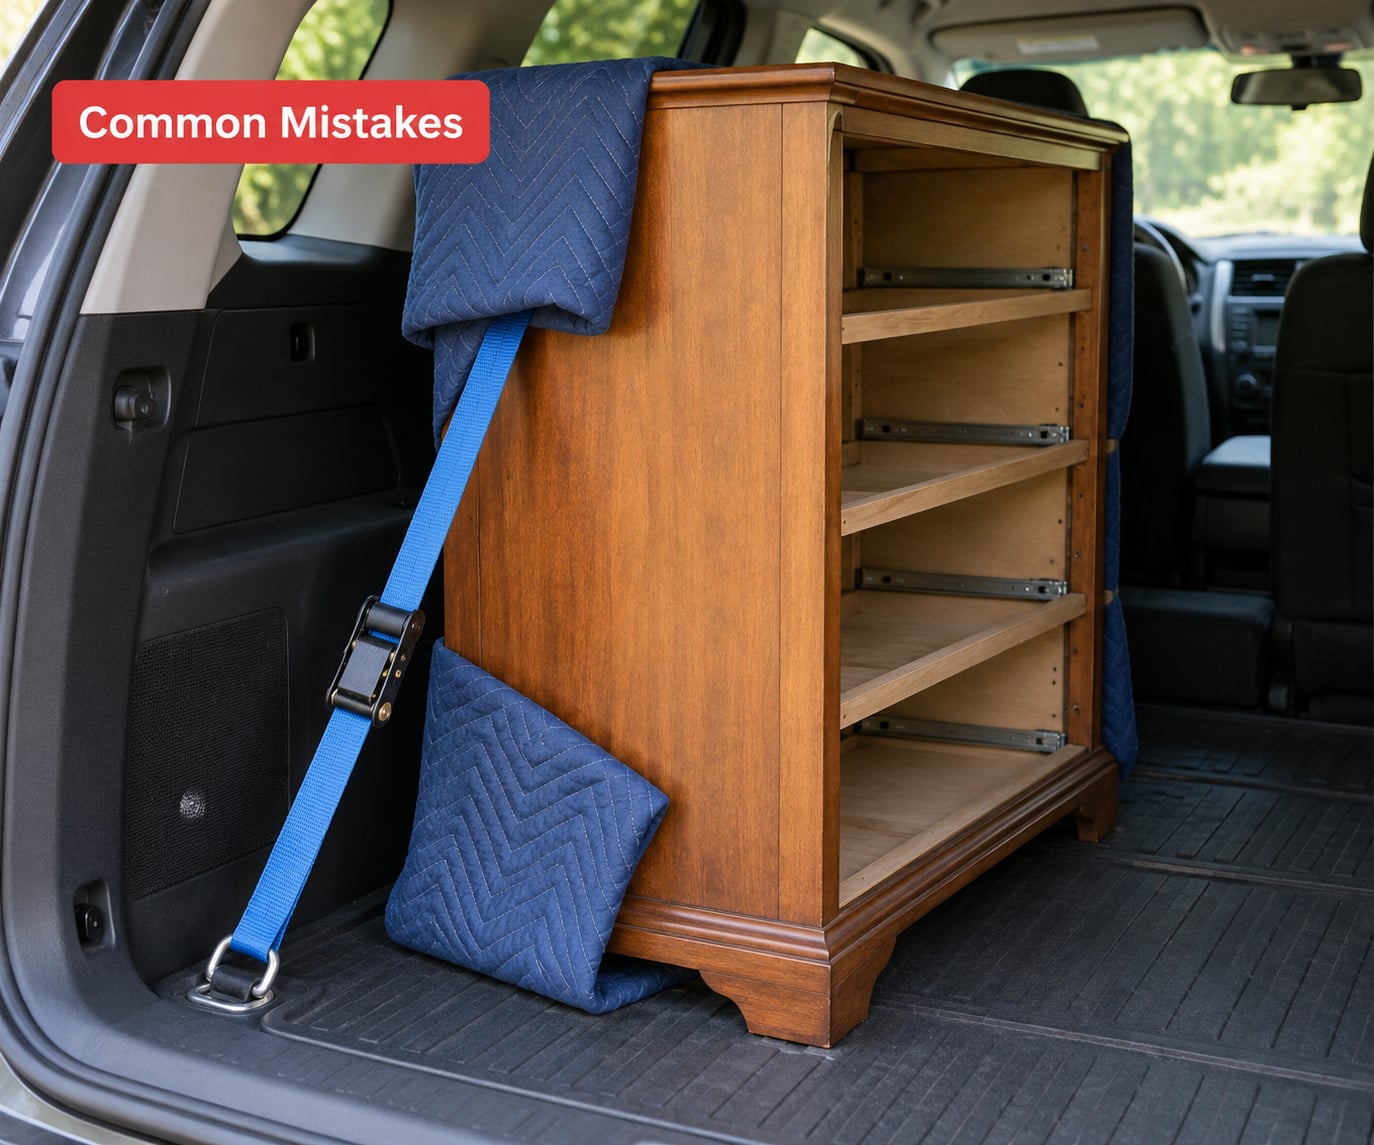
Leaving the drawers installed. Drawers add weight, stick out past the case, and swing open on the first firm stop — the single most reported failure in car transport. Pull every drawer and shelf out, wrap them separately, and strap them flat to the case or into a bag in the footwell. Tip: label each one so reassembly takes five minutes instead of an hour.
Using rope or bungee cords instead of straps. Bungees stretch under load and let furniture creep, and rope can saw into a finished edge. Use ratchet straps attached to rated anchor points, and check them again after the first five minutes of driving. Tip: a short bungee across a drawer front is a fine backup belt, never the main restraint.
Driving with the hatch propped open and the load unrestrained. Airflow at highway speed pulls a loose item backward, and exhaust can enter the cabin through an open hatch. Load and strap the piece first, then close the hatch completely. Tip: if you need the hatch open for the load, that load belongs in a pickup bed or a van.
Loading the dresser where it blocks your view. Furniture against the rear glass costs you rear visibility, blind spot sightlines, and the ability to see a reversing car. Place it low and as far forward as the cargo area allows. Tip: check your mirrors from the driver’s seat before you move off, not from outside the car.
Improvising a roof setup. Rope over the roofline, through the windows and around the frame puts several hundred pounds of stopping force on your windshield pillars and your door frames, and the rack, if there is not one, carries nothing. Use a factory-bolted, load-rated rack with its own straps and stay within the rack’s rating. Tip: if you do not own a rated rack, rent a van instead.
Frequently Asked Questions
Can I transport a dresser in the back seat of my car?
Sometimes, for a small piece. A nightstand or a three-drawer chest often fits across a folded rear seat, but a full-size dresser rarely does. Remove the drawers first, because installed drawers add width and weight. Protect the seat and door frames with a moving blanket, strap the piece to the seat frame or cargo anchors so it cannot slide forward on braking, and check that your rear visibility is still usable before driving.
How should a dresser be positioned in a car?
Upright, pushed as far forward as the cargo area allows, and low. Weight sitting forward and against the seat backs means a hard stop pushes the dresser into the seat instead of into the doors. Restrain it on two axes with ratchet straps attached to rated anchor points, and strap or zip tie the removed drawers flat against the case or bagged in the footwell so nothing can swing open mid-drive.
Can I put a dresser on the roof of my car?
Only with a real, load-rated roof rack bolted to factory mounting points, and only within that rack’s stated weight limit. Rope over the roofline and through the window openings puts heavy stopping force on the windshield pillars and door frames, and most bare roofs have no attachment points at all. On a sedan, a strap-through-window roof carry is a good way to destroy both cars. A rented cargo van is the safer call.
Do I need to remove the drawers before moving a dresser?
Yes, always. Drawers add weight, extend past the case, block your view of the case surface, and swing open on the first firm stop, which is the most common damage in car transport. Take out the drawers and any removable shelves, wrap each front in a moving blanket, bag and label the hardware, then strap or zip tie the drawers flat against the case so they cannot slide during braking.
What is the safest way to secure a dresser in a vehicle?
Two ratchet straps attached to rated cargo anchors, restraining the piece on two separate axes rather than twice in the same direction. Push the dresser forward and low before you tighten anything, then check stability by pushing the top in several directions; anything that moves more than an inch needs another strap. Re-check the straps after five minutes of driving, since the load settles and tighten from there.
How do I transport an antique dresser without damaging it?
Treat the finish as the fragile part. Photograph the piece first, remove all drawers, shelves and hardware, and bag and label each piece for exact reassembly. Wrap the top, the top corners and the drawer fronts in moving blankets, then stretch wrap them to the case so nothing shifts. Move it upright with two people, never drag it across a floor, and expect to touch up small scuffs once it is home.
Conclusion
To transport a dresser in a car, do five things in order: measure the dresser and the cargo opening, empty it and remove the drawers, pad the top, corners and drawer fronts, strap the case to rated anchors on two axes, and keep your visibility clear. Then drive slower than feels necessary and check the straps after the first few minutes.
If the measurements do not work, that is the signal to rent a pickup or cargo van for an hour, not to force the piece into a sedan. People who regret a dresser move almost always regret the shortcut they took to save a rental.