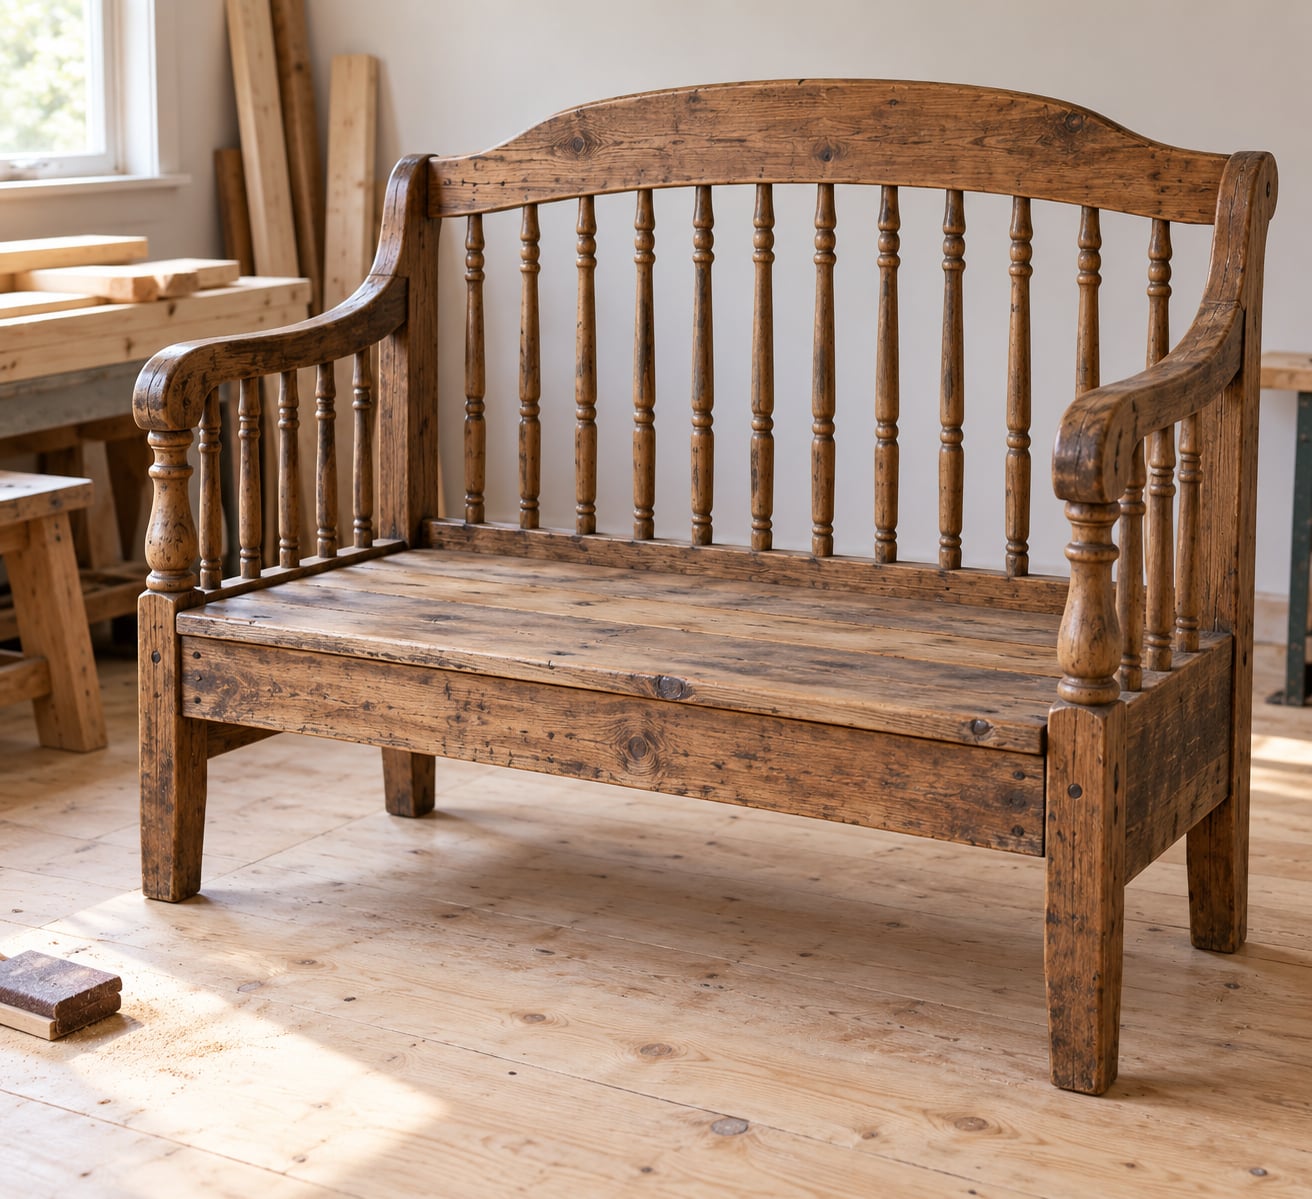
To make a bench from a crib rail, take the crib apart, cut one full end panel down to roughly 19 inches tall, bolt or screw it to the back of a rectangular seat box built from 2x4s, then top the box with 1×4 or 1×6 seat boards and finish the whole thing in primer and paint. The turned spindles and curved arms are the reason anyone keeps the piece.
It is a beginner-level build. Most people spend four to eight hours including sanding and finishing, and the only tools you really need are a saw, a drill, a square and clamps. A miter saw and an impact driver make it faster but neither one is required.
The part people get wrong is the structure, not the wood. A crib side panel on its own has no legs and no seat, so once you mount it you have to stop the bench tipping forward and stop the seat sagging in the middle. Get those two things right and the rest is straightforward carpentry. Here is the whole build, with the measurements and the numbers most tutorials leave out.
Table of Contents
- What You Need
- Materials and cut list
- Step-by-Step
- 1. Plan the Bench Size and Layout
- 2. Remove Hardware and Clean the Rail
- 3. Cut and Shape the Wood
- 4. Assemble and Reinforce the Bench
- 5. Sand, Finish, and Protect the Surface
- 6. Check Stability and Add Finishing Touches
- Common Mistakes
- Frequently Asked Questions
- How many crib rails do I need to make a bench?
- Is it safe to repurpose an old crib into a bench?
- How much does it cost to build a bench from a crib?
- Can the finished bench be taken apart again?
- What is the best paint or finish for a crib rail bench?
- How to Make a Bench from a Crib Rail: Start With a Solid Rail
What You Need
Start with the crib itself. A standard crib gives you four sides plus a front drop rail. The two long sides are roughly 50 to 52 inches, the ends are shorter, and one full end panel is what most people use as the back of the bench because it is solid at the bottom where the mattress used to sit.
Before anything else, check the crib against the current recall list at the manufacturer or your national safety regulator, and remove all drop-side hardware. If you cannot confirm a crib’s history, do not put the finished bench in a child’s room; use it in a hallway or entryway instead. For paint, if the crib predates 1978 there is a real chance of lead, so wear a respirator and sand wet or work outdoors.
Materials and cut list
- One crib end panel for the backrest, cut to 19 inches tall from the bottom rail up
- One crib side panel for the two bench sides, cut to 19 inches as well, plus an extra strip for the front skirt
- 2×4 lumber for the seat box: two pieces at 46 inches and two at 15 inches for a 46 by 16 inch seat, or scale to your rail length
- 1×4 or 1×6 boards for the seat top, two pieces long enough to span the box with a small overhang
- Wood glue and 1 1/4 inch wood screws, roughly a dozen
- Four metal L brackets or 3 inch structural screws for the leg-to-frame joints
- Wood filler or putty for the old hardware holes and any cracks
- Sandpaper in 80, 120 and 220 grit, plus primer, paint and a clear coat if the bench will live outdoors
On tools: a hand saw or a circular saw for cuts, a drill or driver, a speed square, a tape measure, clamps you can borrow, a putty knife, a shop vacuum or tack cloth for dust, and a dust mask. A brad nailer is quicker than screws for holding panels while glue dries, but screws are stronger, and on a bench that will hold an adult, stronger wins.
Pick your rail by sound, not by looks. Press hard on each joint and wiggle it; any movement means the joint has loosened and needs to be rebuilt with fresh glue and screws before you go further. Check for splits along the grain, cracks where spindles enter the rails, and soft or punky wood at the ends. Skip the crib if the bottom rail is bowed more than about a quarter inch.
Step-by-Step
1. Plan the Bench Size and Layout
Measure the rail first, then design the bench around it rather than the other way around. A crib side panel usually gives you 50 to 52 inches of length, which is a sensible bench for an entryway or the end of a bed. Adult comfort lands somewhere specific: aim for a seat height of 17 to 19 inches, a seat depth of 15 to 18 inches, and an overall length near 50 inches.
That depth range matters because it is the single most common complaint in reader comments on these builds. Measure a chair in your own house that you like sitting in and copy it. Shorter adults often find 17 inches uncomfortably deep, so if the bench is for the kids, cut closer to 15 inches.
Lay the end panel, the side panels and the 2×4 pieces on the floor in position before cutting anything. Work out now whether the crib’s original screw holes line up with your frame, because drilling into those existing holes is the easiest way to get a tight joint without guessing.
A quick worked example: for a 46 inch crib panel, build a seat box 46 inches long by 16 inches deep, set the end panel across the back edge, and cap the box with two 1×6 boards cut to 48 inches so they overhang the frame by an inch at each end. Finished result is a 48 inch bench, 19 inches to the top of the back, 16 inches deep.
2. Remove Hardware and Clean the Rail
Take the crib apart fully and bag the hardware. Every bracket, bolt, screw and dowel comes off, because metal left inside the wood shows up later as a rust stain bleeding through your paint. Work the screws out from the back with the same size driver rather than levering with a pry bar, and back out any nails the same way.
If a screw is seized, run a drop of penetrating oil around it, wait a few minutes and try again. If it still refuses, snip the head off and chisel the shank out from the other side. A little damage here is cheaper than a snapped panel end.
Scrape off loose old finish, then wash the panels with warm soapy water and let them dry fully, ideally overnight. Look again for soft spots, loose spindles and hairline cracks. This is also the moment to decide which panel becomes the back, which become the sides, and which becomes the front skirt.
3. Cut and Shape the Wood
Mark the cut line around the panel with a pencil and a straightedge, then cut outside the line so you can sand back to it. Keep the bottom rail of the panel intact; it is the strongest part and it sits closest to the seat frame where the load goes.
A circular saw with a straightedge guide works fine, though it will struggle on a curved armrest. Where the profile curves, a hand saw or a jigsaw follows the shape better. The bottom piece you keep usually has the moulding profile running along it, and cutting on the low flat section keeps that edge crisp.
Cut the 2×4 frame parts to length now, then cut the seat boards last so they can overhang by whatever amount the frame ends up needing. If you want a front skirt instead of legs, rip a strip from a spare crib panel down to about 5 inches tall.
4. Assemble and Reinforce the Bench
Build the seat box like a picture frame. Apply a thin bead of wood glue to one face, screw through with 1 1/4 inch screws, wipe the squeeze-out with a damp cloth, then clamp. Measure both diagonals before you fasten the last corner; equal diagonals mean a square frame, and a square frame is what keeps the bench from racking side to side.
Attach the crib end panel to the back edge of the box. Glue plus screws works; screws alone will eventually work loose under sitting loads. Screw from the inside of the box outward through the crib rail so the screw heads stay hidden under the seat boards.
Now stop the two failure modes. For the seat sagging in the middle, either add a centre support board running the length of the box or use four L brackets under the seat boards. For tipping forward, add a front skirt from the spare crib panel, and if the bench still leans, tack a 1 inch wide board along the bottom front edge to push the base of the seat forward over the front legs.
Finally, decide on legs. Short turned legs salvaged from a table or a nightstand look better than anything new and match the crib’s profile, while plain 3 inch square legs are easier to attach. Whether you screw legs into the frame or use L brackets, pilot the holes first. Splitting a 2×4 end by driving a screw into the end grain is the classic beginner mistake here.
5. Sand, Finish, and Protect the Surface
Work through 80 grit to knock down old finish and any pencil lines, then 120 to level the joints, then 220 for the surface that the cushion will sit on. Sand the flat of each panel with the grain, and pay attention to the places where the crib’s spindles meet the rail, since those show first when a bench gets used.
Fill every old hardware hole and crack with wood filler, let it dry, then sand it flush with 120 grit. Cutting a shallow V into each hole first gives the filler something to key into.
Choose your finish for where the bench lives. Indoors, two coats of quality acrylic paint over a bonding primer is enough, and you can skip the primer if you are painting over a compatible existing finish. Outdoors, use an exterior primer, exterior paint and a clear coat rated for outdoor wood, and plan to re-coat every couple of years. A paint sprayer gives a smoother coat on spindles, while brushing is fine if you keep a wet edge.
Ventilate the room, wear the respirator you would wear for any sanding, and let each coat dry fully before the next. Thick coats on turned spindles sag and stay tacky for days, so lay on thin ones.
6. Check Stability and Add Finishing Touches
Set the bench on a level floor and push down hard on each corner of the seat, then lean your weight onto the back. Any movement, creak or flex tells you where a fastener is loose or a joint needs glue. Tighten, wait, then retest.
Also sit on it properly with your feet on the floor and check for front-to-back tilt; a bench that pitches forward under an adult is the fault most people report. Add or extend the front skirt, or lengthen the legs at the front by half an inch, until it sits flat. Then check it against a wall and shim the back feet with felt pads if it rocks.
Add felt or rubber pads under each leg so it stops sliding and stops marking the floor. A seat cushion is the one addition that turns a bench into comfortable seating, and a couple of pillows make it read as furniture rather than a shop project.
Where you put it is worth a minute of thought. In an entryway it handles shoes, in a nursery it takes the story-time crowd, in a mudroom it takes wet coats, at the end of a bed it gives you somewhere to sit while dressing, and in a reading nook the low back works in your favour. Under a covered porch, add the exterior coat and use cushions you can take in when the weather turns.
Common Mistakes
Using a rail with loose joints. Wiggling every joint before you build saves the whole project. If a joint moves, inject wood glue, clamp it, and drive fresh screws through the solid section of the rail rather than through the cracked end grain.
Joining with screws only, or glue only. Glue gives strength but no grip while it cures; screws grip but can work loose with use. Use both on every structural joint, and add a bracket or a centre support where the seat spans more than about 20 inches.
Over-tightening. Driving screws until the wood dimples splits the rail, especially in older pine. Snug is enough; leave a quarter turn of room.
Skipping the filler. Old screw holes and knot gaps telegraph themselves through paint within a year. Fill, dry, sand flush.
Applying a thick finish. Heavy coats bead on turned spindles and drip. Brush or spray thin coats and respect the drying time on the can.
Not testing for stability. Do the corner test and the full-weight sit test before the cushions go on, not after. Rebuilding at that point means removing the paint you just finished.
A couple of safety notes worth repeating. Sand any older paint outdoors or wet and wear a proper respirator, and keep the drop-side hardware out of the build entirely rather than saving it for later. For decorating, match the paint colour to the trim already in the room rather than the wall, and let the wood’s original colour show through on the spindles if you like the contrast.
Frequently Asked Questions
How many crib rails do I need to make a bench?
One full end panel makes the back of the bench, and one side panel cut to the same height gives you both bench sides plus a strip for the front skirt. That is the standard build. If you only have leftover sides and a short toddler rail, you can still make a low-back or backless bench by using one long side as the seat edge and the toddler rail as the back.
Is it safe to repurpose an old crib into a bench?
Yes, as long as you strip it properly. Check the crib against the current recall list first, remove all drop-side hardware and every screw, bolt and bracket, and skip the crib if the joints are loose or the wood is soft. If the crib predates 1978, treat the paint as a lead risk: sand outdoors or wet, wear a respirator, and keep the finished bench out of a child’s room.
How much does it cost to build a bench from a crib?
Most of the expense is new lumber and hardware, not the crib, which you already own. Expect to buy a few pieces of 2×4, two seat boards, screws, brackets and wood filler, plus primer, paint and a clear coat if the bench goes outdoors. Prices shift with region and store, so check your local timber yard before you commit to a plan.
Can the finished bench be taken apart again?
Yes, if you build it with screws rather than permanent adhesive. Glue is still fine on the structural joints, but skip it on the crib panels where you might want to move the bench later, and use screws alone for the legs. Keeping the seat boards screwed rather than glued lets you get at the frame if you ever need to tighten a joint.
What is the best paint or finish for a crib rail bench?
Indoors, a bonding primer with two coats of quality acrylic paint is enough, and the spindles stay easier to paint with a brush kept moving. Outdoors, use an exterior primer, exterior paint and a clear coat rated for outdoor wood, then re-coat every couple of years. A stain is trickier here because the salvaged rail may already carry old, uneven colour.
How to Make a Bench from a Crib Rail: Start With a Solid Rail
The whole build comes down to four checks. First, inspect the rail: sound joints, no splits, all hardware out. Second, measure your space and aim for a seat 17 to 19 inches high and 15 to 18 inches deep. Third, reinforce every joint with glue and screws, and add a centre support or brackets so the seat cannot sag. Fourth, test the finished bench with your full weight on it before you paint.
Do those four things and you have a piece of furniture no flat-pack shop would sell you, because no factory is going to mould a curved arm by hand. Add a cushion, put a bowl of keys on it, and call the crib retired.