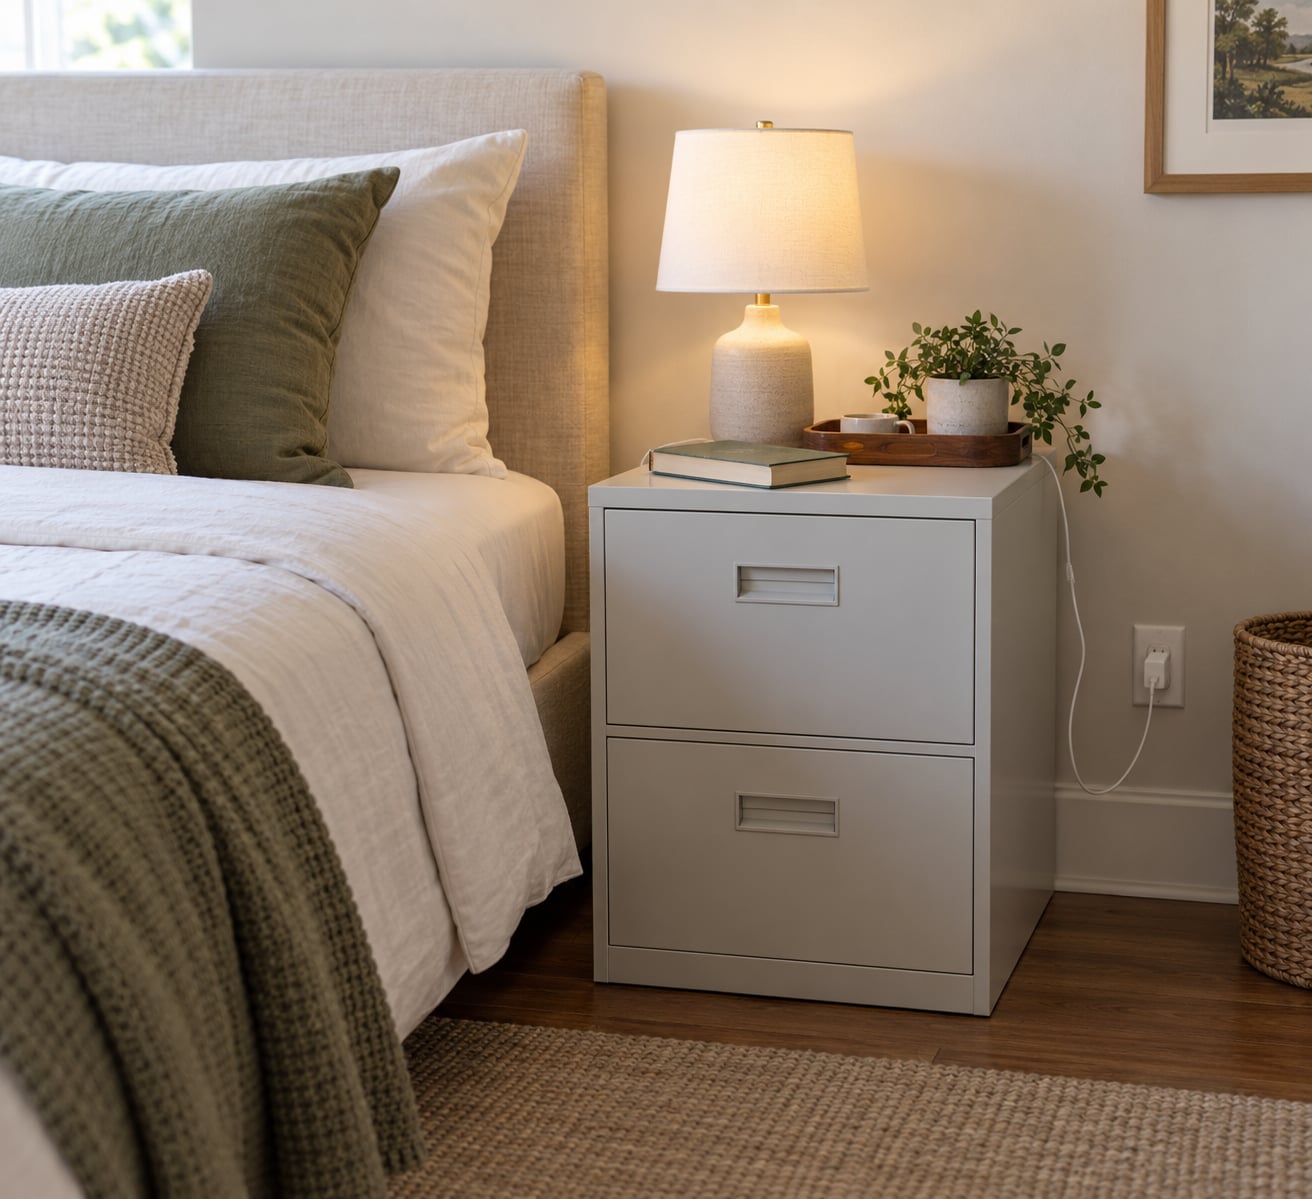
Yes, you can turn a filing cabinet into a nightstand, and most people who try it are pleasantly surprised by how well it works. A two-drawer pedestal file cabinet already has the drawer height, the weight and the storage a bedside table needs. The real work is cosmetic: fixing the height, stripping off the office hardware, and refinishing the surface so it reads as furniture.
A filing cabinet is one of the best under-used hard-sided pieces you can pick up secondhand, and most thrift stores and marketplace sellers have them stacked at the back for almost nothing. A finished conversion is far cheaper than a matching pair of nightstands new, and it solves the usual DIY alternative, which is a thin open shelf that wobbles and stores nothing.
Sticking points are few. Plan on two dry days and roughly 2 to 4 hours of hands-on time, and treat the skill level as beginner: you need a drill, a screwdriver and a steady hand with a roller. You also need access to an outlet and a spot where you can spray or roll without worrying about the floor.
The one thing to sort out before you buy paint is height. A standard letter-size vertical file cabinet is roughly 28 inches tall and 15 inches wide, which already sits near mattress height and needs no legs at all. A lateral four-drawer cabinet runs 49 to 52 inches, and that one is a chest, not a nightstand.
Table of Contents
- What You Need
- Essentials
- Optional, and only if you want them
- Step-by-Step: How to Turn a Filing Cabinet Into a Nightstand
- 1. Measure Before You Turn a Filing Cabinet Into a Nightstand
- 2. Empty, Clean, and Inspect the Cabinet
- 3. Remove Unwanted Hardware and Repair Minor Imperfections
- 4. Sand and Prepare the Surface
- 5. Paint, Refinish, or Add a Decorative Finish
- 6. Add Storage and Nightstand Features
- 7. Secure the Cabinet and Manage Cords
- 8. Style and Place the Finished Nightstand
- Common Mistakes
- Skipping the height check
- Painting over grease without degreasing
- Using ordinary paint on metal
- Leaving the hardware that says office
- Blocking the drawers or the outlet
- Skipping the anchor
- Overloading the top
- Frequently Asked Questions
- Can I use a metal filing cabinet as a nightstand?
- What is the best height for a filing-cabinet nightstand?
- Should I remove the drawers from a filing cabinet before painting it?
- How do I keep a filing cabinet from tipping over when used as a nightstand?
- What is the easiest finish for a filing cabinet makeover?
- Conclusion
What You Need
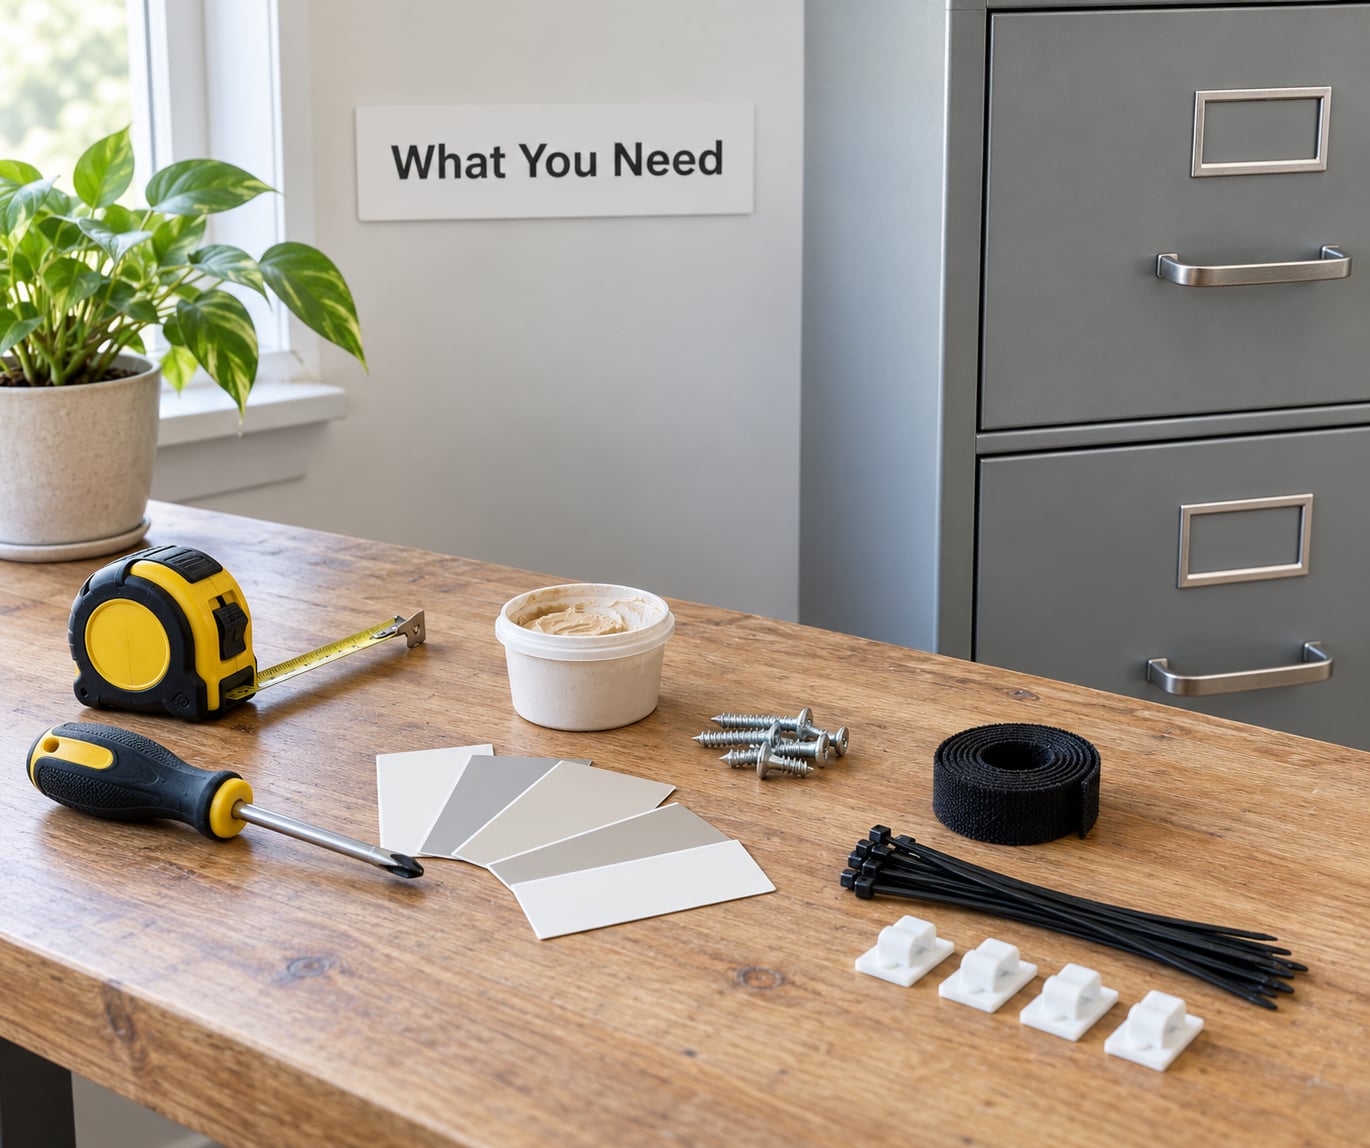
Most of this list you probably own already. The essentials come first, then the optional decorative items you can skip on the first pass.
Essentials
- The filing cabinet itself — ideally a two-drawer vertical pedestal in the 26 to 30 inch height range. Two drawers are easier to work on and hold more than a single deep drawer.
- Tape measure — for the cabinet, the bed and the floor space beside it.
- Phillips and flat-blade screwdrivers — most file cabinet hardware is held with these rather than hex keys.
- Cordless drill with a metal bit and a wood bit — the metal bit for a steel cabinet, the wood bit for a veneer or particleboard carcass.
- Degreaser or TSP substitute — diluted according to the label, in a spray bottle and a rag.
- Sandpaper in two grits — around 120 grit for scuffing glossy metal, 220 grit for smoothing filler and wood.
- Wood filler or metal-body filler — for the holes left behind by old handles and label holders.
- Masking tape and a drop cloth — the tape gives you crisp drawer edges, the cloth protects your floor.
- Primer and topcoat — on metal, pick a bonding or epoxy primer and paint labelled for metal surfaces. On wood, a stain-blocking primer over any water-based paint.
- New drawer pulls — optional, but this is the single fastest way to make it look like bedroom furniture.
- Furniture straps and a wall anchor — for anchoring the piece to the wall.
Optional, and only if you want them
Furniture legs, a felt or leather top pad, a small adhesive cable clip, drawer liners, contact paper for the drawer interiors, and a door or wall hook. Legs matter most for lateral cabinets, not pedestals.
Step-by-Step: How to Turn a Filing Cabinet Into a Nightstand
1. Measure Before You Turn a Filing Cabinet Into a Nightstand
Measure the cabinet’s height, width and depth, then measure your available floor space next to the bed. Write both numbers down before you commit.
Then measure the top of your mattress. Nightstand height is measured from the floor to the top surface, and the useful target sits within a few inches of your mattress top. Anything much taller means you are looking down at the surface all night; anything much shorter means you are reaching down into the drawers.
| Situation | Typical height | What it means for the conversion |
|---|---|---|
| Mattress top surface | 20 to 24 inches | Your reference point |
| Comfortable nightstand top | Within 3 inches of the mattress top | The goal |
| Letter-size vertical file cabinet | About 28 inches tall | Works as is, no legs |
| Legal-size vertical file cabinet | About 30 inches tall | Slightly high but fine |
| Lateral four-drawer cabinet | 49 to 52 inches tall | A chest, not a nightstand |
Also check the drawer clearance. Pull a drawer all the way out and confirm it will open with a wall or nightstand neighbour a few inches away. You need roughly 18 inches of clear depth in front of the cabinet for the drawer to travel.
How to tell it worked: the closed cabinet fits the gap without scraping the wall, and the top surface is level with or just under your mattress top.
2. Empty, Clean, and Inspect the Cabinet
Empty everything out, including paper clips and stray staples that will scratch a new finish. Pull each drawer out fully, remove the plastic drawer liners, and vacuum or wipe the interior.
Wipe the exterior with a diluted degreaser and a rag, then dry it fully. Skipping the degreasing step is the number one reason paint peels off a metal cabinet within a few months.
Now inspect it. Open and close every drawer, checking that the slides move smoothly and the runners are not bent. Look for rust blooms, dents, peeling veneer or swollen particleboard. Press gently on the corners; if the metal dents and stays dented rather than springing back, the cabinet is too damaged to convert.
How to tell it worked: the surface is free of grease and grime, and every drawer returns closed with an even gap all around.
3. Remove Unwanted Hardware and Repair Minor Imperfections
This is the step that separates furniture from office equipment. Remove the label holders, the card slots and the index tabs first; they are usually snapped into a rail or held by a single screw. Popping out a plastic label frame is a matter of squeezing its tabs and pulling.
Next, take out the lock core if the cabinet has a keyed lock. Unscrew the lock from the inside of the door or drawer face and it slides straight out. Mark the empty bore so you can find it to fill later. If you like the idea of a lock in a kid’s room for a medication or tablet, leave it in and repaint around it instead.
Remove the old pulls if you are replacing them, and photograph the screw hole positions before you pull anything, because the spacing rarely lines up between manufacturers. Fill the vacated holes with wood filler on a wood cabinet, or metal-body filler on steel, and let it dry hard enough to sand flush.
Tighten any loose handle screws and hardware while the cabinet is apart. Tightening the case itself with a few extra screws is a quick way to stop a tired cabinet from creaking.
How to tell it worked: no label frames, no exposed bores, and nothing on the surface that says office.
4. Sand and Prepare the Surface
On painted metal, scuff the whole surface with 120 grit in the direction of the grain until the shine is gone everywhere. Paint will not bond to a glossy cabinet otherwise. Light scuffing is the goal here, not bare metal; you are removing gloss, not metal.
On wood, sand any peeling veneer down to sound material with 80 grit, then move up to 120 or 150 until the surface is uniform. Fill the low spots with wood filler and sand them flush with 220. If the carcass is solid wood and in good shape, a light scuff with 180 is all it needs.
Keep sanding outside and wear a dust mask, especially with old cabinet finishes. Wipe everything down with a damp cloth and let it dry fully before anything else goes on. Paint applied over dust will show every speck for the life of the finish.
How to tell it worked: the whole surface scuffs evenly, with no glossy patches left and no dust on your palm after you wipe.
5. Paint, Refinish, or Add a Decorative Finish
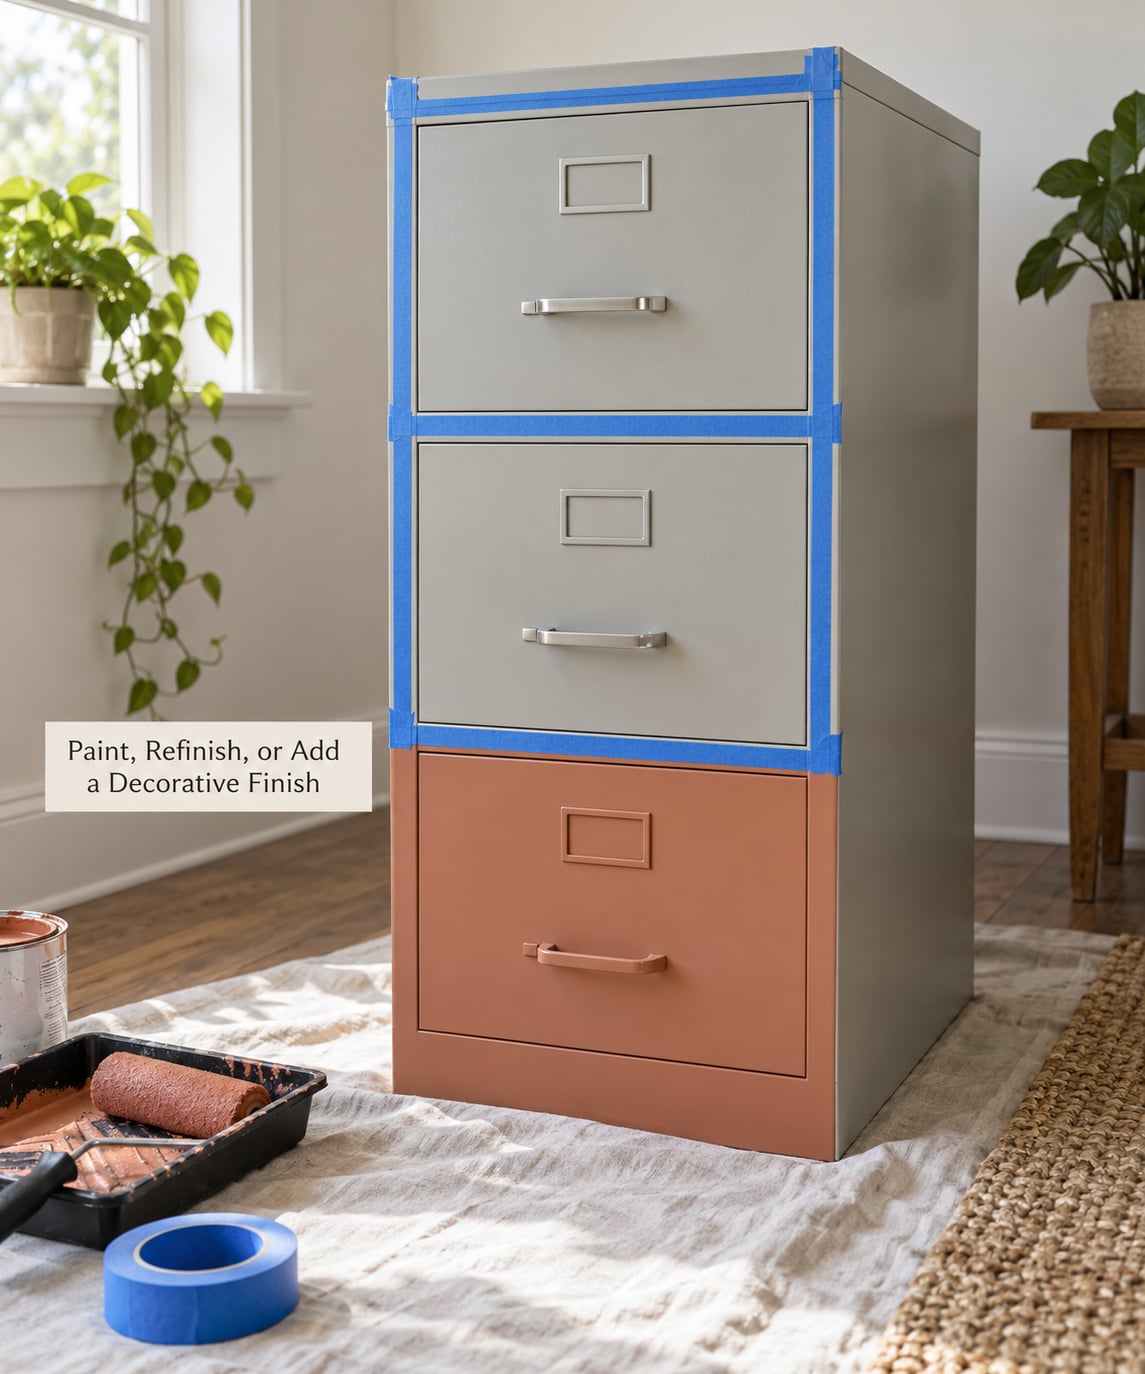
Tape off the drawer edges and any surface you want to keep bare before you start. On metal, a bonding primer goes on first in thin coats, following the can’s drying time. On wood, one coat of stain-blocking primer handles bleed-through and knots.
Then the color. A roller on the large flat sides is much faster than a spray gun and, with a good quality roller, leaves no lap marks. Spray paint or a small brush is easier on the drawers, the edges and the tight corners around the lock bore. Expect two or three thin coats, and remember that the first coat always looks patchy; it is doing nothing except sealing the surface.
For a two-tone look, paint the body in one color and the drawer fronts in another. Farmhouse readers usually go warm white or greige with a matte finish, modern readers go a deep color with satin, and a brass or matte-black pull ties it together. Satin holds fingerprints better than gloss and still looks like furniture.
Let the topcoat cure properly before the cabinet goes back in the bedroom. Full cure takes longer than the dry-to-touch time on the can, so resist loading the drawers for at least a day. Work in a ventilated space, and lay a drop cloth under the cabinet if you are spraying.
Decoupage and wallpaper also work well, but seal the surface first so the paper does not lift at the corners. Stain is only an option for a solid wood cabinet; never stain a veneer or a metal shell.
How to tell it worked: the finish is even, with no runs, and a fingernail drawn along an edge does not mark it.
6. Add Storage and Nightstand Features
Now make the drawers work for you. Bedside storage tends to be small, frequent and mostly shallow, which is why drawers suit the job so well.
Add a small adhesive cable clip inside the back of the top drawer and run a charging cable through the back panel with a grommet or a drilled hole, so a phone can charge overnight inside the cabinet. Put a felt or leather pad on the top surface to protect it from a water ring. Line the drawers with adhesive contact paper or a fabric liner, which hides the scuffed metal interior and makes the piece look intentional. Add a small tray or a shallow box in one drawer to keep charging cables coiled and a pair of glasses from disappearing.
Swap the pulls last. Match the new hardware to the door thickness, drill through the door carefully with a bit that stops short of the far face, or use a fastener with a shallower thread length. A new handle in brass, matte black or brushed nickel changes the read of the whole piece more than any other single upgrade.
How to tell it worked: a phone charges inside the drawer overnight, and the pulls are level and tight.
7. Secure the Cabinet and Manage Cords
A loaded steel cabinet is heavy, and a top-heavy piece beside a bed is a real tipping hazard in a room with children or pets. Anchor a tall cabinet to a wall stud with furniture straps rated above its weight, or fit an anti-tip bracket if the piece is staying a chest rather than a nightstand. For a low pedestal sitting at knee height, anchoring is sensible but far less urgent.
Keep the heaviest items in the bottom drawer and leave the top surface clear. Do not stack tall objects on top; a top-heavy cabinet is the whole problem, so avoid recreating it with decor.
Route cords through the back. Drill a hole in the back panel near the base, fit a plastic grommet so the edges do not chew the cable, and keep the cable run behind the cabinet rather than across the floor. If the outlet is far away, a mounted power strip on the wall behind the bed keeps the cable path short and tidy.
How to tell it worked: tug the top of the cabinet and it does not shift, and no cord crosses a walking path.
8. Style and Place the Finished Nightstand
Leave enough room in front of the drawers to open one fully while sitting up in bed, and keep the cabinet clear of the bed frame so you can reach across and back without catching your knee.
Style the top with one lamp, one small object and nothing tall in the corner. A lamp is the obvious first choice because it needs a flat, stable surface and gives the piece a purpose. Pair it with a small tray for a ring and a glass of water, a book, or a humidifier if that is what you use at night. A single plant or a framed photo is plenty; the top of a file cabinet is small and a cluttered surface makes the conversion look unfinished.
Finish by checking the whole thing from across the room. If it still reads as office equipment, the cause is almost always the height, the label rail or a leftover piece of chrome trim.
Common Mistakes
Nearly every disappointing conversion comes down to one of these.
Skipping the height check
A lateral cabinet at 50 inches beside a bed will always feel like a dresser no matter how well it is painted. Measure first, and if it is too tall, decide whether to keep it as a chest elsewhere rather than forcing it into the bedroom.
Painting over grease without degreasing
Paint will peel or flake within months over a cabinet that has not been cleaned. A diluted degreaser and a rag takes ten minutes and saves the finish.
Using ordinary paint on metal
Interior wall paint will not hold to steel. Use a bonding or epoxy primer plus a paint labelled for metal surfaces, and skip the primer only if the can specifically says it is not needed.
Leaving the hardware that says office
Label holders, card rails and a keyed lock will date the piece instantly. Remove what you do not want and fill the holes; this is the difference between a cabinet and a nightstand.
Blocking the drawers or the outlet
Pushing the piece flush against the wall can stop a drawer from opening and hide the outlet. Pull it forward a few inches and route cords through the back instead of around the side.
Skipping the anchor
A heavy cabinet next to a bed with a toddler or a climbing cat is the one genuinely unsafe part of this project. A strap into a stud takes ten minutes and settles the question.
Overloading the top
A stack of books and a humidifier on top puts the weight exactly where you do not want it. Keep the top surface light and let the drawers do the storing; that is what makes the piece useful in the first place.
Frequently Asked Questions
Can I use a metal filing cabinet as a nightstand?
A metal filing cabinet makes a durable nightstand because it is stable, heavy and already has drawer storage. Pick a two-drawer vertical pedestal around 28 inches tall so the top sits near your mattress, and confirm the top surface is level. Scrub off grease, prime with a bonding primer meant for metal, and repaint so it stops looking like office equipment.
What is the best height for a filing-cabinet nightstand?
Aim for a top surface within about 3 inches of your mattress top, which is usually 20 to 24 inches off the floor. A letter-size vertical file cabinet at roughly 28 inches already works with no changes. Lateral cabinets at 49 to 52 inches are too tall for bedside use. Measure the cabinet, the bed and the floor space before you commit to a piece.
Should I remove the drawers from a filing cabinet before painting it?
Yes, removing the drawers gives you cleaner edges and stops paint collecting on the slides and drawer fronts. Empty everything first, then label each drawer and its hardware so you can put the right pull back on the right door. Photograph the hardware hole spacing before removal, because the holes rarely line up between different drawers.
How do I keep a filing cabinet from tipping over when used as a nightstand?
Anchor a tall or top-heavy cabinet to a wall stud with furniture straps rated above its weight, particularly in a bedroom with children or pets. Keep heavy items in the lowest drawer, leave the top surface clear, and check that the drawers open without catching on the wall. A low pedestal is less of a concern but is still worth anchoring.
What is the easiest finish for a filing cabinet makeover?
For a metal cabinet, spray primer followed by spray topcoat is the least fussy option and the easiest to control on small drawers. For the large flat sides, a quality roller with a paint can matched at the hardware store is faster and leaves fewer lap marks. Solid wood cabinets can be stained, but veneer should be sanded and painted instead.
Conclusion
A filing cabinet becomes a good nightstand when you handle the three things that make it look like office equipment: the height, the hardware and the finish. Start by measuring the cabinet against your mattress and the available floor space, then check the drawers run smoothly and the steel is sound.
Strip out the label holders and the lock, fill the holes, degrease, scuff and repaint with a bonding primer. Add new pulls, line the drawers, anchor the piece and give the top one lamp. That is a weekend of work for a bedside table with real storage, and it will outlast most of what you can buy new.