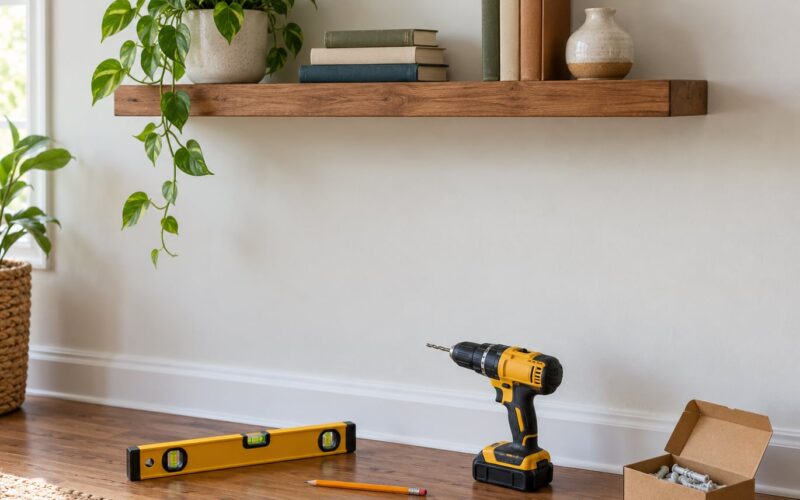
Floating shelves are easier to build than they look: you screw a concealed mounting system into the wall studs, then slide the finished board over it so no bracket shows. With a stud finder, a drill, a level and about an hour per shelf, a beginner can do the whole job in an afternoon.
The part that trips people up isn’t the wood, it’s what goes behind the drywall. Get the hidden support into studs, keep the holes straight and level, and the shelf itself is just a board. This guide walks through the whole process, including how to fix the mistakes that leave a shelf crooked, gapped at the wall or sagging.
Table of Contents
- What You Need
- Step-by-Step: How to Build Floating Shelves
- Step 1: Choose the Shelf Location and Size
- Step 2: Find Studs and Check the Wall
- Step 3: Mark the Bracket or Support Positions
- Step 4: Drill the Mounting Holes
- Step 5: Attach the Hidden Supports
- Step 6: Set the Shelf and Check That It Is Level
- Step 7: Finish, Style, and Load the Shelf
- Common Mistakes
- Extra Tips for a Professional Look
- Frequently Asked Questions
- Can you install floating shelves on drywall without finding a stud?
- How much weight can a floating shelf hold?
- Are floating shelves suitable for rental apartments?
- What type of wall anchors should I use for floating shelves?
- Do floating shelves need visible brackets?
- How do I choose the right shelf size for a room?
What You Need

Gather everything before you start. Half-finished installs are where mistakes happen.
- The shelf board. Solid wood or plywood. A 1.5 to 2 inch thick board resists sagging far better than a thin plank, and wider boards look sturdier on the wall.
- Concealed mounting hardware. Threaded rod brackets with a back plate, hidden lag screw kits, or a support rod sized to the shelf depth.
- Fasteners matched to the wall. Wood screws or lag screws for studs, masonry screws for brick or concrete, drywall anchors only as a supplement.
- Wood glue and brad nails if you are gluing up a box-style shelf.
- Tools: stud finder, tape measure, pencil, 4 foot level, drill with a wood bit slightly smaller than your screw, countersink bit, and safety glasses.
- Optional finishing supplies: sandpaper in 120, 180 and 220 grit, pre-stain conditioner, stain or paint, and a matte polyurethane topcoat.
Match hardware capacity to the board rather than to the wall. A bracket rated below what you plan to load will creep or pull out over time, and a long shelf with two supports in the middle will bow. Two brackets with at least 16 inches of wall contact behind them carry far more than two on a narrow span.
Before you drill anything, find out what is behind the drywall. Electrical cable and plumbing run through the same cavities as studs, and a hidden lag screw can share space with a wire. Use a stud finder with a live-wire detection mode, then probe with a small bit in an area away from your marked holes. If you suspect a wire or pipe, stop and have a qualified professional check.
Step-by-Step: How to Build Floating Shelves
Step 1: Choose the Shelf Location and Size
Measure the wall first, then pick a shelf that relates to something already in the room. Two thirds of the width of the furniture below it, or about two thirds of the wall span, gives you a proportion that reads as intentional rather than random.
Depth depends on the room. Kitchen shelves holding plates and mugs work at 8 to 10 inches deep. Bathroom shelves above a sink need 6 to 8 inches so nothing overhangs the basin. Living room display shelves usually sit at 8 to 12 inches.
Working height matters too. Aim for 10 to 12 inches above a countertop or console, roughly eye level for a living room, and 6 to 8 inches above a toilet tank in a bathroom.
Check what the shelf would cover: door swings, window casings, existing artwork, a wall outlet you still need, or a chair back. A shelf above a door is fine as long as the door opens fully and nothing heavy sits where it could fall onto someone.
Make sure the board fits the hardware. Measure the actual distance between the bracket rods and the board’s internal channel, not the outside dimensions of the kit.
Success check: hold the board up in place mentally and confirm nothing collides, the height feels reachable, and the length looks proportional to the wall.
Step 2: Find Studs and Check the Wall
Run the stud finder across the full wall at the shelf height and mark the edges and center of each stud with pencil. Studs usually sit 16 inches apart in newer homes, but that spacing is not a promise, especially in older houses or around window and door openings.
Slide a scrap of drywall aside or look at a cutout from a previous project if you are unsure what type of wall you have. For a floating shelf you need a wall you can reach framing on: standard drywall on studs, or masonry where you can use appropriate anchors.
Stud centers are 1.5 inches wide, so a shelf spanning 4 feet usually lands on at least two studs, sometimes three. That is the difference between a shelf that stays put and one that works loose.
Success check: you have at least two marked stud centers inside the shelf’s footprint, and each mark is confirmed with a second pass of the stud finder rather than a single reading.
Step 3: Mark the Bracket or Support Positions
Hold the bracket or back plate where it will sit and mark its screw holes with a pencil, transferring the marks to the wall. Then mark the shelf height itself with a long level held across at least two stud locations, drawing a light level line.
Space supports toward the ends of the shelf rather than in the middle. Two supports with most of the board hanging outside them will bow; supports spread wide and near the edges keep the span short.
Every screw mark should land on solid material, ideally a stud. If a mark falls between studs, move the bracket, add a second plate, or add a drywall anchor rated for the load.
Success check: step back and look at your marks against the stud lines. Cross out and remeasure anything off, because holes are permanent once drilled.
Step 4: Drill the Mounting Holes
Pick a bit slightly smaller than the screw shank, usually 1/16 inch under. Drill into the plate while it is clamped or taped in place so the bit starts square, and keep the drill straight with a scrap of wood clamped around the guide as a drill block.
Go deeper than the screw length by about half an inch so the screw can bite into solid material. Brush or blow out the debris afterward so the plate seats flat.
Wear eye protection and keep a dust mask handy if you are drilling into older plaster or drywall. Drill the shallow screw holes in the shelf itself before the board gets a finish on it, and use a countersink bit so screw heads sit below the surface.
Never drill where wiring or plumbing may run. That warning applies to the wood in the shelf too, not just the wall.
Success check: every hole is centered on a stud or rated anchor, drilled straight and deep enough, and clear of debris.
Step 5: Attach the Hidden Supports
Secure the mounting plate or bracket to the studs, driving screws until the head sits flush. Tighten them evenly rather than cranking one down completely first, then repeat the check on the second bracket.
For a support rod system, set the rods at the height you marked and confirm both are at the same depth from the wall. Attach a second reference line across both brackets with the level. If the two rods are not coplanar, the shelf will rock.
Confirm the assembly takes the load the manufacturer intends by pushing down firmly on each bracket with the board off. There should be no flex, no movement and no sound from the wall.
Success check: the support is solid and motionless under hand pressure, and both brackets share one line.
Step 6: Set the Shelf and Check That It Is Level
Lift the shelf onto the supports with a helper for anything over 4 feet. Slide it back until it sits flat against the wall, then run the level along the front edge, the back edge and the ends.
If the front edge dips, the most common causes are brackets at different depths, a bowed board, or shims missing under one bracket. Small shims of plywood under the low side solve it before the shelf is loaded.
Adjust the board by sliding it slightly rather than forcing it. Forcing a shelf onto hardware that sits too high can bow the board or loosen the fasteners.
Once it is level, drive any locking screws or set screws that the hardware uses to stop the shelf lifting off. Some kits have a top access hole for this; others rely on friction alone.
Success check: the level reads true on the front edge and the ends, and a gentle push up on the front of the shelf does not lift it off the supports.
Step 7: Finish, Style, and Load the Shelf
Finishing works best before installation, and stain is easiest on an uninstalled board. Work up through 120, 180 and 220 grit, then apply pre-stain conditioner on pine, maple or any soft wood and let it dry. That step keeps blotchy, uneven color from forming. Follow with two coats of stain and two or three thin coats of matte polyurethane.
Load within the support’s published capacity and keep the heaviest items close to the wall and near studs. Books are the enemy of long shelves: a full row of hardcovers at the outer edge is where sagging starts. Break them into shorter sections or use two shelves instead of one.
Style in layers. Anchor the look with two or three large items, back them with a medium-height group, then add one small object. Vary heights, leave empty space between clusters, and line the front edges up so the shelf reads as a single line across the wall.
Keep cords behind objects and out of sight, or run them inside a wall channel rather than draping them over the front edge where they catch on books.
Common Mistakes
Drilling without finding studs. The most reported failure. Fix: mark stud centers twice, and if a hole lands in empty cavity space, fill the hole with a wooden toothpick or a drywall anchor rated for the load rather than leaving it as a weak point.
Using drywall anchors for the whole shelf. Anchors are fine for light duty in drywall alone, but a shelf with books on it wants at least one fastener into a stud per bracket. Multiple builders report anchors pulling out and leaving the bracket spinning once a shelf is loaded.
Not leveling the brackets. Off-center holes and mismatched depths are the reason shelves sit crooked. Fix: draw a level line across both brackets, use a scrap of wood as a straight guide, and mark every hole before drilling any of them.
Hanging a shelf over a door, a chair or a bed. The shelf is fine until something swings, slides or leans into it. Fix: check door swing with a helper, keep clearance above seating, and never store heavy items over a headrest.
Exceeding the weight limit. Hardware ratings assume a load spread evenly and close to the wall. Fix: check the manufacturer’s number, stay below it, and shift weight toward the wall.
Buying brackets that do not fit the board. Rod spacing, channel width and rod diameter all have to match the board you cut. Fix: measure the hardware first, then cut the board to suit it.
Leaving a gap between the shelf back and the wall. Common with base-plate-up brackets. Fix: scribe the back edge to the wall with a block and a utility knife, or shim the bracket until the board pulls tight.
Long spans sagging. Anything over 4 feet needs an internal brace or a center support. Fix: add a plywood stiffener along the back, or split it into two shorter shelves.
Extra Tips for a Professional Look
Match shelf length to something measurable: the width of a window, a cabinet run, or the wall between two features. Random lengths are the single most common reason a wall of shelves looks off.
Keep every shelf on the same wall at the same depth from the edge, even if the wall is slightly out of square. A consistent line reads as deliberate, and a varying depth reads as a mistake.
Repeat one element across shelves. The same ceramic, the same greenery, or the same frame style repeated at intervals ties separate shelves into one arrangement.
For uneven or textured walls, scribe the back edge with a block held against the wall and a utility knife, cutting away the high spots in passes. Test fit often; a light touch keeps the cut clean.
Where a wall is not perfectly flat, a shallow LED strip mounted under the front edge gives the shelf a soft wash and hides any small gap behind it. Wire the strip before the shelf goes up, test it on a bench, and route the cable into a wall cavity rather than over the top.
Add a thin bead of wood glue along the back of a miter-folded box before the final assembly, and clamp it with painter’s tape while the glue grabs. Painted boxes and miter-folded plywood both hide the fix-ups better than solid wood.
Renters should get written permission and follow the lease and building rules. Where permission is refused, a rental-friendly option is a light shelf on hardware rated for the material, loaded with objects only, never with books or glass.
Test the finished shelf gently once it is loaded. Stand on it only if you built it and you understand the hardware capacity. Otherwise, load it gradually and watch for any tilt over the first few days.
Frequently Asked Questions
Can you install floating shelves on drywall without finding a stud?
You can, but the result depends on the weight. Light shelves holding plants and frames can hang from rated drywall anchors alone. Anything with books, glass or hardware on it needs at least one fastener into a stud per bracket. Use a stud finder, mark the centers, and treat anchors as backup rather than the main support. If you cannot locate framing confidently, ask a professional before drilling.
How much weight can a floating shelf hold?
It depends on the hardware, the board thickness, the span and the wall. Manufacturers publish a load rating per bracket, and that number is the figure to plan around. Short shelves anchored to studs handle considerably more than long spans on drywall anchors. Stay under the published rating, keep heavy items near the wall, and add an internal brace or a center support on anything over four feet.
Are floating shelves suitable for rental apartments?
Only with permission. Most leases prohibit drilling, and mounting hardware can cause damage that costs a deposit. Ask the landlord in writing before you start. If permission is granted, fill every hole and use studs wherever possible. If it is refused, use adhesive mounting rated for the wall and load the shelf with light objects only, never books or glass.
What type of wall anchors should I use for floating shelves?
For standard drywall with no stud in reach, use heavy-duty toggle or molly anchors rated above the load you plan to place on the shelf. For brick, concrete or masonry, use masonry screws or sleeve anchors rather than drywall anchors. Avoid small plastic expansion anchors for a loaded shelf, since they are the ones reported as pulling out. Anchors supplement studs rather than replace them.
Do floating shelves need visible brackets?
No. The defining feature of a floating shelf is that the mounting hardware is hidden. Options include threaded rod brackets set into routed channels, hidden lag screws driven into studs, or an internal frame inside a miter-folded plywood box that slides onto the wall. A board on surface-mounted brackets is a bracketed shelf, not a floating one, even if it looks similar.
How do I choose the right shelf size for a room?
Match the length to something already on the wall: about two thirds of the width of the furniture below it, or of the wall span between two features. Depth runs 6 to 8 inches in a bathroom, 8 to 10 in a kitchen and 8 to 12 in a living room. Keep anything over four feet to two supports near the ends, and remember that a longer shelf needs a thicker board to stay flat.
Start with one shelf over a spot you use every day, locate the studs twice and check for wiring before the drill touches the wall. Get that first one level and tight, and the second and third go up in half the time.