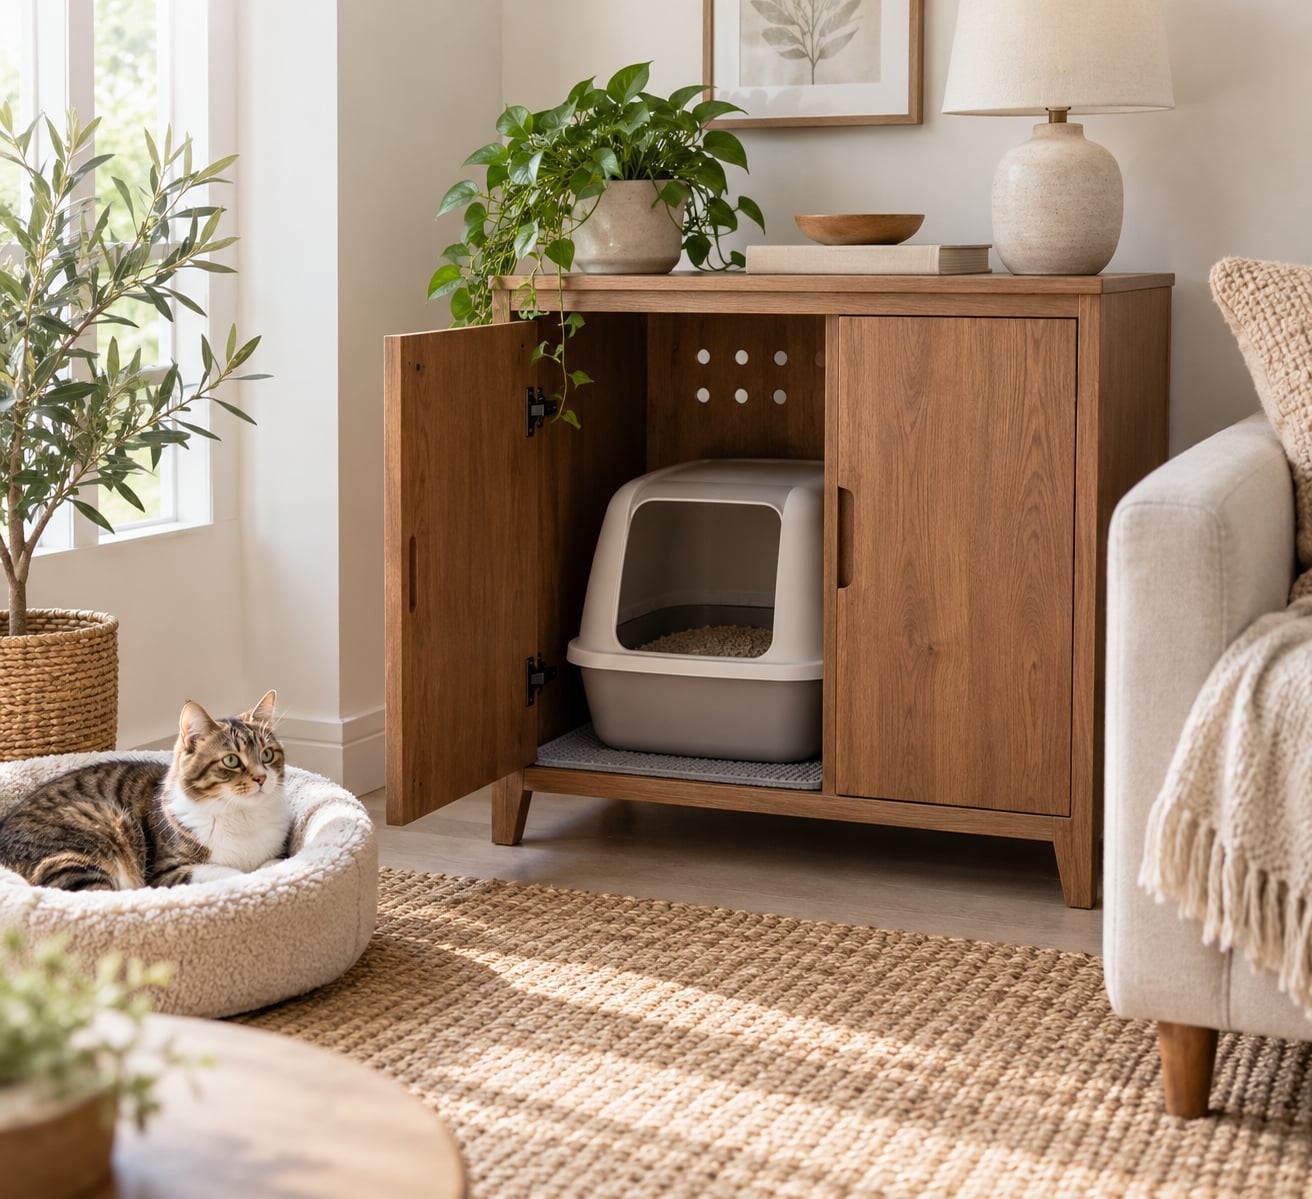
To hide a litter box in furniture, pick a cabinet, bench, dresser or side table that already has an opening, then add a cat-sized entrance, ventilation and a door wide enough to scoop from. Most conversions take an afternoon with a jigsaw, a drill and a weekend’s worth of sanding and paint.
The concealment is the easy part. What actually decides whether the setup works is what happens inside: air moving out of the box, a surface you can scrub, and an entrance your cat does not have to crouch through. Get those three right and the cabinet reads as plain storage from across the room.
Two rules come before any measuring. Cats use litter boxes in private, and hiding one is only fair to them if the box stays easy to reach, quiet and ventilated. In a multi-cat household, the usual guidance is one box per cat plus one extra, which is exactly the situation a hidden-litter-box furniture project tends to run into. A single cabinet rarely solves a three-cat apartment. It solves a one-cat apartment beautifully.
What follows is the full conversion, start to finish: what to gather, how to size the opening, where to cut, what to seal, and the mistakes that show up in almost every first attempt.
Table of Contents
- What You Need
- The furniture
- The litter box and its liner
- Hand tools
- Finishing supplies
- Ventilation and odor control
- How to Hide a Litter Box in Furniture: Step-by-Step
- Choose a Cabinet with a Fits-Anywhere Litter Box
- Prepare the Furniture and Interior
- How to Hide a Litter Box in Furniture with a Clean Access Opening
- Add Ventilation and Odor Control
- Finish, Test, and Clean the Station
- Common Mistakes
- Frequently Asked Questions
- What is the best furniture to hide a litter box in?
- How do you keep a litter box inside a cabinet from smelling?
- Do hidden litter boxes need ventilation?
- Can I make a litter-box cabinet without remodeling?
- How often should I clean litter hidden inside furniture?
- What if my cat will not use a litter box in a cabinet?
- Conclusion
What You Need
You can do this with a thrift-store find or a piece you already own. Gather everything before you start cutting, because the middle of a project is the worst time to realise the primer is in the garage.
The furniture
The piece has to open, breathe and hold weight. A solid-wood or birch-plywood cabinet, a small dresser with removable drawers, a bench with a lift top, or a side table with a cabinet section all work. Skip particle board and MDF if you can: both soak up moisture from a wet litter box, swell and take on a smell that no amount of scrubbing fully removes. That single material choice is the difference between an enclosure that lasts years and one that starts falling apart in the second winter.
The litter box and its liner
Measure the box first, then measure the furniture’s interior. An average box needs roughly 22 by 15 inches of floor space on its own, and a large or long-haired cat needs more. A removable liner or a washable rubber mat gives you something to lift out, wipe and replace rather than scrubbing the cabinet floor. If you are housing an automatic or self-cleaning box, budget for the extra width it needs and for a cord pass-through at the back.
Hand tools
- Jigsaw or coping saw for the entrance opening
- Drill with a 1-inch hole bit, or a jigsaw, for ventilation slots
- Screwdriver or drill driver, plus wood screws
- Tape measure and a straightedge or square
- Sandpaper, 120 and 220 grit
- Utility knife for trimming liner material
Finishing supplies
A moisture-resistant sealant or primer to seal any cut edge, paint or stain to match the piece, and matching hardware if you are swapping a knob or replacing a flap. Paint the interior a lighter colour than the exterior while you are at it; a pale interior makes it much easier to spot a stray stain during a weekly check.
Ventilation and odor control
You need a way to cut at least four ventilation openings, plus something to line them if you want a draft screen. A small activated carbon filter, sold for pet enclosures, sits behind a vent and does real work. Add a litter catcher mat sized slightly larger than the box opening, a box of baking soda, and an enzymatic cleaner made for pet accidents. If your cat is timid, a quiet 12-volt fan on a low setting speeds up odor escape; skip it if it rattles or hums loudly, because some cats find that off-putting and a nervous cat stops using the box.
How to Hide a Litter Box in Furniture: Step-by-Step
Read all five steps before cutting. The order matters, particularly the part about measuring the cat, because the entrance is the one cut you cannot easily redo.
Choose a Cabinet with a Fits-Anywhere Litter Box
Measure the litter box’s length, width and height, then measure the furniture’s interior in the same three directions. Leave about an inch of clearance on each side so you can lift the box out to scoop, and check the door or lid you will use for cleaning swings clear of the box once it is loaded with wet litter. The weight of a full box plus clumped litter is heavier than people expect, and a thin shelf in a flat-pack piece may sag under it. If the box has to sit on a removable shelf rather than the cabinet floor, reinforce under it with a length of plywood.
Size the entrance to the cat, not to the box. Measure from the cat’s nose to the base of the tail with the tail extended, then add two or three inches of width on either side, and make the opening at least eight inches tall so nobody has to duck or crouch. A crouch is the thing that makes a cat decide the box is a trap instead of a toilet. Kittens, senior cats and cats with stiff hips need a wide, low opening on the same floor level as the rest of the room, which rules out any design that requires a jump or a step.
Prepare the Furniture and Interior
Empty the piece completely and check the frame for wobble, loose joints and water damage. Thrifted furniture sometimes carries a musty smell of its own that gets blamed on the litter box later, so deal with that first. Tap on the panels and listen for hollow, dead spots; those are where particle board hides under a veneer or laminate skin.
Remove the drawers and their slides if you are using a dresser, and fill the leftover holes with wood filler once the removal is final. For the cabinet floor, cut a plywood or plastic liner to fit and secure it with screws or adhesive so it does not slide when you pull the box out. Anything you line the interior with has to survive a scoop and a scrub.
How to Hide a Litter Box in Furniture with a Clean Access Opening
Mark the entrance on the side or back panel, low and toward one corner, so the box inside does not block the whole opening. Draw the rectangle, drill a starter hole in the middle or at a corner, and cut out with a jigsaw using a fine-tooth blade to limit tear-out. On laminated or veneered panels, tape the cut line first and score the tape with a utility knife; the blade follows the tape instead of wandering into the soft core.
Fit a cat door flap if you want a tidy look and a door that stays shut when nobody is using it. Check the panel thickness before you buy anything. A standard flap needs a few inches of solid material to screw into, and a thin side panel will flex and rattle every time the cat pushes through. Reinforce it with a plywood backing plate cut two inches larger than the flap opening, screwed from the inside, or use a rigid plastic pass-through door that clamps on. Sand every raw edge with 120 grit until your hand moves over it without catching, then seal the cut edge with primer or edge banding so moisture has nowhere to sit.
Leave the decorative front completely alone if the piece already has doors or drawers. A cabinet with an intact face, one cat opening and a removable liner is invisible from across the room, and you have saved yourself the work of matching a new door face.
Add Ventilation and Odor Control
An enclosure without airflow becomes an ammonia trap. Urine contains ammonia compounds that off-gas as it sits, and in a sealed wooden cabinet those compounds get absorbed into the panel rather than leaving the room. That is why a fully sealed cabinet can smell worse than an open box in the same spot, and it is the reason many vets caution against fully enclosed setups.
Cut four to six ventilation openings, each roughly an inch across, high on the back panel and about four to six inches below the top edge, where warm air collects. High slots pull rising odor out instead of pushing it across the floor at cat height. On a side panel, a single two-inch slot near the top works too. Fit a fine mesh or screen over any opening that faces a room, and seal the panel from the inside with the same finish you used on the cut edge. Ventilation is not decoration; it is the difference between a hidden litter box and a wooden box that reeks.
Then give the interior an odor plan: a layer of baking soda under the liner, a carbon filter behind a vent, low-dust clumping litter so less of it ends up on your floors, and an enzymatic cleaner for the interior surfaces on cleaning day. A washable mat at the exit, sized a little larger than the entrance, catches the litter that would otherwise get tracked down the hallway.
Finish, Test, and Clean the Station
Seal cut edges, prime bare wood, then paint or stain to match the rest of the room. If you are matching an existing piece, sample the finish on the back of the piece first, where a mistake will not show. Let the finish cure fully before you put litter in there; a soft finish that has not cured will stick to the liner and come off in sheets.
Set the box inside, walk in front of it and check two things: can you see litter around the edges of the opening, and is the entrance clear of the box’s rim. Then let the cat set the pace. Do not move an old litter box out of the way on day one. Leave the familiar open box where it is for a week or two while the enclosed one sits unused next to it, then remove the old one once the cat is choosing the new spot. If accidents start, put the old box back rather than fighting the cat.
Set a cleaning routine before the first scoop. You want to be able to lift the liner out and wipe the floor with an enzymatic cleaner without moving the whole cabinet, and once a month, pull the box and scrub the interior. Check for soaked corners and softened particle board while you are in there.
Common Mistakes
Almost every abandoned hidden-litter-box project fails for one of these reasons. Each has a straightforward fix.
- An entrance that is too small. If the cat has to squeeze sideways or duck, they will use the floor beside the cabinet instead. Measure the cat nose-to-tail and add clearance on both sides.
- A near-sealed cabinet. No vents means ammonia concentrates and soaks into the wood. Four to six one-inch holes high on the back panel, or a two-inch slot near the top, fixes it.
- A box you cannot get at. If scooping means dragging the cabinet across the floor, you will stop doing it within a month. Fit a hinged front door, or a lift-top bench, that clears the loaded box.
- Furniture that wobbles under the weight. Wet clumped litter is heavy. Check the shelf, reinforce it with plywood if needed, and level the piece on a rug rather than bare floor.
- MDF or particle board in the base. These materials swell with moisture and hold odor permanently. Line the floor with plywood or a washable plastic tray, or start with a solid-wood piece.
- Sharp or raw cut edges. A cat will not push through a rough hole and neither would you want to. Sand to 120 grit and seal every exposed edge with primer or edge banding.
- A finish that is not safe for cats. Let primer and paint cure completely before the box goes in, and avoid sealers with a strong solvent smell in a small enclosed space.
- Expecting concealment to fix litter scatter. Hiding the box does nothing about litter on the floor. A catcher mat at the exit and a top-entry box do more than any enclosure.
One more failure mode worth naming: a cabinet that hides the box so well you stop looking at it. A cat that goes quiet for a few days may be urinating in the enclosure without litter, and a light-colored interior is what makes that visible. Lift the liner and check, even on weeks when nothing seems wrong.
Frequently Asked Questions
What is the best furniture to hide a litter box in?
A low cabinet, dresser with removable drawers, or lift-top bench works best. You want an opening your cat can reach at floor level, an interior at least an inch larger than the box on each side, and a door wide enough to scoop from. Solid wood or birch plywood lasts far longer than particle board, which swells and holds odor after a few wet months.
How do you keep a litter box inside a cabinet from smelling?
Keep air moving. Cut four to six one-inch ventilation holes high on the back panel, about four to six inches below the top edge, and screen them so nothing climbs in. Add an activated carbon filter behind a vent, a layer of baking soda under the liner, and use low-dust clumping litter. Seal every cut edge so moisture has nowhere to sit, and scrub the interior with an enzymatic cleaner monthly.
Do hidden litter boxes need ventilation?
Yes, and it is the requirement most often skipped. Urine off-gasses ammonia compounds that get absorbed into a sealed wooden panel instead of escaping, so a closed cabinet can smell worse than an open box in the same spot. Ventilation also matters for your cat, since stale, humid air makes the box unpleasant to sit in. High slots work better than low ones because warm air rises.
Can I make a litter-box cabinet without remodeling?
Yes, and most people never touch a wall. Convert a piece you already own, or set a ready-made cabinet in a corner. If you rent, a curtain on a tension rod under an existing console table, or a box inside a large wicker chest, takes minutes and reverses in seconds when you move. The same caution applies to any enclosure: it still needs ventilation and a low, wide entrance.
How often should I clean litter hidden inside furniture?
Scoop clumps and solids daily, the same as an open box, since leaving them is what causes odor. Once a week, lift the liner, wipe the cabinet floor and walls with an enzymatic cleaner, and check the corners for dampness or a softened edge. Monthly, pull the box out and scrub behind it. A concealed box is easier to forget, so put the deep clean on a calendar reminder.
What if my cat will not use a litter box in a cabinet?
Go back through the four usual causes: entrance too small, enclosed feeling, noise, or a location the cat does not like. Make the opening wider and lower, keep the flap loose or remove it, and place the cabinet somewhere quiet with a clear line of escape. Most importantly, leave your old open box in place for another week or two rather than forcing the change.
Conclusion
If you only remember one step from this guide, remember the first one. Measuring the litter box, then measuring the inside of the furniture you want to use, decides whether the rest is easy. Pick a piece that already has a door, a removable drawer or a lift top, and check two things before you commit: the cat can reach the opening without jumping, and you can reach the box to scoop it. Get ventilation in the back panel before you finish, because a sealed cabinet is the one mistake you cannot sand out later.