How to store toys in a living room comes down to three things: give every toy category its own container, keep the containers out of sight in something that already looks like furniture, and leave only the toys that get used this week on display. A storage ottoman for the bulky stuff, one lidded basket for soft toys, a shallow labelled bin for small parts at child height, and a five-minute reset at the end of play will carry most families. Budget a single afternoon for the reset and a weekly slot for staying on top of it.
Most of the frustration I hear about toy storage is not really about storage. It is about volume. Toys arrive as birthday presents, holidays and impulse buys, and they rarely leave. A system only works if the number of things coming out of the room roughly matches the number going back in, so this guide starts with sorting and ends with a routine, not with a shopping list.
One note before you start: you are organising a room, not childproofing it. Lidded bins for small parts and out-of-reach shelves for anything a toddler could put in their mouth are storage habits with a safety benefit, but no container replaces proper childproofing or supervision.
Table of Contents
- What You Need
- Step-by-Step: How to Store Toys in a Living Room
- Step 1: Sort the Toys and Identify What to Keep
- Step 2: Measure the Room and Map Storage Zones
- Step 3: Choose Storage That Fits the Room
- Step 4: Put Small and Loose Toys in Containers
- Step 5: Create a Quick-Cleanup Routine
- Common Mistakes
- Frequently Asked Questions
- What is the best way to hide toys in a living room?
- How can I organize toys in a small living room?
- What type of storage is best for living-room toys?
- How do I keep loose toys from spreading across the floor?
- How do I make toy storage look less cluttered?
- Conclusion
What You Need
You can do the whole job with what most homes already have, but a few things make it faster and the result tidier.
- Three sorting containers. Cardboard boxes, laundry baskets or large bags labelled keep, donate and bin. Working on the floor is fastest; sorting on the sofa just moves the mess.
- A measuring tape. You need the height under the coffee table, the depth of the console, the wall space above the sofa and the corner clearances. Most buying mistakes come from guessing.
- Painter’s tape. Tape out the zones on the floor before you move anything. It is the fastest way to test whether a storage spot blocks a walkway or crowds the sofa.
- Containers sized to the toy, not to the shelf. Shallow and wide beats deep and narrow, because a child can see and reach the contents. A 30 cm wide box gets dug through; a 60 cm wide tote gets ignored.
- Labels or label tape. A photo of the contents on the front of each bin beats a written word for most three-to-six-year-olds.
- Hooks, a tension rod or over-door organisers if you rent and cannot drill. These are the cheapest way to add storage without touching a wall.
- Optional: one dual-purpose piece. An ottoman, storage bench, coffee table with a drawer or a sideboard with doors. You only need one if the rest of your storage is containers, and it is the piece that does the most for the look of the room.
On colour, match containers to something already in the room: greys, ivory, warm oak, muted green. The eye is drawn to a saturated plastic bin the way it is drawn to a traffic cone, so a neutral bin disappears where a bright one shouts. On transparency, clear bins show a child what is inside and advertise the mess to an adult; opaque bins keep the room calm but need a picture label so nobody hunts through them.
Step-by-Step: How to Store Toys in a Living Room
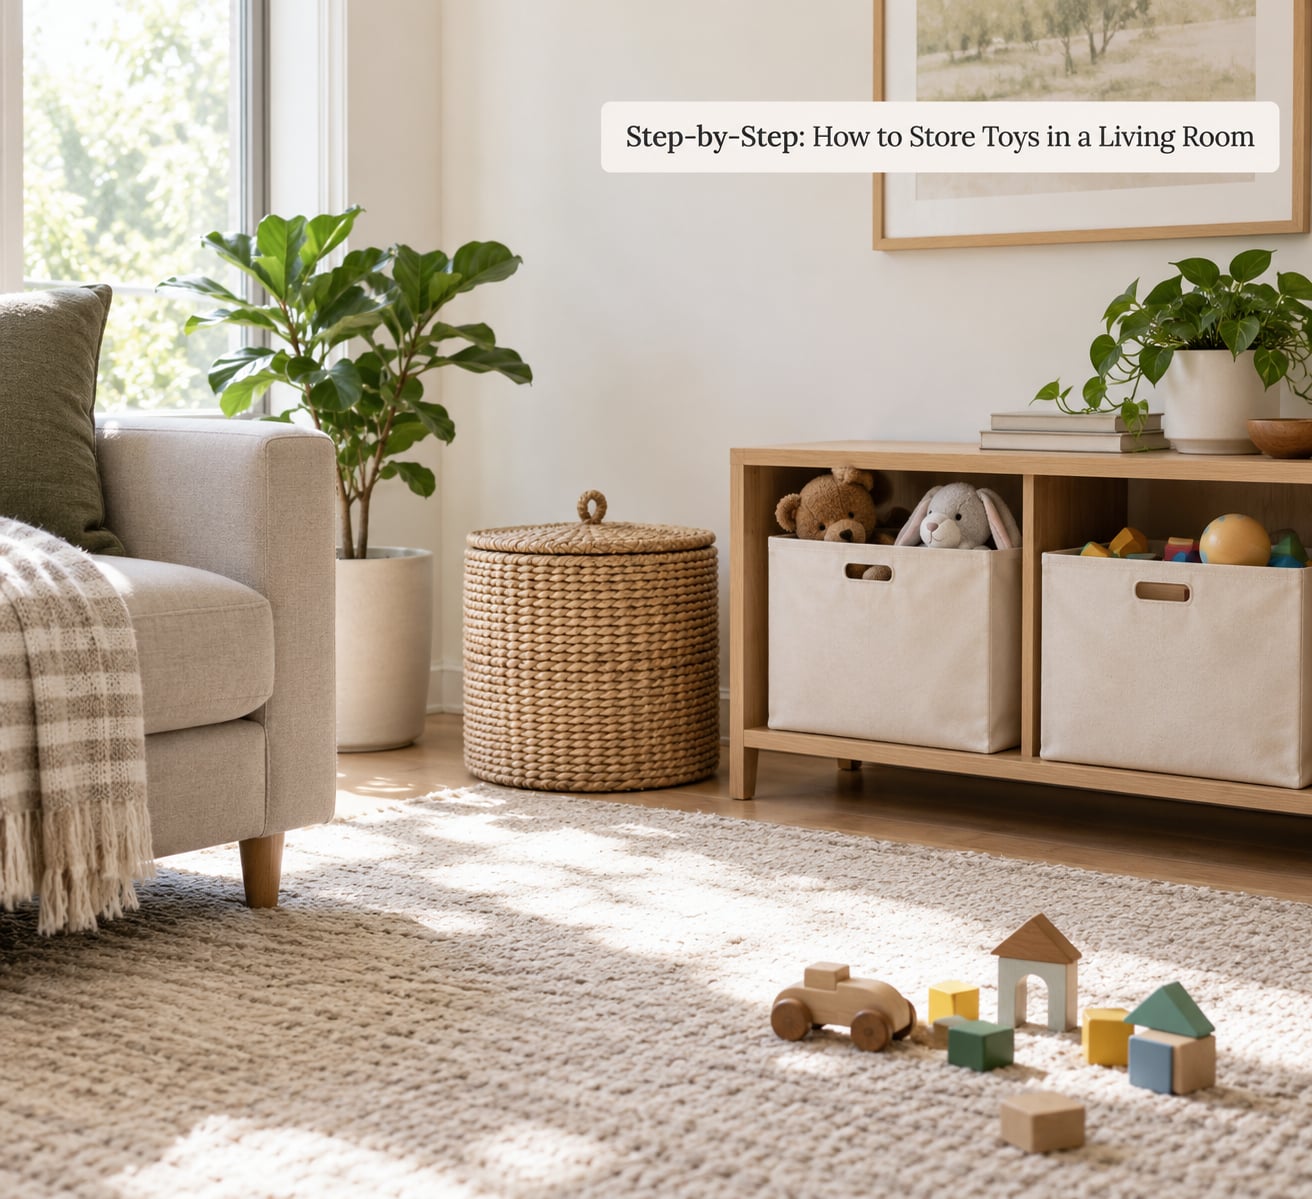
These five steps take about an afternoon the first time and about twenty minutes a month afterwards. Do them in order. Skipping the first one and jumping straight to buying containers is how families end up with beautiful boxes full of duplicates.
Step 1: Sort the Toys and Identify What to Keep
Spread every toy in the room on the floor and sort it into three piles: keep, donate, bin. Sorting by how a toy is used beats sorting by where it came from, so group building sets, vehicles, pretend play, soft toys, puzzles and games, art supplies, and large ride-on or outdoor items.
For each keep pile, ask when your child last played with it. If it has not been touched in three months, it belongs in the donate pile even if it was a gift and even if it was expensive. Parents describe this as the hardest part of the whole job, and they are right. Nobody wants to take away the chance their child might enjoy that toy one more day, and that hesitation is exactly what fills the room.
A useful ceiling is the twenty-toy rule: roughly twenty toys per child per category, kept out at a time, with the rest stored elsewhere and swapped in monthly. It sounds rigid and works better than any bin arrangement, because it puts a limit on what the room has to hold.
You will know step one worked when the keep pile fits into the containers you already own plus one more, and the donate pile is big enough to leave the house this week. Book the donation drop before you start, not after.
Step 2: Measure the Room and Map Storage Zones
Measure the space you actually have, not the space in the listing photo. Note the clearance under the sofa, the inside height of the coffee table, the length of the console top, the wall above the sofa, and the tightest corner in the room. Ten of those pull-out bins under a sofa work beautifully until one of them is a centimetre too deep.
Then tape three zones on the floor:
- Daily-access zone. Open floor or a low basket where the toys used today stay. This is the only zone that should be visible on a normal day.
- Hidden zone. Under the sofa, inside a sideboard, on a high shelf, or in a lidded bin. This is where the rest of the keep pile lives.
- Rotation zone. A tote, a high closet shelf or a garage shelf outside the living room, where the swap-out toys wait for their turn.
Map the zones against the furniture you have rather than the furniture you wish you had. A zone that blocks the walkway between the sofa and the kitchen will annoy you every single day, however good the container looks. You will know step two worked when you can walk a full lap of the room carrying a full laundry basket without moving anything.
Step 3: Choose Storage That Fits the Room
Match the container to the zone, and match its visibility to how often the toy comes out. What follows is the short version of the options, and where each one earns its place.
Storage ottoman or bench. The single best thing you can buy for a living room that doubles as a playroom, because it does two jobs: seating and storage, with a lid that hides the contents completely. Buy one with a lift-top or a hinged lid, not a removable cushion tray, since a tray slides off when a child pulls it.
Coffee table with a drawer or a lift top. Works well if the room is already styled around a low table, and it disappears entirely. Deep drawers are better than trays; a shallow tray ends up with everything shoved to one side.
Sideboard or console table with doors. The answer to art supplies, board games and craft clutter in a room you want to keep looking adult. Doors are the whole point: an open shelf of 40 toy boxes is a toy store, not a living room.
Lidded baskets. Cheap, movable and good for soft toys, blankets and seasonal toys. Buy a lidded wicker or canvas one for the living room and skip the open decorative weave, which gets crushed and frays under daily use. Line the inside with a washable bag if you have a dog or a sticky-fingered three-year-old.
Shallow bins with lids for small parts. Building bricks, magnetic tiles and craft beads need a tight-fitting lid, and they need to be out of reach of a toddler. Label the lid with a photo of the contents.
Open shelving and cube units. Fine for books, board games with the art on the spine facing out, and display baskets that hold a category neatly. Open shelving only works once children are tall enough to use it, so keep the everyday bins lower down and the display items higher up.
Hooks, over-door organisers and a rolling cart. A cart on casters is the most underrated item in a small living room: it holds a season of craft supplies and rolls out of the way when guests arrive. Hang soft toys, dressing-up clothes or headphones on wall hooks so the floor and the arms of the sofa stay free.
Renters can get most of this without drilling: a tension rod fitted under a window gives a hanging rail for canvas totes, over-door hooks add a row of small baskets, and a freestanding shelf leaning against a wall needs no fixings at all. You will know step three worked when the room looks calm when you walk in the door and the daily toys are still within a child’s reach.
Step 4: Put Small and Loose Toys in Containers
Loose toys are what makes a living room unusable, and they need their own rules because they travel. Nothing smaller than a fist should live loose in the room.
Use one shallow container per category, with the daily category at child height and the rest stacked above it. Building bricks and magnetic tiles go in a lidded bin; puzzles and board games go in slim stackable cases stored on their sides so nothing gets sat on; dress-up clothes hang on hooks; soft toys go in one large lidded basket that closes with a drawstring. Art supplies live best on a cart or in a caddy with divided pockets, so a five-year-old can find the scissors without an adult sorting the box.
Two habits keep containers working. Do not overfill them: once a bin needs leaning on, kids stop putting things back, and a third-full bin puts itself away in seconds. And label the front and the lid, so the container is identifiable from any angle.
You will know step four worked when you can pick up a handful of floor toys and know exactly which bin each one goes in.
Step 5: Create a Quick-Cleanup Routine
Storage does not maintain itself, and the reason toy piles look impossible is usually that cleanup takes too long to start. Make it small and make it the same every day.
Keep one catchall basket in the play area, the basket that catches everything mid-play so the floor is clear in thirty seconds. At the end of play, set a five-minute timer: everything goes into the catchall first, with no sorting required, then the basket gets emptied into the labelled bins. Ten minutes at most. Do it before dinner rather than at bedtime, when everyone is tired.
Children do more of the tidying themselves when the container matches the category, sits within reach and shows a picture of what belongs in it. That is the whole argument for labelled bins at child height, and it is worth more than any storage gadget.
On top of the daily reset, add a monthly swap: pull the rotation tote from the hidden zone, move a small selection into the daily-access zone and take the tired pieces out of the room. The same five minutes on the first Monday of the month keeps the volume honest, which is the part most toy storage advice skips.
If toys still overwhelm you, treat it as an inflow problem rather than a storage problem. New toys stay in a designated spot until something goes to donate. This one rule does more than any bin you can buy, and it is the habit that stops the pile from rebuilding itself every few weeks.
Common Mistakes
Most toy storage systems fail in predictable ways, and each failure has a straightforward fix.
- Buying containers before sorting. You end up with five attractive boxes and nowhere to put the train set. Fix: finish the sort, then count what you own, then buy only the gap.
- Putting everything in open bins. The room looks like a toy shop and the floor is unusable. Fix: keep open storage for one displayed category and move the rest behind a lid or a door.
- Storing heavy items high. Lifting a brick box onto a top shelf is how things fall. Fix: heaviest and bulkiest items at the bottom, inside something that takes the weight, with the daily-access shelf between knee and shoulder height.
- Labelling with words a child cannot read. Bins labelled in adult handwriting become a guessing game. Fix: a photo of the contents, or a picture drawn by your child, on the front of each bin.
- Blocking a walkway. Storage that sits in the path between the sofa and the kitchen gets shoved aside and never reset. Fix: tape your zones on the floor first and walk the route with a full basket before you commit.
- Letting unused toys hold valuable floor space. A ride-on truck nobody rides is still furniture-sized clutter. Fix: rotate it out of the room for a season before you decide it has no home at all.
- Using decorative baskets for daily use. Pretty open-weave baskets look good empty and collapse under a load of soft toys. Fix: lidded or canvas baskets for daily toys, decorative ones for display and blankets.
- Storing small parts within toddler reach. Building bricks, beads and magnetic tiles are a containment and safety problem, not a tidiness one. Fix: tight lids, and the bin goes on a high shelf or inside a closed cabinet until your child is old enough to use it safely.
- Building the system in a weekend and expecting it to last. A tidy room that nobody resets comes apart in about ten days. Fix: the five-minute timer. If the reset is longer than that, your zones are wrong, not your children.
One last tip for keeping the whole thing working: review the zones twice a year, in spring and before the holidays. Toys get bigger, children get taller, and shelves that worked for a three-year-old stop working for a seven-year-old. Five minutes of adjustment now beats rebuilding the whole system later.
Frequently Asked Questions
What is the best way to hide toys in a living room?
Store toys in containers that close and in furniture that hides them: a lidded storage ottoman or bench for bulky toys, a sideboard or console table with doors for board games and craft supplies, and lidded baskets for soft toys. Keep only the toys used that week in one open basket at child height, and rotate the rest out of the room entirely.
How can I organize toys in a small living room?
Use vertical and concealed space rather than floor space: under-sofa pull-out bins, a slim shelf above the sofa, a rolling cart that can be pushed into a corner, and one dual-purpose ottoman or bench. Choose a single daily-access basket for current toys, keep every other category behind a lid or a door, and follow the twenty-toy rule to keep the visible count low.
What type of storage is best for living-room toys?
It depends on the toy. Lidded bins with tight lids suit building pieces and anything small enough to be a choking hazard. Lidded fabric or wicker baskets suit soft toys and blankets. A sideboard with doors keeps board games and art supplies out of sight, and a storage ottoman or bench is the best single purchase because it doubles as seating.
How do I keep loose toys from spreading across the floor?
Give everything a named home and make putting it away one move. Use a catchall basket in the play area so mid-play tidying takes thirty seconds, then a five-minute timer at the end of play to empty it into labelled bins. Photo labels and child-height storage let children do the sorting themselves, which is what keeps the floor clear between sessions.
How do I make toy storage look less cluttered?
Most of the clutter is visual, so reduce what is on show. Close lids and doors, keep only one open basket of daily toys in the room, and store the rest behind a door or off-site in a rotation tote. Match container colours to your decor in greys, ivory, oak or muted green so storage blends in rather than standing out, and buy one good piece instead of several cheap ones.
Conclusion
Learning how to store toys in a living room is mostly about sequence. Sort before you buy, measure before you place, put small loose toys in shallow labelled containers at child height, hide everything else behind a lid or a door, and keep the daily reset to five minutes with a monthly swap so the volume stays honest. The styling follows from that: neutral containers, one visible basket, one dual-purpose piece of furniture doing real work.
Start with one job this week. Pull out every toy in the room, make the keep and donate piles, then measure a single storage zone and place the most-used toys in one easy-to-reach container. Once that works for a fortnight, add the second zone.