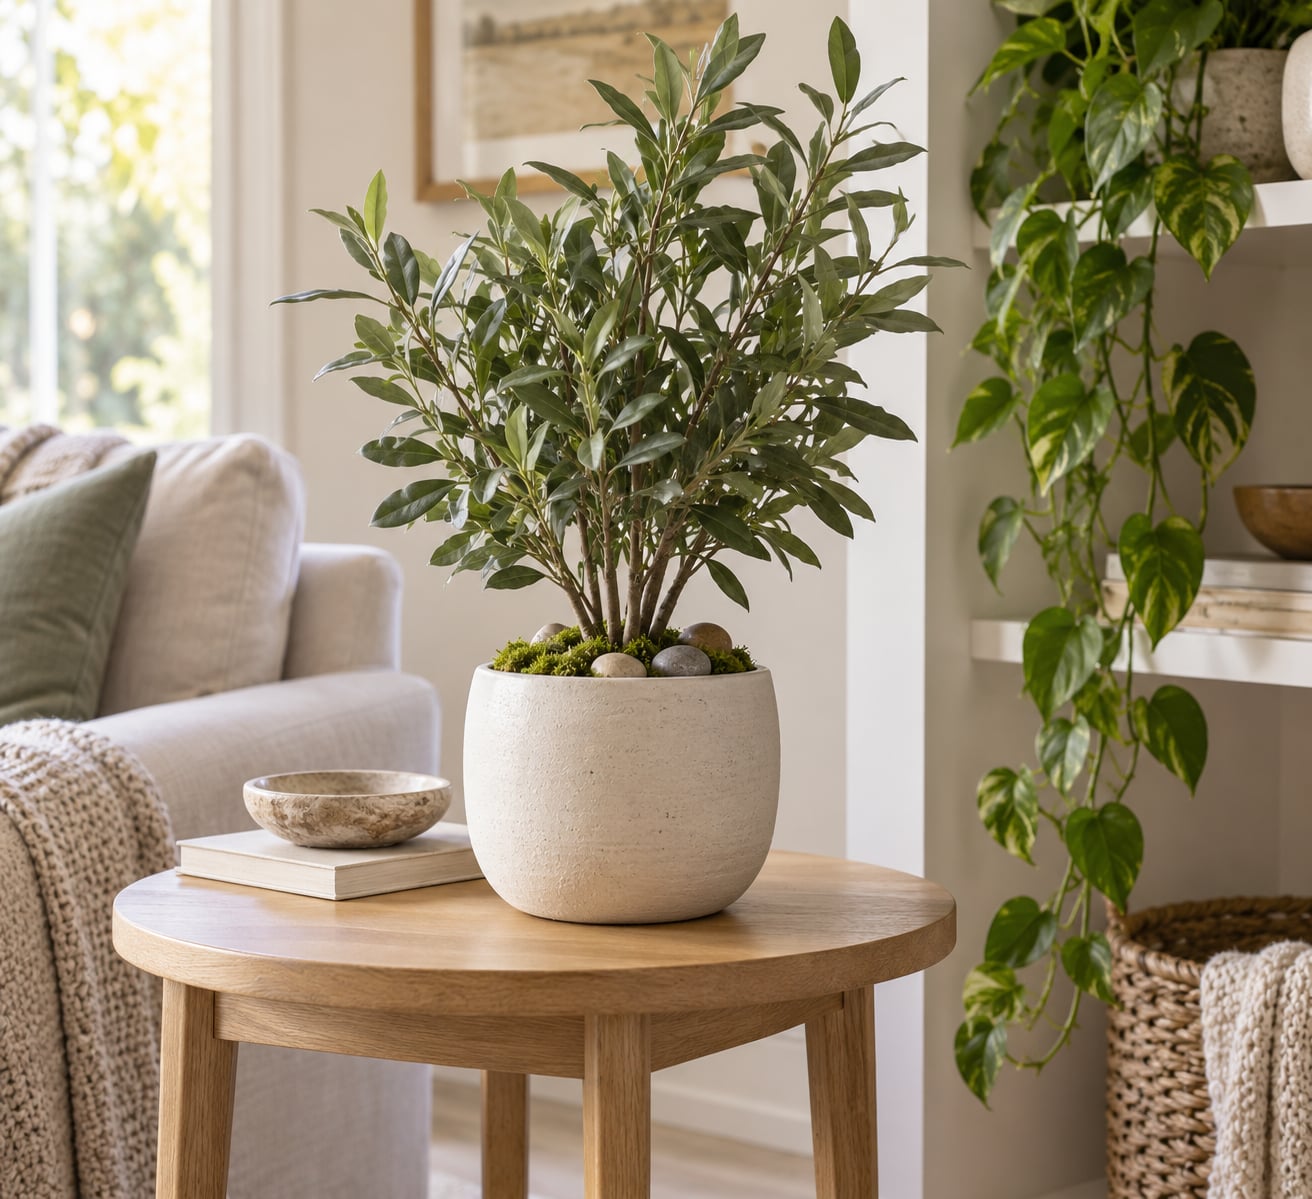
The fastest way to make artificial greenery believable is to stop treating it as a decoration and start treating it like a plant you own: bend the stems so nothing grows perfectly straight, thin the leaves so they face different directions, hide the foam and wire in the pot, then group the result in odd numbers at mixed heights. Real foliage is never symmetrical and never one single green, so variation is the whole trick.
Most fake plants give themselves away within about three seconds of entering a room. Four things are responsible, and once you know them you can fix the plant you already own instead of buying a new one.
- One flat green. Every leaf the same colour, which no living plant has.
- Stems that stand straight up. Factory stems are rigid and symmetrical because they have to fit in a box.
- Visible base. Floral foam, plastic cross-strips and bare wire show the whole thing is manufactured.
- Shiny or stiff leaves. A plastic sheen or leaves that never droop under their own weight.
On the question people actually ask out loud, whether faux plants are tacky: a bad display is, and a good one is not. Nobody objects to greenery that suits the room. They object to a shiny plastic fern in a chrome pot, crammed with three identical plants, on a mantelpiece nobody sits near. Every trick below is aimed at that specific failure.
Table of Contents
- What You Need
- Step-by-Step: How to Style Faux Plants So They Look Real
- Choose a Plant with Believable Shape and Scale
- Clean, Fluff, and Reshape the Foliage
- Add Natural-Looking Texture and Color Variation
- Build a Concealed, Supportive Base
- Style the Stems in Groups, Not Straight Upright
- Place the Plant Where a Living Version Would Grow
- Finish with Small Details That Sell the Illusion
- Common Mistakes
- Tips for Making Faux Plants Look More Real
- How to Style Faux Plants So They Look Real in Groups of Three
- Match Faux Green to Your Paint and Lighting
- Keep Faux Greenery Realistic Between Deep Cleanings
- Frequently Asked Questions
- How do you make fake plants look less shiny?
- What can I use to cover the stems or foam in a faux plant?
- How do you reshape artificial stems without breaking them?
- Should faux plants be placed in a sunny window?
- How do you choose the right pot for a fake plant?
- Can artificial plants be mixed with real plants without looking different?
What You Need
None of this is required. But a styling job takes twenty minutes with the right kit and an hour of hunting for scissors otherwise.
- Fresh-looking stems — loose botanical wire, floral wire, or extra faux stems to add length and movement.
- Floral foam — for anchoring when the original base has gone flat or the stems have been cut back.
- Wire cutters or needle-nose pliers — for trimming wire stems. Cover the cut end with floral tape afterwards so nobody finds a sharp edge.
- Pruning shears and small scissors — for thinning foliage and trimming stray leaves.
- Matte floral spray paint or glaze — to tint uniform leaves in two or three green shades and to kill shine.
- Soil, moss, pebbles or mulch — for top-dressing the pot and hiding what is underneath.
- A plain craft mat and a damp microfiber cloth — the mat catches clippings, the cloth lifts dust and grease.
- Decorative pot or cachepot — usually the single fastest way to upgrade a cheap arrangement.
A garment steamer is useful too. Hold it a few inches from a stiff leaf and you get a natural curl in about ten seconds, which no amount of finger-bending will give you on polyester foliage.
Step-by-Step: How to Style Faux Plants So They Look Real
Choose a Plant with Believable Shape and Scale
Start by matching the plant to the spot, not to the shelf gap. A small pot crammed on a wide console looks borrowed; a slightly wider plant with room to spread looks placed on purpose.
Check three things in the store or before you unbox it. Does the foliage grow asymmetrically, with one side fuller than the other? Do the leaves vary in size, or are they stamped from one mould? Is there visible vein detail, or is the surface a flat printed green?
Height matters as much as width. A floor plant under a low coffee table is a mistake every time, because a living plant of that species would have grown outward to reach light. Check that the pot is narrower than the canopy and that nothing about the plant is too shiny to be believable.
Clean, Fluff, and Reshape the Foliage
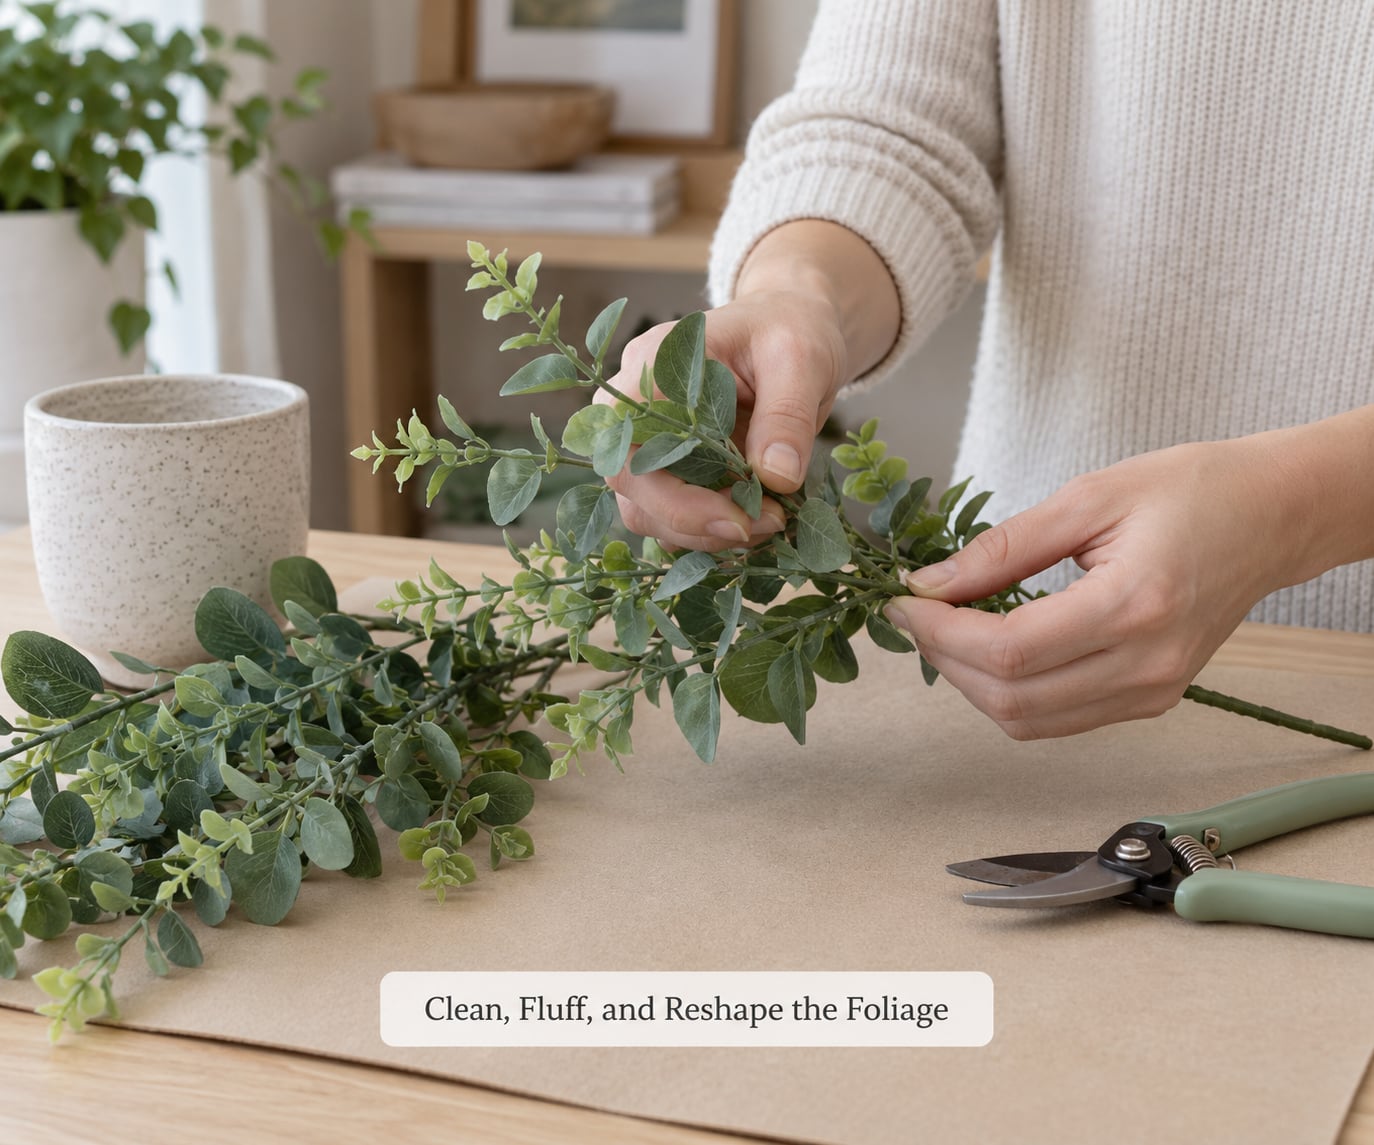
Every faux plant spends most of its life compressed in packaging. Layers of leaves are pressed flat against each other, so the first job is separation, not styling.
Work from the bottom up. Take each stem in one hand and comb the foliage through with the other, starting at the base and pulling outward toward the tips. Bend every stem a few degrees off vertical. Real branches lean, droop under their own weight, and reach toward whatever light the room has, so a stem that is straight is a stem that reads as fake.
Know your success check: step back two full arm-lengths and look at the silhouette. You should see gaps, uneven edges and at least one stem that arcs outward or hangs down. If the outline is a clean oval, keep bending.
Add Natural-Looking Texture and Color Variation
This is the step that does the most work. A plant with three shades of green on it looks like a plant; a plant with one shade looks printed.
You can vary the colour by tinting. Test a matte floral spray on an underside leaf first, then mist the outer leaves in two related greens so the interior stays darker and the tips read lighter. Work in daylight, in thin passes, and let each coat dry before the next or the colour goes muddy.
Vary the texture by mixing. Combine broad leaves with fine ones, matte with a slight sheen, and full stems with sparse ones. A trailing stem set next to an upright stem of the same species immediately reads as a real arrangement, because no one plants five identical cuttings in one pot.
For stiff fabric or plastic leaves, steam them rather than forcing them. Ten seconds of steam adds curl and droop that finger-bending cannot, and it does not crease the leaf the way a hard bend does.
Build a Concealed, Supportive Base
The base is the number one giveaway and the easiest thing to hide. Push your cut stems down into fresh floral foam, or tie them to a ball of tightly packed moss if you want something heavier. Then fill around them.
Top-dress with three-quarters of an inch of real soil, then scatter moss, small pebbles or mulch over the top so the surface looks planted rather than filled. Weight also matters for stability, so a layer of pebbles at the bottom of the pot stops a tall plant tipping when someone brushes past it.
Check the work by tilting the pot toward you. You should not see foam, wire ends, plastic cross-strips or bare plastic showing at the soil line. If you do, add more moss and pat it down until the surface reads as continuous ground cover.
Style the Stems in Groups, Not Straight Upright
Group in odd numbers. Three or five plants of mixed height, at least two species and two textures, is the rule most decorators arrive at independently because it works.
Within each plant, fan the stems out, arc a few over the pot rim, and let one or two trail. Vary the lengths: cut one stem back so a shorter branch sits in front of a taller one, which creates depth. Cross the stems slightly as you seat them so you do not end up with a flat fan facing one direction.
Your check here is the three-angle test. Walk around the arrangement and view it from the front, both sides, and slightly above. If it only works from one spot, the stems need crossing over. Real plants do not have a good side.
Place the Plant Where a Living Version Would Grow
Position is where styling turns into decorating. A living version of the plant would put itself where the light is, near a window or beneath a tree canopy, and it would not be placed where people walk through it.
Match the plant to the light it claims to like. Low-light species such as snake plant, pothos and ZZ plant belong in hallways, basements and north-facing offices, not pressed against a bright south window. A fiddle leaf fig wants a bright corner with indirect light and enough floor space that its trunk is visible, which is the opposite of a plant crammed between a sofa arm and a curtain.
Balance the room too. A tall plant on a low surface beside heavy furniture fixes an awkward gap, and a trailing stem over the edge of a shelf softens a hard corner. Keep the display off the walking path and off the seat someone actually uses.
Finish with Small Details That Sell the Illusion
The last pass is small and it matters. Wipe every leaf with a damp microfiber cloth, working top to bottom, because dust dulls colour and makes a good plant look tired. Trim or tuck any leaf that points straight at the viewer.
Then vary the stems one more time: snip a couple of tips so the heights are not all the same, and check for stray wire poking through the soil. Step back once more. If the pot looks slightly too empty on one side, add a pebble there rather than rotating the plant until the gap faces a wall.
Your final check is honest: squint at it from across the room. What fails under a squint is usually shine, so a light mist of matte sealant on the shiniest leaves finishes the job.
Common Mistakes
These are the fixes that rescue a bad display fastest. Most of them take under five minutes.
- Every leaf the same green. Break the colour with matte spray in two or three shades, darker inside and lighter at the tips.
- Leaves that catch the light like plastic. Dust, then knock the shine back with a matte sealant or a light coat of paint.
- Visible wires, foam and plastic ribs. Bury them under moss, pebbles or mulch, and tape over any cut wire end.
- Stems that stand bolt upright. Bend each one, and let two or three arc outward or trail over the pot rim.
- A pot that swallows the plant. Move up a size or drop a size until the pot is narrower than the canopy.
- One lonely plant on a wide surface. Group three at mixed heights, or pair it with a stack of books and a small bowl so the surface reads as a vignette.
- Everything crammed at eye level. Spread the display: one tall, one low, one trailing, so the eye travels instead of landing on a wall of green.
One more that gets overlooked: placing the plant where a real one would not survive. Faux greenery in a dark hallway is fine. Faux greenery crowded into a bright south-facing window all summer will fade to a yellow-green in a year or two.
Tips for Making Faux Plants Look More Real
How to Style Faux Plants So They Look Real in Groups of Three
Three is the number to start with because it lets you build height, mass and movement without clutter. Put the tallest at the back, a mid-height plant off to one side rather than centred, and something low or trailing at the front.
Keep two of the three visibly different, whether that is a broad-leaf and a narrow-leaf, or matte foliage beside glossy. Then step back. If the tallest sits dead centre it looks staged; nudge it a few inches and the grouping starts to look grown.
Match Faux Green to Your Paint and Lighting
Artificial greens carry a colour temperature of their own, and a cool bluish fake plant against a warm beige wall looks pasted on. Check the plant under your room’s own light at the time of day you use the space most, because warm bulbs in the evening shift everything warmer.
Greens with a yellow cast sit comfortably with warm whites, creams and wood tones. Cooler blue-greens look better against grey, navy and stark white. If a plant fights the room, a thin coat of floral spray in the room’s temperature fixes it faster than returning anything.
Light matters as much as colour. In a dim room, a very dark green plant disappears, so choose something with visible mid-tone variation. Direct sun through glass is what causes the fade people complain about in year two.
Keep Faux Greenery Realistic Between Deep Cleanings
Wipe foliage with a damp microfiber cloth every week or two. Fabric leaves collect dust and pet hair noticeably faster than living plants, and pet hair is the giveaway most often missed.
Give each plant a quarter turn every month or two so the same side does not sit in the same light, and re-bend any stems that have crept back toward their factory shape. Push faux away from windows with strong direct sun, and keep pets and small children in mind by choosing foliage without loose small parts or shedding.
Frequently Asked Questions
How do you make fake plants look less shiny?
Dust the leaves with a damp microfiber cloth first, because dust is what makes foliage look plastic. If the leaves are still glossy, apply a light mist of matte floral spray sealant, working from the stem outward. For fabric leaves you can also mix a little acrylic paint into water and sponge it on for a flatter finish. Test on an underside leaf and let it dry before touching the whole plant.
What can I use to cover the stems or foam in a faux plant?
Peat moss or preserved moss is the most convincing cover, pressed down over the base so it looks like ground cover. Small aquarium pebbles, decorative gravel, mulch or bark chips also work well and add weight so a tall plant stays upright. Real potting soil on its own looks sparse, so use a thin soil layer topped with moss or pebbles. Any cut wire ends should be wrapped in floral tape.
How do you reshape artificial stems without breaking them?
Work slowly and always grip the stem below the point you are bending, not at the leaf. Wire-cored stems can be bent a few degrees at a time, repeating until you reach the shape you want. For stiff polyester or plastic foliage, a garment steamer held a few inches away softens the material so it curls naturally without creasing. If you must cut a wire stem, use pliers and cover the cut end with floral tape.
Should faux plants be placed in a sunny window?
Not for long. Direct sunlight through glass is the main cause of fading, and most artificial foliage shifts to a dull yellow-green within a year or two of repeated exposure. Faux plants placed in bright rooms look better a few feet back from the window, where the light is indirect. If the spot only gets gentle morning light, that is fine, and you should rotate the pot occasionally so all sides get even colour.
How do you choose the right pot for a fake plant?
The pot should be narrower than the plant’s widest point so the foliage spills over the rim rather than sitting inside it. Match the pot to the room, not the plant, and choose something with weight such as ceramic, stoneware or a resin planter so a tall stem will not tip. A plain cachepot in a neutral finish hides cheap plastic pots and mismatched colours, and it is the fastest single upgrade to an arrangement.
Can artificial plants be mixed with real plants without looking different?
Yes, and it is the most reliable trick available. Put the real plants closest to where people sit or walk, so the eye verifies them first, and place the faux greenery behind or above eye level where nobody examines the stems. Match the green tones as closely as you can, and keep pots in a shared material so the grouping reads as one planting. One or two real plants in a cluster make the whole arrangement believable.
If you do one thing this weekend, bend the stems. A plant you already own, with every branch angled a few degrees off vertical and the base buried under moss, will read differently the moment you step back, and it costs nothing.