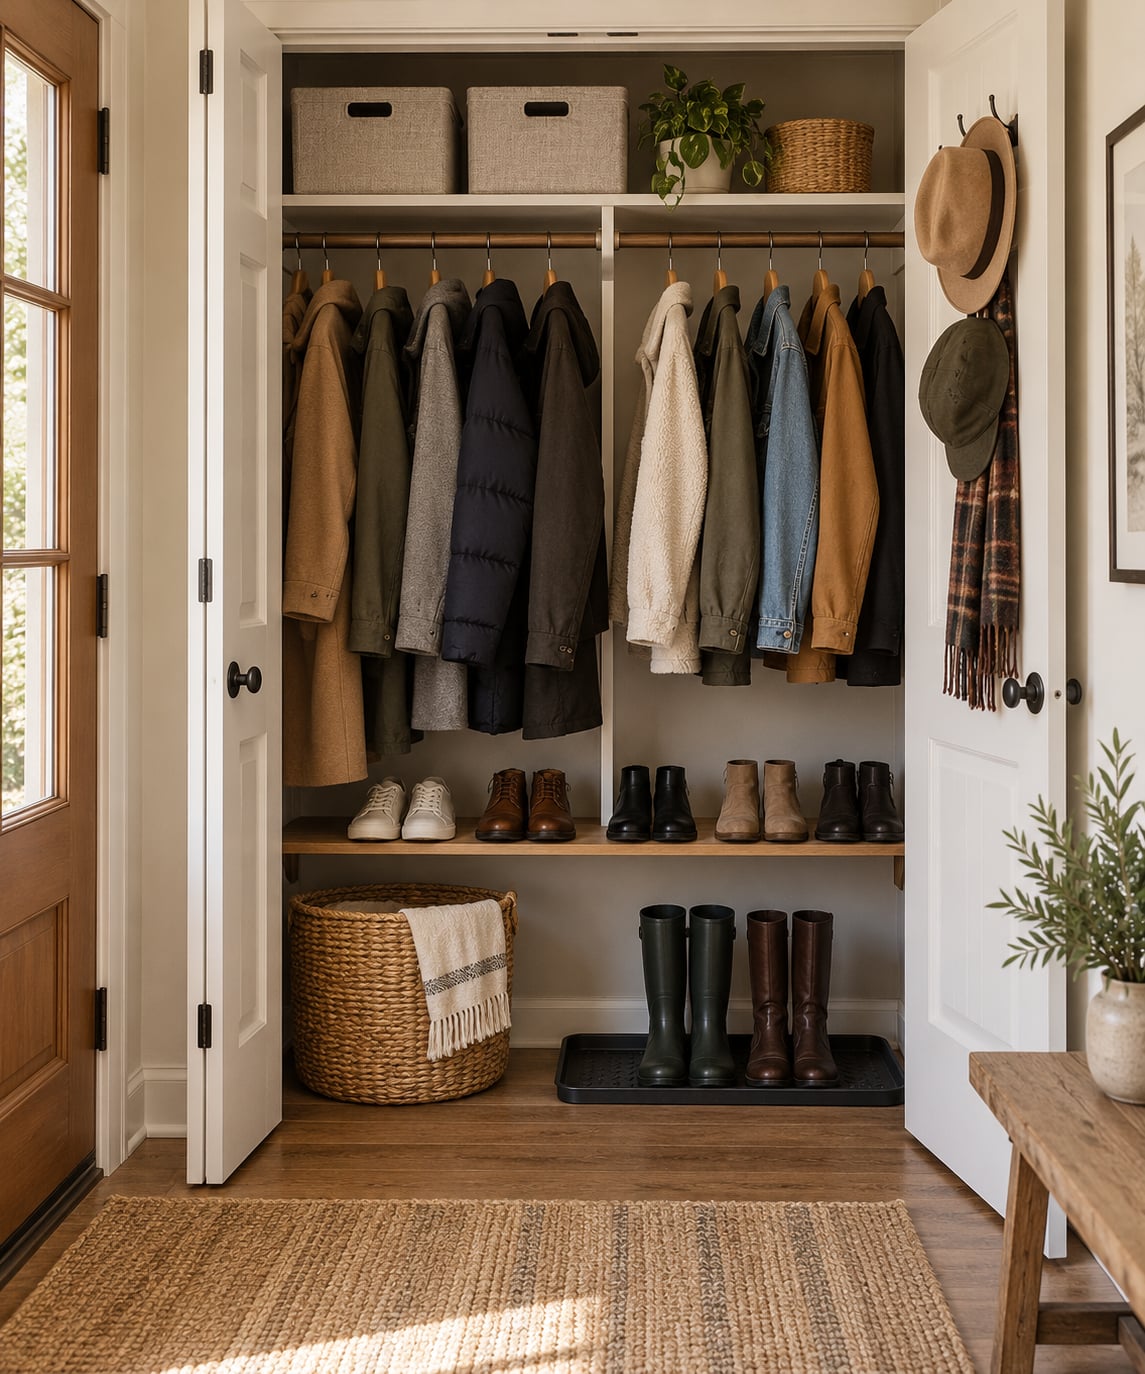
If you want to know how to organize a coat closet without buying a fitted system, divide it into four zones and give every zone one job: upper shelf for bulky seasonal gear, hanging space for the coats people actually wear, floor level for shoes and a drop zone, and the back of the door for the small stuff. Most closets fall apart because everything shares one zone, so the daily coat ends up buried behind a vacuum and a donation bag.
The whole job takes an afternoon. Clear it out, measure it, decide what belongs, then add one or two storage pieces. If you do nothing else, get shoes off the floor and give the coats a dedicated rod at a height everyone can reach.
Builders love these projects because the payoff is visible every single morning. It is the rare cabinet that every guest sees and every family member uses.
Table of Contents
- What You Need
- Measuring and marking tools
- Installation tools
- The hardware and storage pieces
- The low-cost and no-construction alternatives
- Step-by-Step: How to Organize a Coat Closet
- Clear and Measure the Closet
- Choose a Layout for the Space You Have
- How to Organize a Coat Closet Zone by Zone
- Install or Add Simple Storage
- Group, Label, and Style the Contents
- Maintain the Organized Coat Closet
- Common Coat Closet Mistakes
- Frequently Asked Questions
- What is the best way to organize a small coat closet?
- How can I organize a coat closet without drilling holes?
- Where should I put shoes in a coat closet?
- How do I store seasonal coats in a small closet?
- What can I use instead of a coat closet organizer?
- How do I keep a coat closet from becoming cluttered again?
- Conclusion
What You Need

You need far less than a hardware store aisle suggests. The tools are basic, and the storage pieces can be as simple as a second rod and a stack of baskets.
Measuring and marking tools
A 25-foot tape measure covers a standard coat closet and any awkward reach past a door. A phone takes the “before” photos, and painter’s tape marks problem spots on the wall so you can see them without committing to a fix.
Installation tools
A drill with a driver bit, a stud finder, a level, and a tape measure cover most installs. If you rent, you can skip all of it: tension rods, over-the-door racks, and adhesive hooks hold weight without touching a wall.
The hardware and storage pieces
- A closet rod and two pole or flange sockets for the primary hanging run
- A second rod or a wooden dowel for a double-hang section
- Wall hooks or a rail for hats, umbrellas, and dog leashes
- Shelf risers, if the existing shelf sits too high to use
- An over-the-door organizer for the back of the door
- Two or three bins or baskets with labels or tag tape
- A shoe shelf, a boot tray, or a stack of two-in-one hangers
- Matching hangers: wooden for structured coats, slim padded for everything else
The low-cost and no-construction alternatives
Most of the list above is optional. Repurpose what you already own: a shoe rack from the bedroom, a freestanding rack for overflow, a tension rod in a doorway, and baskets that already hold mismatched laundry. Buying containers before purging is the single most common money mistake in this project, and it is the one to skip.
Step-by-Step: How to Organize a Coat Closet

Clear and Measure the Closet
Take everything out and put it in one pile on the floor, then sort into four groups: staying, going elsewhere, going to be donated, and going to be dealt with. Sorting on the closet floor is faster than sorting in a bag, and you can still see what you have.
With the shell empty, photograph the space from the doorway. You will want that photo later, and it makes the awkward geometry obvious in a way that measuring alone does not.
Measure four numbers: the width across the opening, the depth from the door to the back wall, the full interior height, and the height of the existing rod and shelf. Typical builder-grade coat closets run about 36 to 48 inches wide, roughly 24 inches deep, and about 84 inches of interior height, but many apartments are smaller and older closets are oddly narrow. A closet only 24 inches deep can hold a row of shoes on a shelf before the coats need clearance, so depth is the number that decides whether shoes go on the floor or on a riser.
While the closet is empty, wipe the shell down, check the rod for sag, and look for wall blemishes, nail holes, or scuffs. Put a small piece of painter’s tape on each one so you are not rediscovering them after the clothes go back in.
Choose a Layout for the Space You Have
Your layout depends on the closet’s shape and who uses it. Most people need one of four.
Single tall rod. Best for long coats, parkas, and dressing gowns, and the easiest plan. It works best in a closet deeper than about 24 inches, because the coats need room to hang straight without touching the back wall.
Double-hang layout. A second rod below the first, or a rod set at about half height, roughly doubles your hanging capacity. This is the answer for a family sharing one closet, and it is the reason many built-in closets feel larger than they are. Keep the lower run for shorter jackets and kids, and the upper run for adult coats.
Vertical layout. Builder-grade closets have a wide band of dead space above the top shelf. A second shelf, a set of cubbies, or a rod mounted high in that gap turns wasted volume into usable storage for off-season coats and bedding.
No-drill layout. For rentals, an over-the-door organizer, a tension rod, adhesive hooks on the trim, and a freestanding shoe rack give most of the same benefit with nothing permanently attached to the wall.
If the closet is shallow, skip the floor-level shoes entirely and let the coats own the floor. A hanging organizer with drop-front boxes on the rod stores accessories without taking floor width.
How to Organize a Coat Closet Zone by Zone
The fastest way to organize a coat closet is to give each of its four physical areas a single job. The rule underneath all four zones is frequency: what leaves the house daily goes at hand and eye level, and what leaves twice a year goes high or goes away.
The four zones and what belongs in each:
| Zone | What Goes There | Container | Why It Works |
|---|---|---|---|
| Upper shelf | Off-season coats, sleeping bags, guest linens, rarely used bags | Lidded bins or drop-front boxes | Out of sight, and heavy items are already at the top where they belong structurally |
| Hanging space | Everyday coats, jackets, umbrellas, child coats on the lower run | Uniform hangers, grouped by person | A coat you can see is a coat someone will hang back up |
| Floor and lower level | Boots in a tray, the daily two pairs of shoes, the drop zone for keys and leashes | Boot tray, shallow shelf, or a mat | Lifting shoes off the floor frees the space the coats need to hang |
| Back of the door | Hats, gloves, scarves, sunglasses, dog leashes, spare tote bags | Over-the-door hooks or shallow pockets | Uses surface area that is otherwise blank |
A few rules make the difference between a closet that stays usable and one that reverts to chaos:
- Limit the daily shoes. Four pairs per person, one pair in season, is the number most organizers land on. More than that and the floor disappears again.
- Keep the drop zone small and defined. A basket by the door for leashes, keys, and lunchboxes beats a pile.
- Group coats by person first, then by type, then by length. Grouping by length alone looks tidy but makes the right coat harder to find.
- Match the hanger to the garment. Wide structured shoulders for wool and structured coats, slim hangers for everything else, and a heavy-duty hanger for a wet raincoat.
- Keep one small bin per category, and label the front edge. Gloves in one basket, scarves in another, and a label on each means nobody has to dig.
Equally important is what stays out. A coat closet is not a junk closet. Vacuum cleaners, mops, brooms, cleaning chemicals, luggage, donation bags, and mystery boxes all migrate here because the closet is deep and out of sight, and they are the reason half of these organizers fail. Move the cleaning supplies to a utility closet, the luggage to a high shelf in a bedroom, and the donation bag to the car or straight out the door. A coat closet holds outerwear, footwear, and the accessories that go with them.
Install or Add Simple Storage
Add only what the zone plan calls for. Most closets need one of three upgrades, and the cheapest one usually solves the problem.
A second rod. Mount it below the existing rod or at about half height, using pole sockets or a wooden dowel screwed into the side walls. A dowel is a fraction of the cost of a fluted closet rod and holds the same weight. This single addition often gains the better part of a foot of hanging space in a tight closet.
A kid-height rod. A low run around 36 to 40 inches off the floor is the fix parents in r/declutter and r/organization keep circling back to. Kids hang their own coats when the rod is at their shoulder height, and coats that land on the floor stop appearing on the floor.
Shelf risers or a second shelf. Riser blocks lift an existing shelf by 4 to 6 inches, which is the difference between a shelf you use and a shelf you ignore. For a dead band of space above the shelf, a simple plywood or MDF box with a lip holds a full bin without sliding around.
An over-the-door organizer is worth adding when the door blocks nothing and the closet is otherwise tight. Skip it if the door rubs the trim or the hinges are soft, because a full organizer is heavy.
On build versus buy: a custom closet system from a closet company is finished, warranty-backed, and designed for your exact dimensions, and it involves contractors and a longer timeline. A DIY build using plywood, a dowel or rod, pole sockets, screws, and edge banding costs less in materials, takes a weekend, and gives you exactly the cubbies and rod heights you want. Buying a modular ready-made system sits in between: faster than building, more flexible than a custom install, and limited to the sizes the manufacturer offers.
Whichever route you take, protect what you are working with. Locate studs before drilling, avoid running a screw into wiring, sand any cut edge and cover it with edge banding, and use a level on every rod. If you are dealing with electrical, plumbing, or structural changes, hire a licensed pro rather than improvising.
Group, Label, and Style the Contents
Grouping is what turns storage into a system. Pick one rule and stick to it for each family member: left-to-right by frequency of use is my preference, because the most-worn jacket ends up nearest the door. Group by person, then by length, so the visual line stays straight.
Swap mismatched wire hangers for one type, because identical hangers make the hanging section look fuller and stop the sliding-shoulder dents. Wooden hangers suit structured coats and jackets. Slim velvet or padded hangers hold a lot in a narrow closet, and tiered hangers stack shirts vertically.
For the small stuff, one basket per category, all the same size so the shelf reads as a grid. Clear bins show the contents, and a strip of tape on the front with a marker is enough labeling. If the closet is open in the entryway, matching baskets in one color hide the visual noise of mismatched containers completely.
Stack soft items inside bins vertically, and put a folded towel or a piece of cardboard between layers so nothing collapses. Fill a bin only to about three-quarters full; a full bin is a bin nobody opens.
Maintain the Organized Coat Closet
The reason organized closets fail is that there is no rhythm attached to them. Three short habits fix that.
A weekly three-minute reset: return everything to its zone, wipe the floor, and check that the shoes on the floor are the ones that get worn. Do it Sunday evening and it takes less time than finding one missing glove.
One in, one out. Every new coat or pair of shoes that comes in displaces something going to donation. It is the only rule that keeps a closet from slowly refilling.
A twice-a-year edit, timed to the seasons: pull the winter gear out before spring, decide what was not worn twice, and move the rest to a labeled bin in the garage, under a bed, or a storage unit. Relocating off-season coats to labeled bins outside the entryway is the most commonly repeated advice in organizing forums, and it works because the entryway closet stops being asked to store two seasons at once.
Common Coat Closet Mistakes
Most messy coat closets repeat a handful of predictable errors. Each one has a simple fix.
Buying organizers before purging. This is the number one mistake, and people name it as such on r/declutter and r/organizing. New bins make the mess look intentional and give the clutter somewhere to sit. Fix: sort first, measure second, buy only the container that solves a specific zone problem.
Using the closet as a catch-all. Vacuums, mops, luggage, and donation bags quietly expand until the coats have no rod left. Fix: write a one-line inventory of what belongs here, and move everything else out the same day you sort.
A single rod for every coat length. Long coats and short jackets on one rod waste vertical space, because the short items leave air above them. Fix: use two heights so a full-length parka and a child’s raincoat each hang properly.
Rod height set for adults only. Kids cannot reach a rod at 68 inches, so coats end up on the floor and on chair backs. Fix: add a low run or a wall-mounted hook at kid height.
Shoes on the floor. They are the fastest way to fill a small closet, and they block the coats from closing properly. Fix: cap the daily pairs, then add a shelf, riser, or over-door shoe slot.
Cramming the top shelf and door. The most crowded storage in a closet is the storage nobody can see, which means nobody can retrieve anything from it. Fix: keep the top shelf to lidded bins with clear labels and leave a third of it empty.
No maintenance rhythm. A perfect reset in March has collapsed by July in most homes. Fix: a weekly reset and a seasonal edit on a shared calendar.
For small closets specifically, the trick is giving up some items rather than squeezing them tighter. Four pairs of shoes, one daily bag, and off-season gear stored elsewhere will beat any storage product. For renters, the same restraint matters even more, since everything has to come back down when you move: tension rods, over-door racks, and freestanding shelving are worth more than anything screwed in.
Mixed-family closets need a shared drop zone, because backpacks and lunchboxes are the items most likely to be abandoned anywhere. One low bin by the door, at kid height, is usually enough for everyone to manage on their own.
Frequently Asked Questions
What is the best way to organize a small coat closet?
Divide the interior into four zones with one job each: upper shelf for bulky seasonal items, hanging space for daily coats, floor for shoes and a drop zone, and the back of the door for small accessories. Add a second rod at a lower height to double hanging capacity, keep daily shoes off the floor, and limit what stays in the closet to what leaves the house every day.
How can I organize a coat closet without drilling holes?
Use over-the-door organizers, tension rods, adhesive hooks on the trim, a freestanding shoe rack, and stackable riser blocks instead of wall-mounted hardware. You can also add a rolling garment rack outside the closet for overflow. Everything comes down cleanly at move-out, which is the trade for a setup you cannot tailor to your exact dimensions.
Where should I put shoes in a coat closet?
Off the floor and out of the coat hanging path. The best options are a shelf above the coat rods, riser blocks that lift the existing shelf by 4 to 6 inches, an over-the-door shoe organizer in a shallow closet, or a slim tray at the front edge. Keep to about four pairs per person, since that is usually where the floor gets taken back.
How do I store seasonal coats in a small closet?
Wash them before storing, then pack them loosely in breathable lidded bins with cedar or lavender inside, never plastic bags. Store them on the top shelf of the closet if they fit, or move them to labeled bins in a dry garage, under the bed, or a storage unit. The point is to give the entryway closet back to one season at a time.
What can I use instead of a coat closet organizer?
Repurpose what you already own: a bedroom shoe rack, a freestanding garment rack, matching laundry baskets, a wooden dowel mounted low with two screws, and a tension rod in a doorway. A hanging organizer with drop-front boxes stores gloves and scarves without taking any floor width. Skip buying a full kit before you have finished purging.
How do I keep a coat closet from becoming cluttered again?
Attach new habits to triggers you already have: a three-minute reset each Sunday evening, a one-in-one-out rule for shoes and coats, and a twice-a-year seasonal edit before the weather turns. Give every item one permanent home in one of the four zones. An item with no assigned home is the one that ends up on the floor.
Conclusion
Organizing a coat closet comes down to four zones, one job each, and the frequency rule that puts daily coats and shoes where hands can reach them. Clear the closet completely before you buy anything, measure the width, depth, and rod height, then decide what belongs there and what was only borrowing the space.
Start with three things this weekend: empty and sort everything, measure the shell and mark the problem spots, and put the coats and shoes people use every day into the most accessible zone. Add the second rod or the kid-height hook once the zones are working, and keep the weekly reset going so the closet still looks this good in six months.