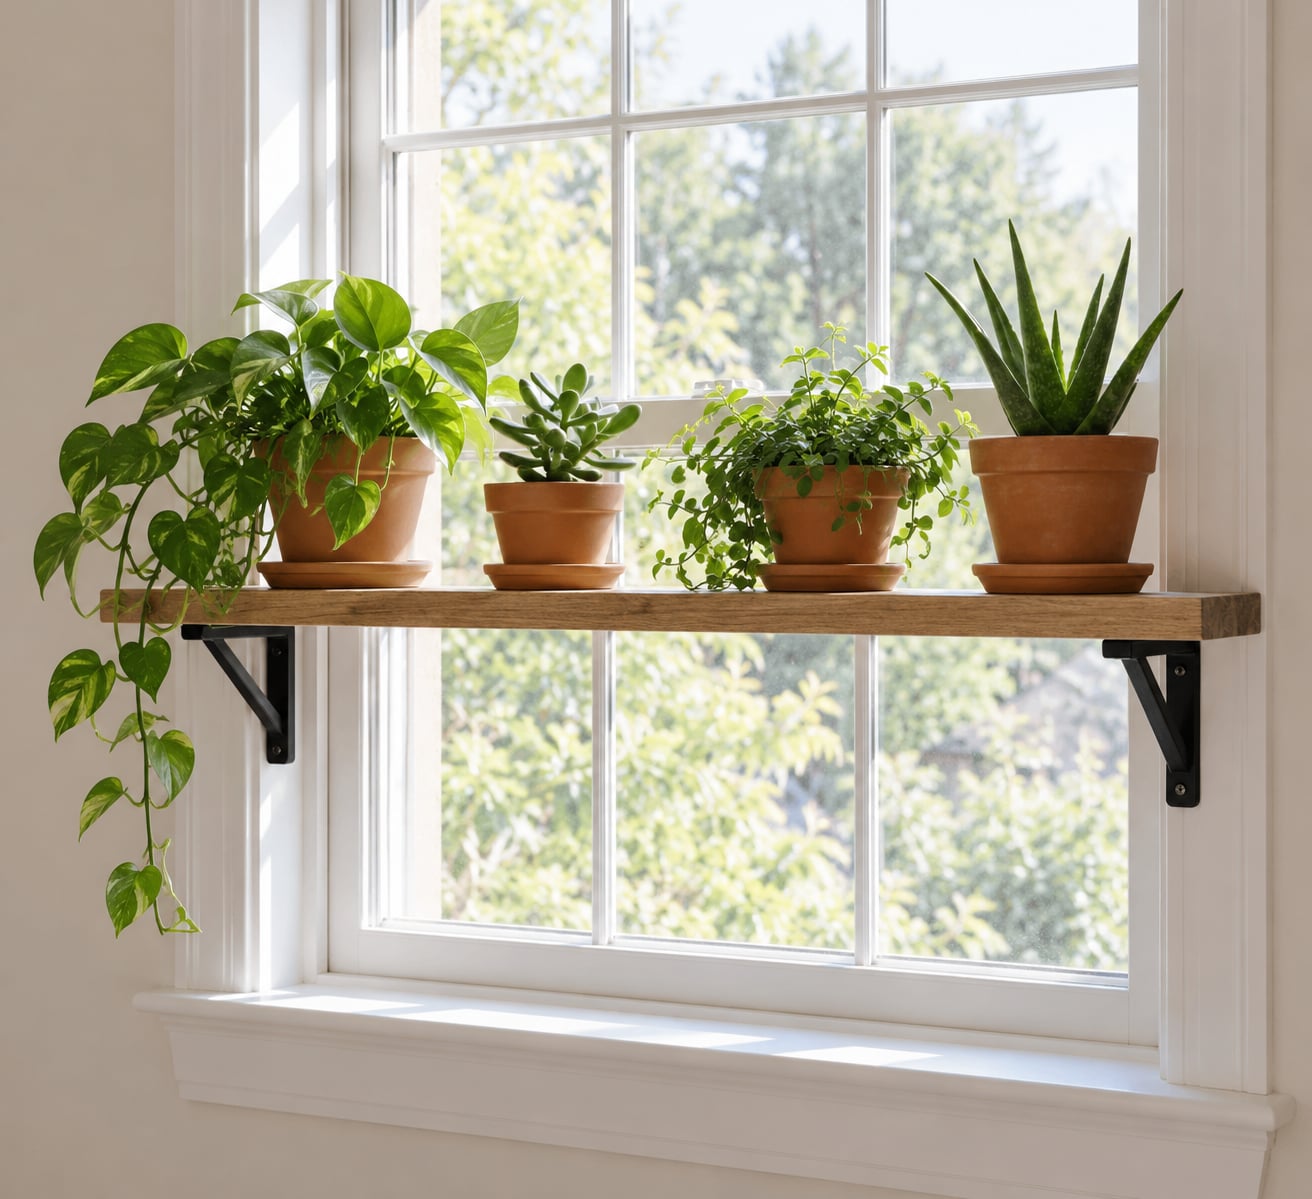
If you want to know how to make a plant shelf in a window, the reliable route is a board held by two brackets screwed into solid framing, sized so the window still opens and the sash stays clear. Budget an afternoon and one hardware-store trip, and pick up a spare board to learn on.
Windowsills run out of room long before the window does. A shelf turns the vertical space inside a window opening into usable surface, which means more plants sitting in the brightest part of the room without giving up your window seat.
Two things cause most of the trouble: a shelf wide enough to catch the sash when it opens, and a pot that drips straight onto the trim. Both are solved at the measuring and planning stage, before a single hole gets drilled.
Below is the full build, plus the no-drill route if you rent, and a look at what to fix when a shelf sags, blocks the window, or gets too heavy for its fasteners.
Table of Contents
- What You Need
- Cut list for a standard bracket shelf
- Which method fits your window
- Step-by-Step: How to Make a Plant Shelf in a Window
- Measure the window and plan bracket placement
- Build or prepare the shelf
- Mark and drill the mounting points
- Attach the shelf and check its level
- Add plants and prevent water damage
- Style the finished plant shelf
- Common Mistakes
- Frequently Asked Questions
- Can I make a window plant shelf without drilling?
- What is the best depth for a window plant shelf?
- How much weight can a window-mounted plant shelf hold?
- Will a plant shelf keep the window from opening?
- Which plants work best in a window shelf?
- How do I stop water from damaging the wood shelf?
- Conclusion
What You Need
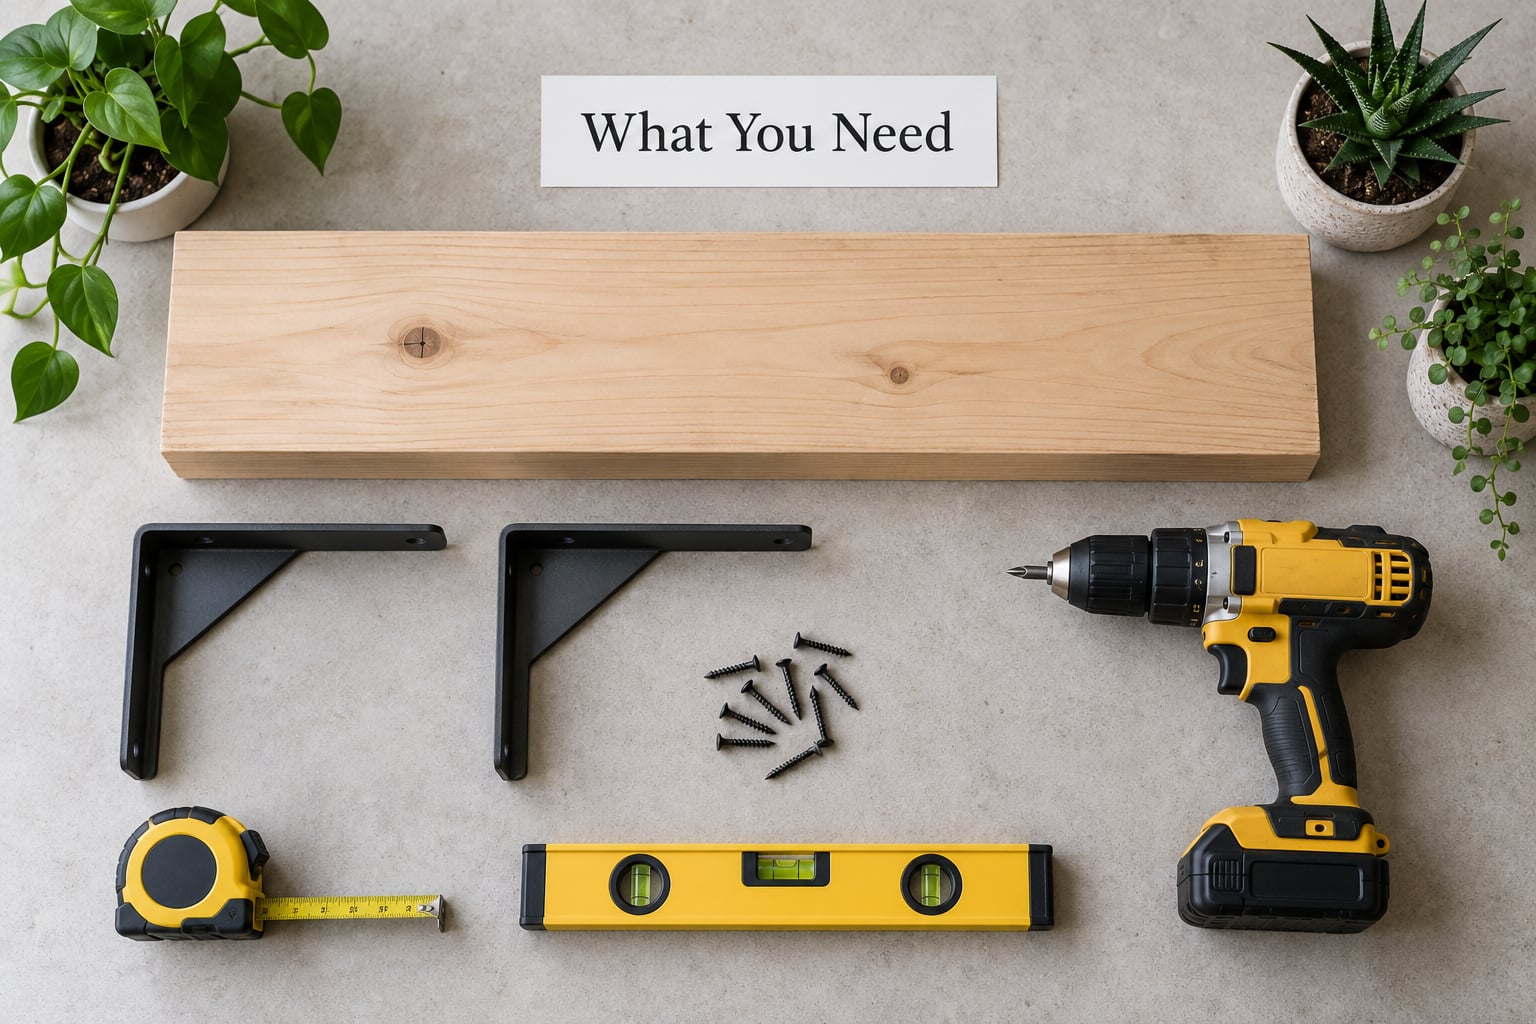
The primary method here is a bracket-mounted shelf: a single board, two brackets, four structural screws. It works on most windows and it is fully removable if you patch the holes later.
For the board, match the material to your window:
- Standard trim window: one 1×12 pine board, cut to your measured width. Pine is cheap, light, and easy to sand.
- Deep window well: 1×4 pine for the visible shelf face plus 2×2 pine for a front lip if you want a built-in look.
- Wide or heavy loads: 3/4 inch plywood instead of pine. Heavier, but it will not bow.
- Rental or temporary: a 1×10 pine board, 8 to 10 inches deep. Small pots only.
Two shelf brackets are enough for a shelf up to about 36 inches. Past that, add a third in the middle, because long spans sag in the middle and a wet soil pot magnifies any sag.
For fasteners, match the fastener to the wall. Wood screws into studs or trim, and masonry needs a different bit and anchor. More on that below.
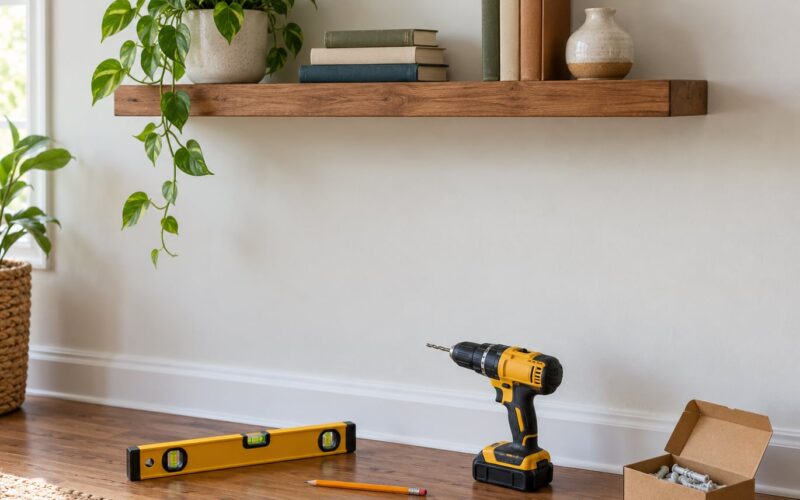
You also need a drill, a tape measure, a level, a stud finder, painter’s tape, clamps, wood glue, sandpaper, wood filler, and caulk. No stud finder? Tap the trim with a knock and listen for the dull sound that means framing is behind it.
A saw matters too. A hand saw works for pine; a miter saw makes clean square cuts in plywood. Beginners usually get away with a circular saw and a straightedge, but the cut needs to be square or the shelf will rock.
Cut list for a standard bracket shelf
| Part | Material | Size | Qty |
|---|---|---|---|
| Shelf board | 1×12 pine | Your measured width, 8 to 10 inches deep | 1 |
| Brackets | Steel shelf bracket, 8 inch | 8 inch rise | 2 |
| Structural screws | 2.5 inch construction screw | For brackets into studs or solid trim | 4 |
| Liner | Vinyl sink liner or silicone mat | Slightly larger than the board | 1 |
| Pot saucers | Plastic or terracotta | One per pot | As needed |
Which method fits your window
| Method | Build time | Drilling | Removable | Best for |
|---|---|---|---|---|
| Bracket shelf | 2 to 3 hours | Yes, into wall | Mostly | Most windows, especially rentals with permission |
| Built-in window well shelf | 6 to 8 hours | Yes, into studs | No | Deep wells where you want to keep the seat |
| Sill extension board | 45 minutes | No | Yes | Shallow sills needing 2 to 4 more inches |
| Hanging tray on a curtain rod | 1 hour | No, if the rod exists | Yes | Trailing plants, renters |
| Tension-fit shelf | 20 minutes | No | Yes | Light plants only |
Step-by-Step: How to Make a Plant Shelf in a Window
Measure the window and plan bracket placement
Measure the window opening at its widest point, then subtract 2 inches so the shelf slides past the trim instead of jamming into it. Take that measurement twice. Two inches of slack is the cheapest insurance in the whole project, and getting how to make a plant shelf in a window right starts with that one number.
Next, measure how far the sash travels when it opens. A double-hung window needs roughly half the opening height in clear space above the sill; that measurement, minus an inch of tolerance, is the most shelf depth you can use without blocking it.
Mark your two bracket points with painter’s tape at least 8 inches in from each end. Keeping them in from the ends is what stops the board from splitting at the edge when you drive screws through it.
Look for obstructions too. Blinds, curtain rods, and a raised sill all eat into the depth you thought you had. If curtains hang outside the window, your shelf needs to stop short of the rod.
Build or prepare the shelf
Cut the board to your measured length, then check it is square by measuring corner to corner on the face. If the diagonals differ, trim the long corner until they match.
Sand up to 120 grit, then round or chamfer the front edge slightly. Water sits on a sharp edge and soaks in faster, and a rounded edge is kinder to leaves that hang over the side.
Finish it before it goes up. Fill nail holes and screw holes with wood filler, sand flush, then stain or paint to match your window trim. A coat of exterior or spar varnish on the top face helps when you overwater.
If you are lining the board, cut a vinyl sink liner or a silicone baking mat slightly larger than the board and glue or staple it to the top. That single step prevents most water damage complaints I have seen with window shelves.
Mark and drill the mounting points
Hold the bracket or a scrap block in position against the wall or trim above the sill, use the level, and mark both sides in pencil or tape before you touch the drill.
Find a stud if one lines up. Drive your structural screws into framing wherever you can; a screw anchored in a stud holds several times what the same screw does in drywall alone.
Know your wall. Solid wood trim takes screws directly. Drywall needs a toggle anchor or a screw into a stud. Hollow metal or vinyl frames need self-tapping screws and pilot holes. Masonry needs a masonry bit and appropriate anchors, or a professional.
Do not fasten into the window sash. The sash moves, and anything screwed to it moves with it, which wrecks the fit and eventually pulls the frame loose.
Attach the shelf and check its level
Screw the brackets in with your structural screws, then tighten them evenly. Cranking one side all the way first is what twists a board out of flat.
Set the board on the brackets and check the level front to back and side to side. A 3/4 inch plywood board is heavy enough to bow a bracket slightly, so re-level after it is loaded.
Push hard on the front edge and then the sides. If it moves or flexes, take the load off and fix the cause: too few brackets, screws that missed framing, or a span wider than the brackets are rated for.
For a no-drill option, a tension-fit shelf clamped between the window jambs and the opposite wall works in a narrow recess, and a suction-mounted caddy is fine on smooth glass for a couple of small pots. Both have limits, so treat them as temporary and light. Adhesive hooks and suction cups get distrusted for good reason once you add wet soil.
Add plants and prevent water damage
Start with light plants. Small succulents, a pothos, or herbs in short pots prove the shelf works before you add anything heavy. Load is the step people rush, and it is the one that bends a board.
Every pot needs a saucer, and a plastic liner under the whole row catches anything that gets past them. Water in the sink or a tub rather than over the shelf, so you control how much actually lands in the pot.
Spread weight evenly instead of grouping the big pots in the middle, where the span sags most. Leave gaps between pots for airflow, and keep leaves from pressing against the glass.
Check for drips after the first few waterings. If you see marks on the sill, the pot is too large for its saucer or the liner is not sealed at the edges.
Style the finished plant shelf
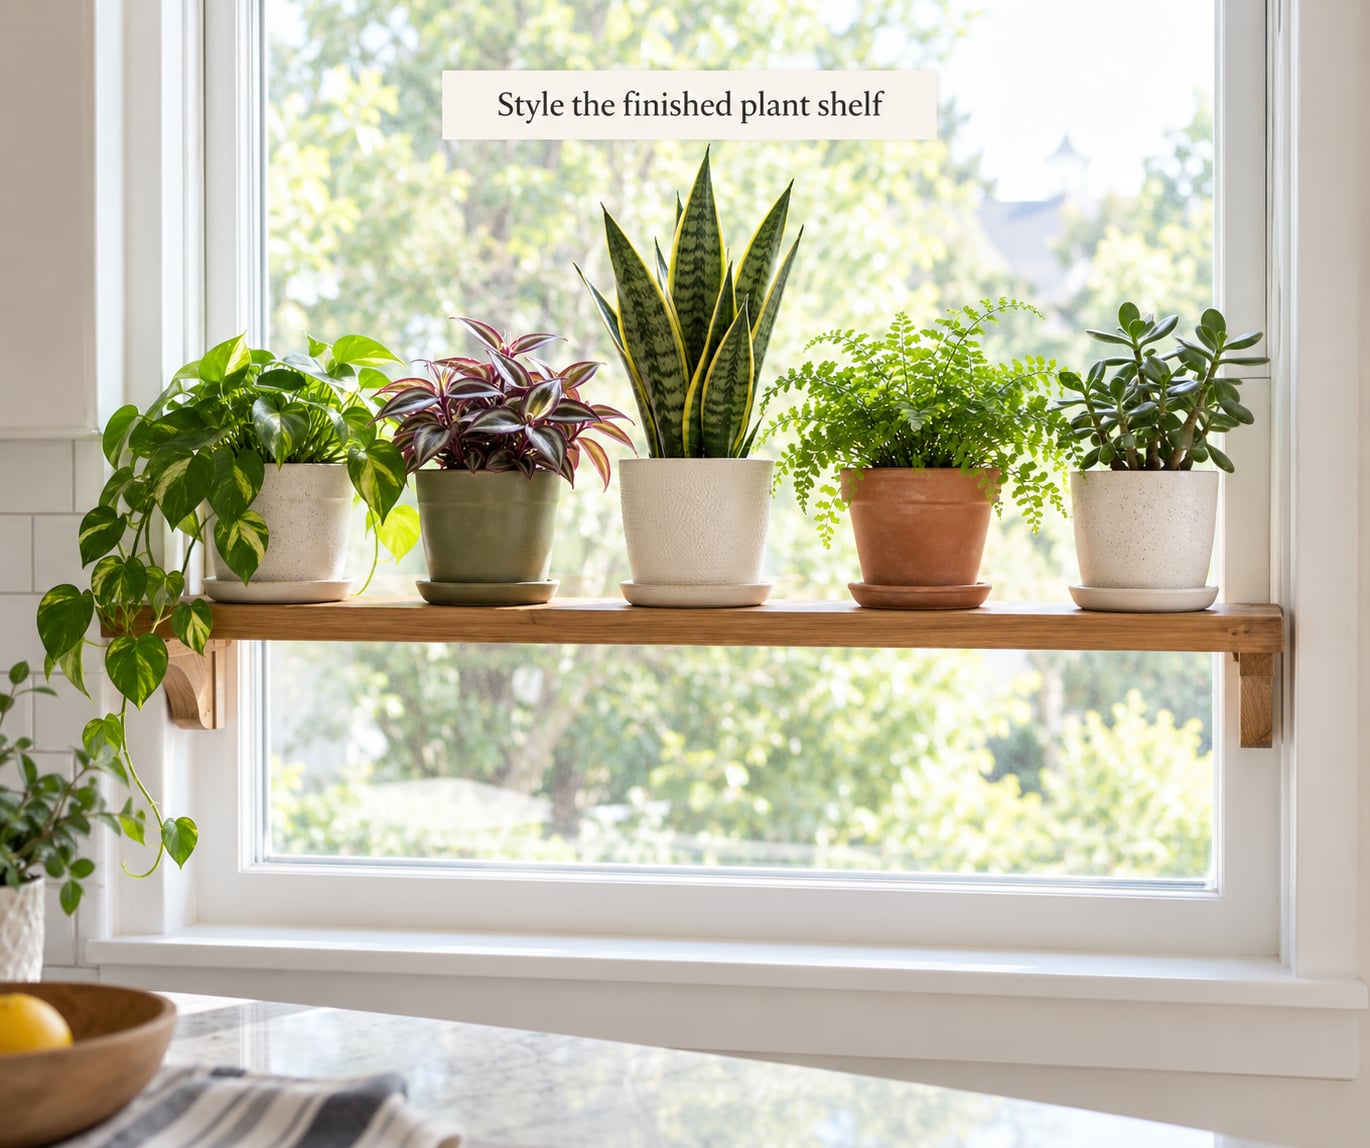
Arrange by height. Put upright plants at the back, medium pots in the middle, and trailing plants at the front edge so the spill over reads as intentional.
Group two or three pots in the same material or color rather than lining up five different ones. It looks calmer and it takes less time than it sounds.
Let light decide the rest. A south-facing window with several hours of direct sun suits cacti, succulents, and most herbs. East and west windows give gentler light that handles ferns, pothos, and ZZ plants. A north-facing window with low light favors orchids, ferns, and peperomia.
Watch the heat. Glass behind a shelf magnifies afternoon sun, and a small pot can scorch leaves that would be fine on an open sill. Sheer curtains or a sheer blind diffuse it without cutting the light.
Finish by checking the window still opens fully and the curtains still draw. If either is compromised, the shelf is too deep or too wide, and the fix is measuring again rather than trimming the plants.
Common Mistakes
Shelf too long. If it spans past the trim, the window will not open or the sash will hit it. Cut 2 inches short of the opening and you will not regret it.
Board too thin. A 1/4 inch panel sags with wet soil. Use 3/4 inch pine or plywood, and add a middle bracket past 36 inches.
Brackets placed unevenly. A shelf mounted 3 inches off-center on one end looks crooked from across the room and never stops feeling wrong. Measure both sides from the same reference point and check with a level before drilling.
Wrong fasteners. Short drywall screws in hollow trim pull loose under load. Use construction screws into framing, or appropriate anchors when framing is not available.
Overloading. Soil is heavy and water doubles it. A 12 inch pot of wet soil can weigh 40 pounds on its own, and readers on homeplant forums keep repeating the same warning: put the heavy pots low, close to the bracket, never at the end of a long span.
Drilling into the sash or weak trim. Thin vinyl or aluminum trim has almost nothing behind it, and the sash moves. Fasten to the wall, the casing, or a stud beside the opening instead.
Blocking the window. Open the window fully after mounting. If it binds, the shelf is too deep. Trim 2 inches and try again rather than forcing it.
Ignoring drips. The most repeated problem on plant forums is water reaching the sill and blinds. Use a liner, saucers, and water in a sink. That covers it.
Frequently Asked Questions
Can I make a window plant shelf without drilling?
Yes. A tension-fit shelf that clamps between the window jambs and the opposite wall needs no holes at all, and a hanging tray suspended from an existing curtain rod works the same way. Both are removable and renter-friendly. Keep loads light: a couple of small pots, not a heavy planter. Suction cups and adhesive hooks can hold a single small pot on smooth glass, but they are not a safe surface for wet soil.
What is the best depth for a window plant shelf?
Between 6 and 10 inches deep is the practical range, and 8 inches suits most 4 to 6 inch pots. Depth matters more than width here, because a deep shelf is what blocks a sash from opening. Measure how far the sash travels and stay inside that number with an inch to spare. Deep windowsills can take deeper boards, but most standard trim windows cannot.
How much weight can a window-mounted plant shelf hold?
With two 8 inch steel brackets screwed into studs, expect around 40 to 50 pounds for a shelf up to 36 inches long. Add a middle bracket past that length. Remember that wet soil is far heavier than dry: a 12 inch pot of soil and water can weigh around 40 pounds on its own, so most people keep only one or two large pots up there.
Will a plant shelf keep the window from opening?
Only if it is too deep or too long, and both are easy to check before you drill. Measure the sash travel first, keep the shelf at least an inch shorter than that clearance, and cut the board 2 inches narrower than the opening so it passes inside the trim. Open and close the window fully after mounting. If it binds, you need a shallower board, not a lighter load.
Which plants work best in a window shelf?
Match the plant to the light your window actually gets. South-facing windows with several hours of direct sun suit cacti, succulents, and most herbs. East and west windows handle ferns, pothos, philodendron, and ZZ plants. North-facing low light favors orchids, peperomia, and most ferns. A shelf set tight against glass can scorch leaves in strong afternoon sun, so sheer curtains help more than they cost.
How do I stop water from damaging the wood shelf?
Put a waterproof layer on the board before it goes up. A vinyl sink liner or a silicone baking mat glued or stapled to the top surface catches everything that gets past the pots, and every pot needs a saucer. Seal the liner edges so water cannot creep underneath, and water plants in a sink or tub rather than over the shelf. Sand bare wood and recoat it when you see the first dull spot.
Conclusion
Measure first, mount into solid framing, test the shelf empty, then load it with light plants. Most failed window shelves trace back to a measurement taken after the board was already cut.
If you are unsure about the mounting, start with a short 20 inch shelf over the sill rather than a full-width build. It teaches you the drilling, it proves the window still opens, and you can always widen the board later once you know exactly how the trim behaves.