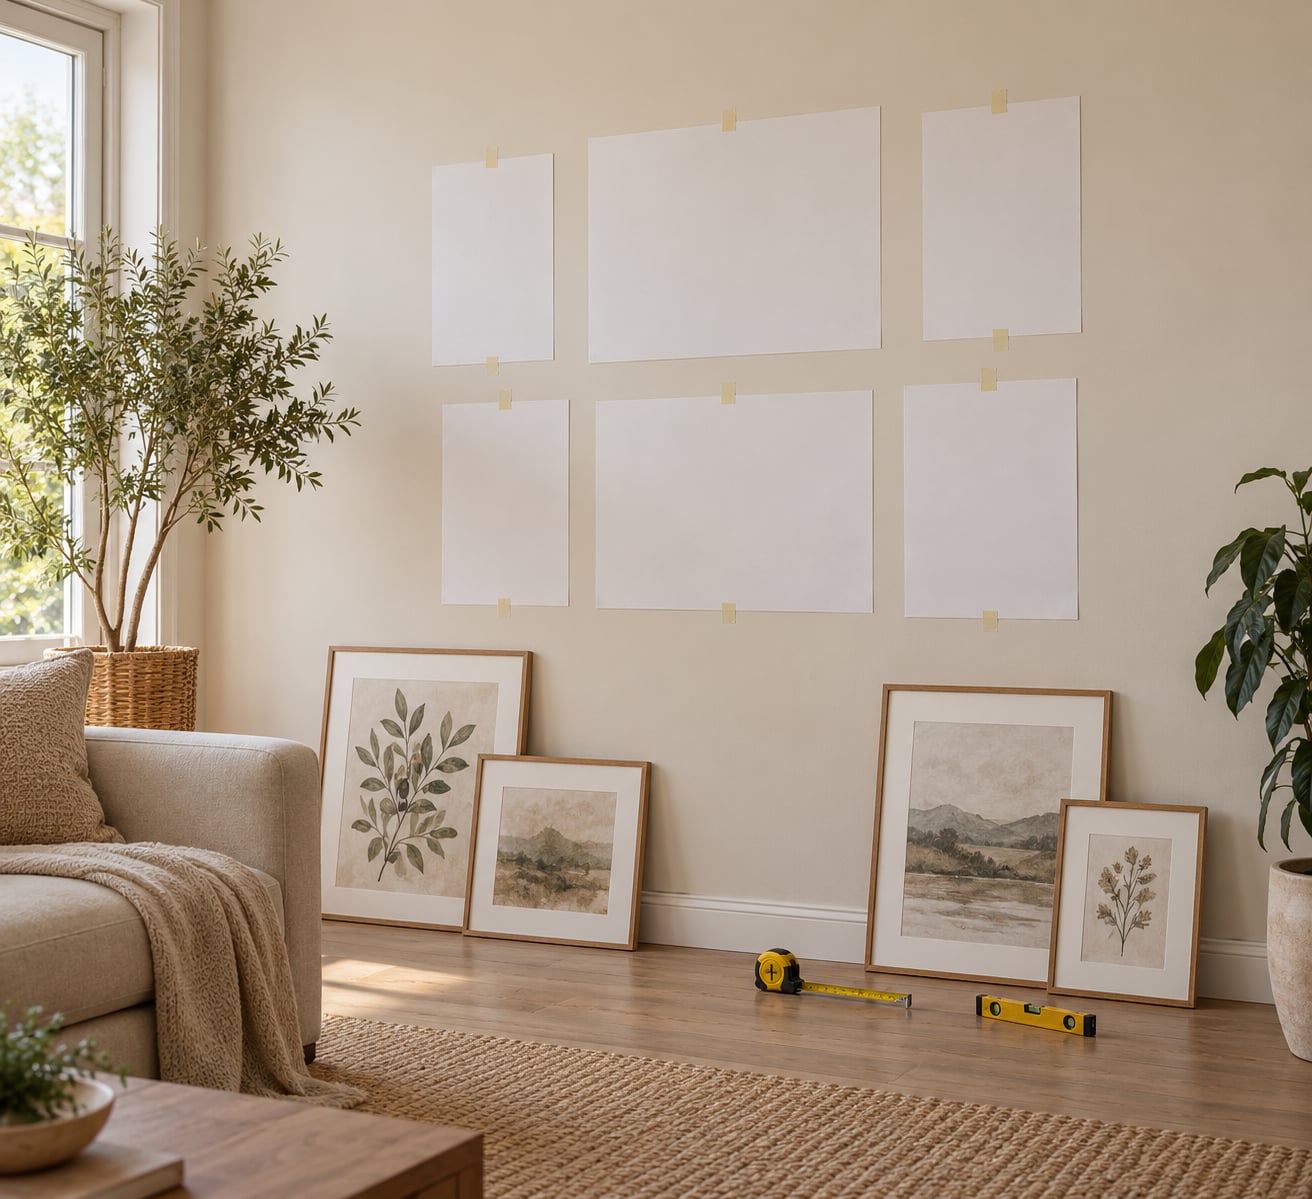
The fastest way to hang a gallery wall that looks planned rather than accidental is to build the layout on the floor first, trace every frame onto paper, tape the templates to the wall, then hang from the center piece outward. Most walls take 2 to 3 hours on a weekend afternoon, and the only difficult part is resisting the urge to hammer a nail before the paper is up.
Three numbers do most of the work. The center of your arrangement hangs about 57 inches from the floor on an empty wall, the bottom edge sits 7 to 10 inches above a sofa or bed, and the gap between frames stays a consistent 2 to 3 inches. Get those right and the arrangement reads as one composition instead of a pile of separate pictures.
Below is the process I use, from empty wall to finished display, including the parts people usually learn the hard way: matching hardware to the wall type, deciding whether frames align by top edge or by center, and what to do with holes from an earlier attempt.
Table of Contents
- What You Need
- Step-by-Step: How to Hang a Gallery Wall
- Choose and Arrange the Artwork
- Mark the Wall Layout
- Install the Hanging Hardware
- Hang and Style the Gallery Wall
- Common Mistakes
- Frequently Asked Questions
- How high should I hang a gallery wall?
- How do I hang a gallery wall without damaging a rented wall?
- Should gallery wall frames match in size or color?
- How do I keep a gallery wall level when the frames are different sizes?
- What kind of wall anchors should I use for a gallery wall?
- How do I plan a gallery wall around a sofa or bed?
- Conclusion
What You Need
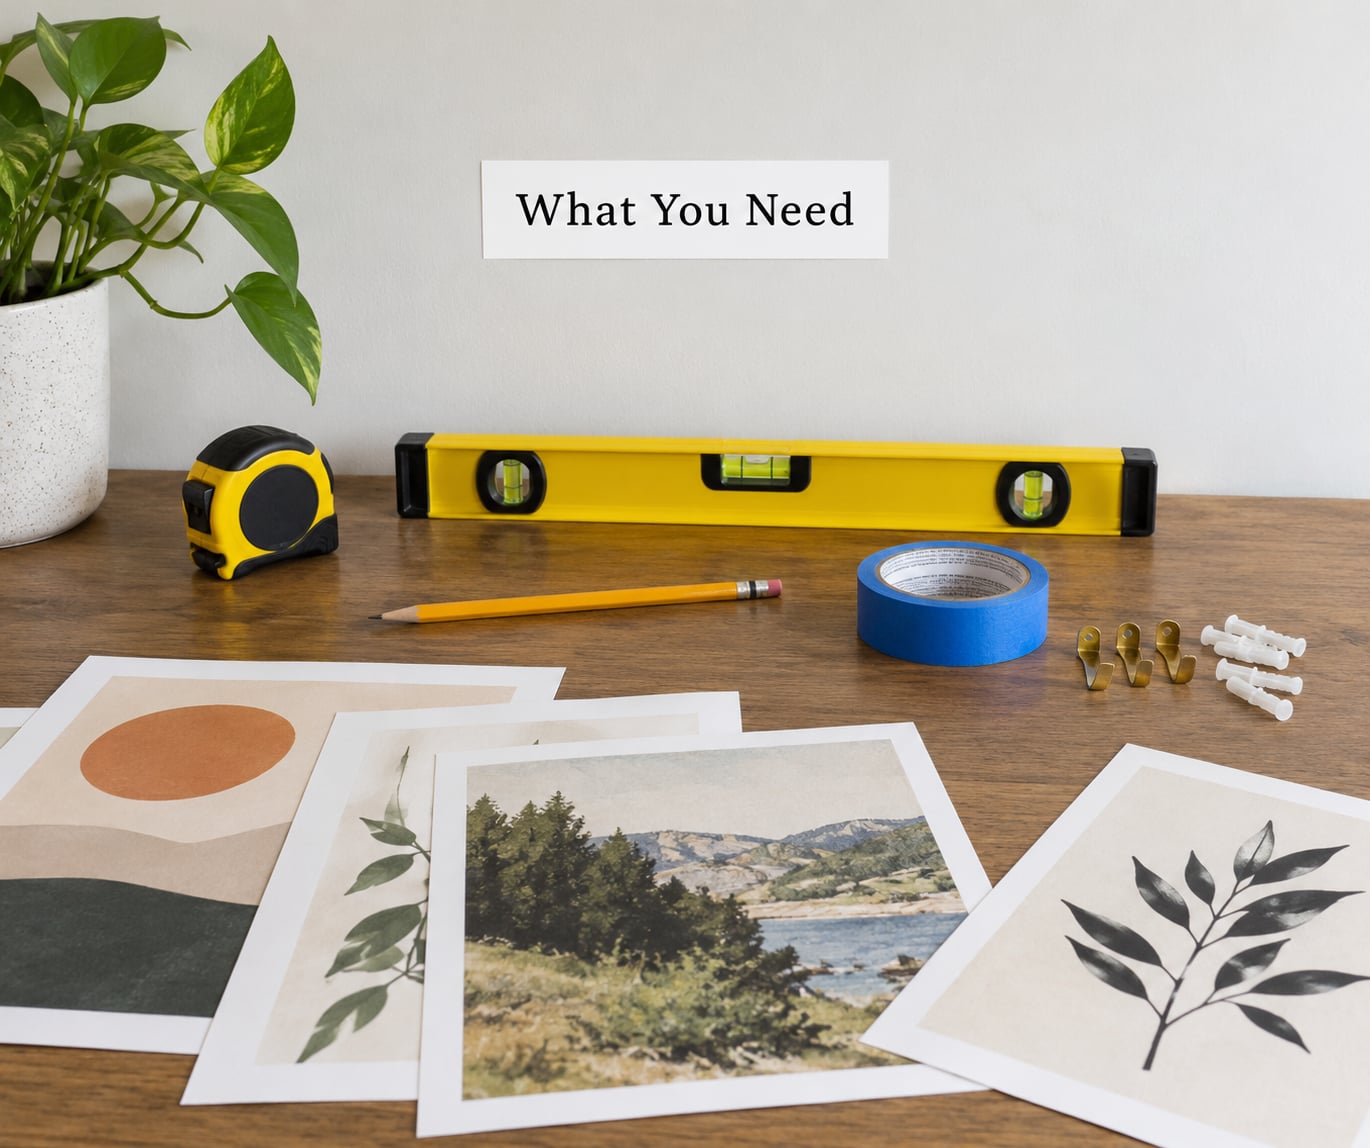
The tool list is short, and most of it you probably own already.
- Tape measure for the wall, the furniture below it, and each frame.
- Pencil and a small level for marking. A cheap 6 inch level does the job.
- Painter’s tape for the mock-up on the wall.
- Large paper such as kraft paper, brown paper bags or butcher paper, plus a marker, for tracing frames.
- Hammer and nails, or the hardware that came with the frames.
- Wall anchors matched to the wall and to the weight of your frames.
- Optional: a stud finder, painter’s shims or a small block of wood to level frames that sit at slightly different depths, and a phone app that maps nail positions.
Hardware is the part worth thinking about before you start, because it depends on what your wall is made of and how heavy the frames are.
- Nails with wire or D-rings. The most secure option and the right one for anything heavy. It needs a stud, or drywall with an anchor behind the nail, and it leaves small holes to patch later.
- Sawtooth hangers. Fast on drywall and paneling, limited by the weight of the frame’s glass. The tooth sits low on the back, so you hang close to the top edge of the frame.
- Wall anchors. For drywall with no stud in reach, and for light to moderate weight only. Use the rating printed on the box rather than a guess: plastic expansion anchors suit lighter pieces, metal toggle or hollow-wall anchors suit heavier ones.
- Adhesive hanging strips. The renter friendly option, rated per strip set. They need a clean surface and 24 to 48 hours of cure time before anything goes on the wall.
- Picture ledge shelf. Works on any wall, with a stud preferred, and limited only by the bracket. The easiest option to rearrange, and a good fit for kids who outgrow their art.
If you rent, adhesive strips and a ledge are your two realistic options. If you own, use a stud finder and put at least one frame on an actual stud whenever the layout allows it.
Step-by-Step: How to Hang a Gallery Wall
Choose and Arrange the Artwork
How to hang a gallery wall starts with picking the pieces, because the layout has to fit what you own rather than what a photo online implies. Seven to eleven pieces is a comfortable range. Fewer than five looks sparse, and more than about fifteen becomes a checkerboard that takes a full day to install.
Group the art before you touch the wall. Sorting by color or by subject gives you a collection that reads as one thing: a row of muted landscape prints, a set of family snapshots in similar tones, or botanical studies in pale green and cream. Mixing two or three styles works when something ties them together, and the most reliable tie is color. Pick one or two dominant tones and let everything else support them.
Now lay the frames on the floor and try arrangements. Three layouts cover most situations:
- Salon style is the freeform cluster with frames at different heights. It takes the most practice and forgives the most because nothing has to line up.
- Grid means matching frames in equal rows and columns. It suits a formal dining room or hallway and demands that sizes match closely.
- Staggered two-row puts a large anchor piece beside smaller ones, often with one row above and one below. It works well above a sofa because it fills a wide, short wall.
Photograph two or three arrangements on your phone and step back. Squint at the phone image, because squinting is roughly what a visitor does when they walk into the room.
Mark the Wall Layout
Measure the wall and the furniture underneath it before you decide where the arrangement starts. Over a sofa, the bottom edge of the lowest frame goes 7 to 10 inches above the sofa back. On a bare wall, mark 57 inches from the floor as the center of the whole arrangement.
The 2/3 rule covers width: the artwork should span roughly two-thirds of the surface below it. A 72 inch sofa wants about 48 inches of art above it, and a headboard or dresser follows the same ratio.
Center the arrangement on the wall, on the sofa, or on whatever else anchors it. The middle of the layout, not its top edge, lines up with the center of the thing below.
Now trace each frame onto paper, label it on the back, and tape it to the wall. Fill in the gaps with paper the color of the wall so the shape of the arrangement is readable, not the artwork itself. Adjust until the spacing reads as even, then walk to the opposite side of the room and look again. Angle changes what you see, and this is the moment that catches most crooked layouts.
Keep the templates up. You will need them in the next step.
Install the Hanging Hardware
For every frame, measure the hanging distance: the distance from the top edge of the frame down to the nail, hook or D-ring. For a wire, hang it so the frame sits with about a third of the drop on each side of the wire. For a sawtooth hanger on the back of the frame, the hanger tooth goes into the nail.
Transfer that number to the template. Measure up from the bottom edge of the paper by the hanging distance and mark the spot with a pencil. Repeat for each frame, then run the level across the marks so you know which ones need a nudge before drilling.
Check what is behind the wall before you drill. A stud finder locates studs, but outlets, switches and plumbing do not announce themselves, and a metal stud stops a bit in a way you will hear and feel. Keep clear of light switches, outlets, and any area where a wire or pipe is likely to run. If you rent or cannot drill, adhesive strips or a ledge avoid the problem completely.
For drywall with no stud in reach, use anchors rated above the weight of the frame. Plastic expansion anchors suit lighter pieces, metal toggle or hollow-wall anchors suit heavier ones, and masonry or concrete surfaces need a masonry bit and appropriate anchors. On tile or glass, adhesive strips are usually the only sensible route, so clean the surface first with rubbing alcohol and let it dry.
Hang and Style the Gallery Wall
Start with the frame closest to the center of the layout and work outward in both directions. Hanging from the middle keeps small errors at the edges, where they matter least.
For mixed frame sizes, align by center rather than by top edge. Centers line up visually across rows of different heights; tops only line up when every frame is the same size, and even then the hanging hardware on the backs sits at different heights. If a large canvas has no hardware, keyhole hangers or a French cleat work well.
Keep a small folded piece of cardboard under a frame that sits proud of the wall so the picture face stays parallel to the floor. Step back after every two or three pieces and compare the gaps, not the frames. That is how you catch uneven spacing before the last nail goes in.
A couple of finishing touches change the result more than people expect. A picture light or track lighting angled down at 30 degrees removes glare and gives the wall depth at night. Mixing in one or two three-dimensional objects, such as a small mirror, a clock or a shallow wall basket, breaks up a wall of flat rectangles.
Leave room to grow. Clusters are easier to expand later if you hang the bottom row a little low rather than centering everything tightly, and a picture ledge lets you swap pieces without new holes.
Common Mistakes
Hanging too high is the most common error, and it usually happens because people measure from their own eye level rather than from a standing average of about 57 inches. If you step back and the wall reads as floating above the furniture, drop the whole arrangement 2 to 3 inches.
Mismatched hardware is the second. A sawtooth hanger and a D-ring set on frames of the same height produce a staggered row. Check what is on the back of each frame and measure the hanging distance for each one individually.
Ignoring frame depth tilts the arrangement. A canvas that sits an inch off the wall catches light differently than a flat print next to it, so shim the deeper piece back until the faces align.
Even spacing that drifts is harder to notice than one big gap. Use the paper templates rather than eyeballing, and measure two gaps between every pair of frames instead of one.
Drilling into an unsafe spot leaves a hole you then have to repair. Locate studs and services first, and treat any wall that has an outlet on it with extra care.
Holes from a previous attempt are easy to hide. Fill small nail holes with spackle or drywall paste, let it dry, sand flush, and touch up with matching paint. For a larger hole, use a self-adhesive mesh patch over the area before painting.
Frequently Asked Questions
How high should I hang a gallery wall?
On an empty wall, hang the center of the arrangement about 57 inches from the floor, which is close to average standing eye level. Over furniture, hang the bottom edge of the lowest frame 7 to 10 inches above the sofa back, bed frame or console top. If you have tall ceilings, a slightly higher placement can look intentional, but anything more than a few inches above 57 inches tends to read as floating.
How do I hang a gallery wall without damaging a rented wall?
Use adhesive hanging strips rated above the weight of each frame, or hang a picture ledge on two brackets. Both hold light to medium frames on smooth painted drywall and come off with no residue when warmed with a hair dryer and peeled slowly. Skip heavy glass frames on strips, test in a corner first, and give the adhesive 24 to 48 hours to set before you hang anything.
Should gallery wall frames match in size or color?
Matching sizes suit a grid layout, where equal rows and columns only work if the frames are close in dimension. For salon and staggered layouts, vary the sizes and keep the frames tied together by color, material or mat color instead. Two or three dominant tones across the whole set will make mismatched frames look chosen rather than accidental.
How do I keep a gallery wall level when the frames are different sizes?
Ignore frame tops and align the centers of the artwork. Trace each frame onto paper, mark the hanging distance on the template, then check every mark with a level before drilling. For frames that sit at different depths, slide a folded piece of cardboard behind the proud one so the faces line up. Fill empty wall space with paper so the whole shape stays balanced.
What kind of wall anchors should I use for a gallery wall?
Use plastic expansion anchors for light frames in drywall, and metal toggle or hollow-wall anchors for heavier pieces, always picking an anchor rated above the frame weight. On masonry, concrete, brick or plaster, use a masonry bit with masonry anchors, or hire a professional if the surface is fragile. On tile or glass, adhesive strips are the safer option because drilling risks cracking.
How do I plan a gallery wall around a sofa or bed?
Measure the furniture first, then apply the 2/3 rule: the artwork should span about two-thirds of the sofa or bed width, centered on it. Set the bottom edge of the lowest frame 7 to 10 inches above the furniture, then build the layout upward from that line. Leave the wall a little narrow rather than edge to edge, since art that spans the full width usually looks stretched.
Conclusion
The first move is the cheap one: gather your art, try two arrangements on the floor, and mark the center of the wall at 57 inches or 7 to 10 inches above your furniture. Trace every frame onto paper and tape those templates up before any hardware goes in. That single hour of planning is what keeps a gallery wall from becoming a row of holes and a few crooked pictures. Once the paper looks right on the wall from across the room, the drilling takes about fifteen minutes per frame.