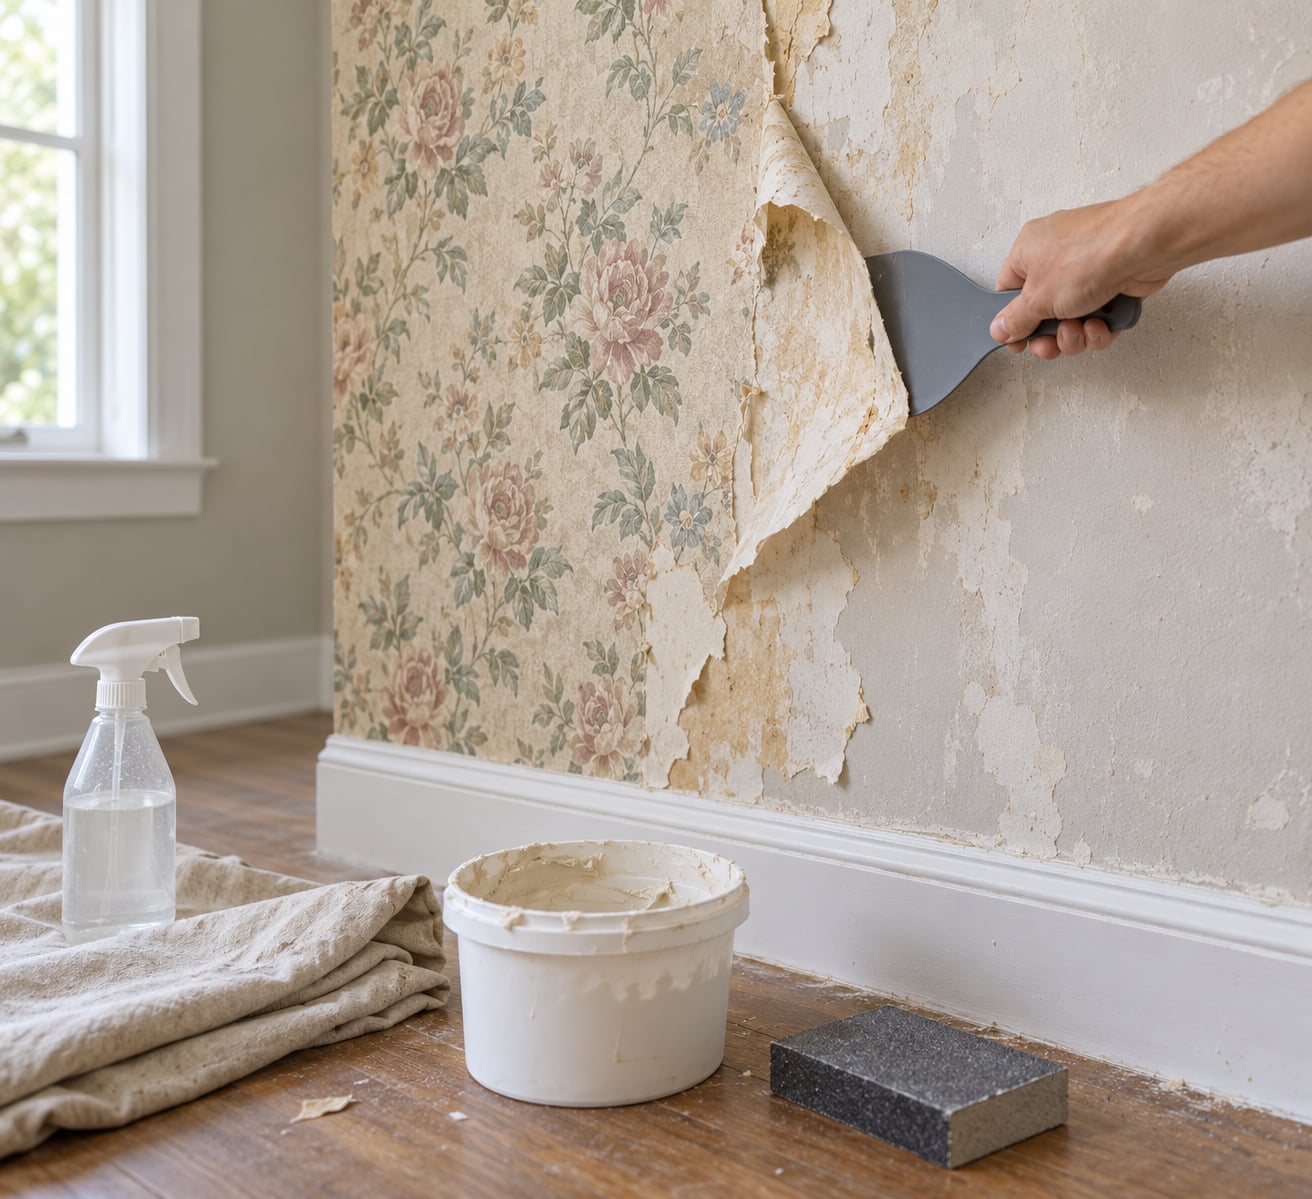
To remove old wallpaper from drywall, score the surface so solution can reach the adhesive, soak it with warm soapy water for 10 to 15 minutes, then peel it away in sections with a rounded plastic putty knife held nearly flat. Clean off the paste residue, patch any torn paper, and prime before you paint. Budget two to five hours for a single 12 by 12 room, and put the steamer away if you have one.
That is the whole method, and the order matters more than the products. Water reactivates dried wallpaper paste, and scoring perforates the surface layer so the water actually gets to the paste instead of sitting on top of it. Skip either one and you are scraping dry paper, which is how people end up gouging drywall.
I have pulled paper off three walls in my own house, including a 1960s floral that was basically glued down, and the thing that surprised me most was how much of the damage came from impatience rather than from the wallpaper itself. A wall that feels tacky after soaking is a good sign, not a failure. It means the adhesive is waking back up.
One honest note before you start. Old paper is thirsty, and a thirsty wall delaminates. Work in sections about four feet wide instead of soaking an entire room, and give the wall a full day to dry before you paint.
Table of Contents
- What You Need to Remove Old Wallpaper from Drywall
- Step-by-Step
- Step 1: Prepare the Room and Test the Wallpaper
- Step 2: Score the Surface Without Cutting Into Drywall
- Step 3: Apply Wallpaper Remover and Let It Penetrate
- Step 4: Lift and Scrape the Wallpaper
- Step 5: Remove Remaining Adhesive and Smooth the Drywall
- Step 6: Repair Small Holes and Sand the Surface
- Common Mistakes
- Frequently Asked Questions
- Can I remove old wallpaper from drywall with vinegar?
- Is it safe to use a steamer on drywall?
- How do I remove wallpaper adhesive that is left behind?
- Can I reuse wallpaper that was removed from drywall?
- What should I do if the drywall paper tears while removing wallpaper?
- Conclusion
What You Need to Remove Old Wallpaper from Drywall
Most of the toolkit is cheap and most of it is reusable. The two things people regret skipping are the plastic scraper and the drop cloth, and the one thing people regret buying too cheaply is joint compound for the repair stage.
| Tool or supply | Why you need it | Material |
|---|---|---|
| Wallpaper scoring tool | Perforates the surface layer so remover reaches the paste. A garden trowel punctured with a nail works in a pinch. | Steel teeth, plastic body |
| Rounded putty knife, 6 to 12 inch | The single most important tool. Gets behind the paper without catching the drywall face. | Plastic, never metal |
| Wallpaper remover or warm soapy water | Reactivates the adhesive. Warm works better than hot on modern paper; hot helps on old paste. | Liquid or gel |
| Pump or garden sprayer | Covers a whole section evenly. Beats refilling a spray bottle forty times. | Plastic |
| Drop cloth | Wet paper tears into small pieces and gets everywhere. A canvas cloth survives the job; a bedsheet does not. | Canvas or plastic sheeting |
| Utility knife | Cuts loose seams, trims paper around outlets, and can score if you have no scoring tool. | Metal blade |
| Gloves and eye protection | Wet stripper is irritating and paper strips flick wet debris. | Nitrile or rubber |
| Drywall compound and putty knife | Repairs nail holes, torn paper, and small gouges after the paper comes down. | Ready-mixed light weight |
| Fine sandpaper or sanding sponge, about 220 grit | Smooths dried compound and any raised paper fibers. | Abrasive |
Add a steamer or heat gun only if you have no other option. They work fast on stubborn paper and they are the fastest way to blister paint, soften drywall paper, and burn your hand at the same time. Plenty of people rent one, finish the job, and never touch it again.
Step-by-Step
Step 1: Prepare the Room and Test the Wallpaper
Move what you can, push the rest to the center of the room, and lay the drop cloth tight against the baseboards. Open a window, put on gloves and eye protection, and cover the outlets with painter’s tape or a plastic bag secured with tape.
Now find a hidden spot, usually behind a radiator or in a closet corner, and test it. If the sheet lifts with a gentle pull and the back is clean white or grey paper, it is strippable and the job will take an afternoon. If it tears or drags, it is pasted paper. If it feels like a thick, rubbery layer with a texture you can pick at, it is vinyl, and vinyl needs more dwell time and a sharper scoring pattern.
Peel-and-stick and wallpaper borders behave differently again. They often strip back like a decal and leave a sticky residue rather than paste, which changes your cleanup step completely. Know which one you have before you commit an afternoon.
Step 2: Score the Surface Without Cutting Into Drywall
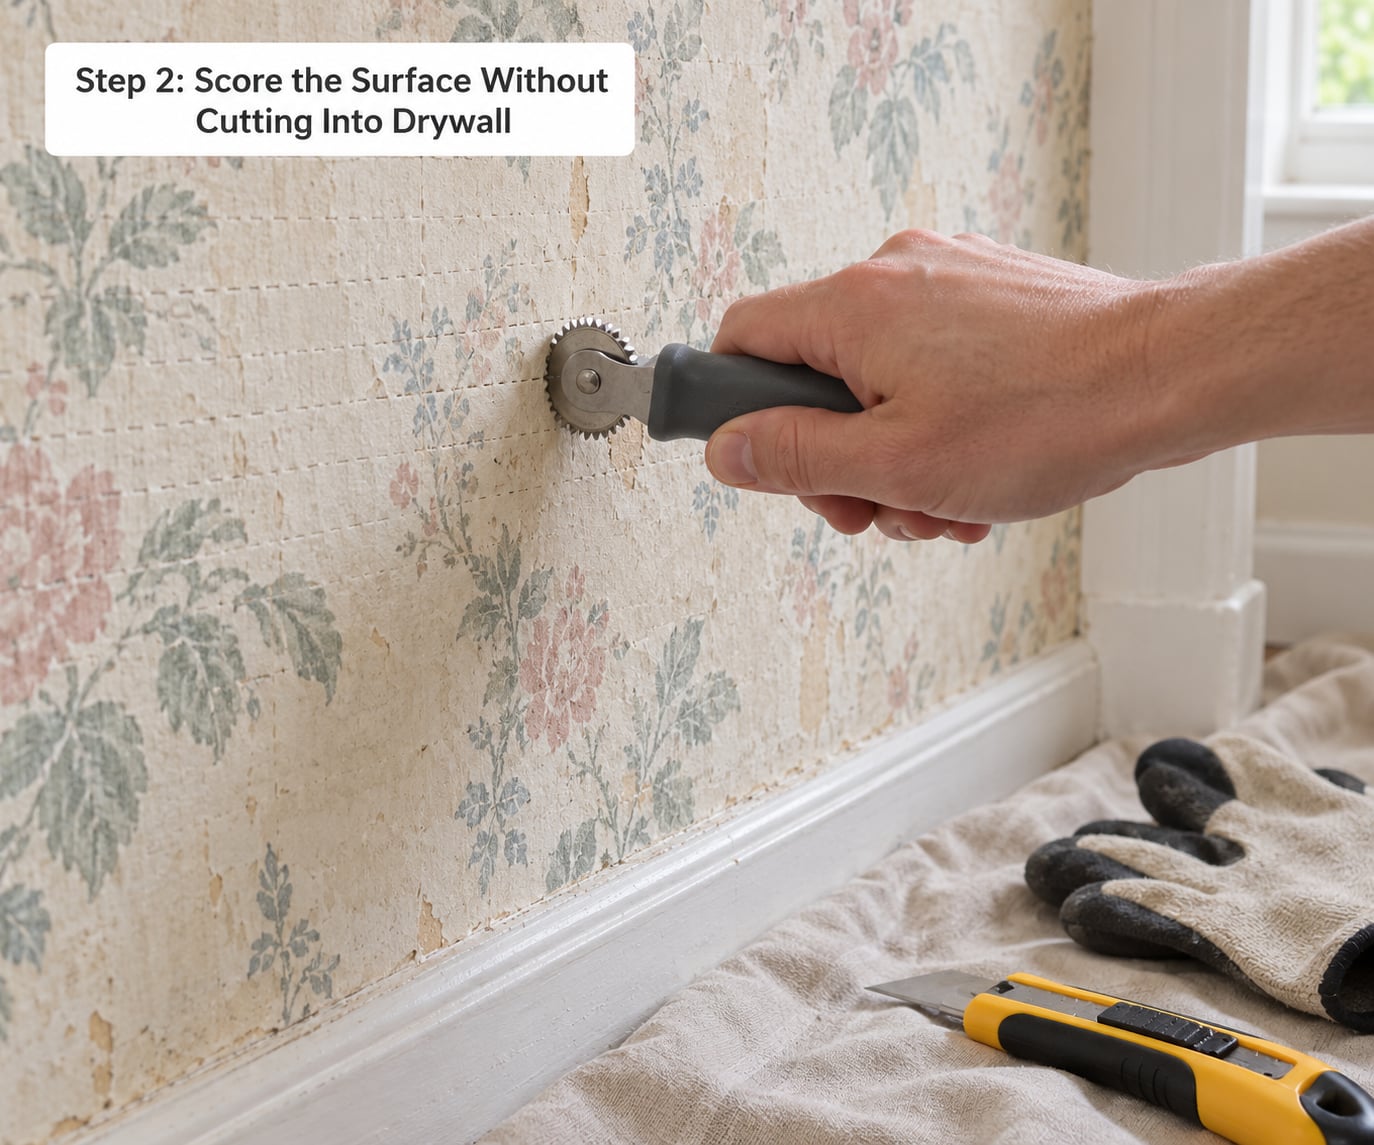
Score the wallpaper so the remover can penetrate the adhesive underneath. Work in overlapping circles or tight zigzags across the whole section rather than long straight cuts, because straight lines follow the drywall paper fibers and can tear them.
Use light pressure. You are perforating the surface, not cutting the wall. On fragile paper or thin vinyl, you can skip scoring entirely and rely on a longer soak instead, which is a contrarian piece of advice that shows up often on DIY forums and for good reason: aggressive scoring does more harm than it prevents.
You know you scored enough when the surface looks faintly dulled and you can feel a slight texture under your palm, not when you see grooves.
Step 3: Apply Wallpaper Remover and Let It Penetrate
Mix your remover and let it sit in the spray bottle for a minute. If you are using water and dish soap, warm water with a few drops of soap per quart works on most modern paste. For decades-old wallpaper, add a third vinegar and use water that is hot but not scalding. A commercial gel stripper penetrates better and makes far less mess on large walls, at the cost of ventilation and cleanup time.
Spray the section evenly and wait 10 to 15 minutes. Gel products can sit longer. The sign that it is working is a wall that feels tacky or slightly greasy under your hand, and paper that lifts at a seam without resistance.
Keep the section width to roughly the size of a door. Going wider feels efficient and soaks the drywall paper through, which is the single most common way people create the gouges they were trying to avoid. Re-wet any dry patches before you start scraping.
Step 4: Lift and Scrape the Wallpaper
Start at a loose seam or a corner, slide the plastic putty knife under the paper, and pull the sheet back at a low angle, almost parallel to the wall. Pulling straight out at 90 degrees is what tears the paper face.
Keep the knife nearly flat and push it in the direction the paper is lifting, the way you would slice a sheet of pie crust. When the paper stops coming away and the knife starts to catch, stop and re-wet that spot. Give it another five minutes. Forcing a dry edge is the point where most drywall damage happens.
You will probably be surprised how much paper comes off in long satisfying strips and how much stubborn backing stays behind. The second coat, once the wall dries a little, usually takes off what the first one missed.
Step 5: Remove Remaining Adhesive and Smooth the Drywall
Scrape the thick residue with the putty knife while it is still slightly damp, then wipe what is left with a sponge and warm water. A few drops of dish soap in the water cuts through paste that plain water just spreads around. For a stubborn film, a dilute solution of trisodium phosphate works well, though you need gloves and a window open and you should keep it away from kids and pets.
Resist the urge to scrub hard. Old drywall paper is thin and it delaminates under aggressive scrubbing, and a shiny spot that feels smooth to your hand can still bubble the first time you roll paint over it. Wipe down, let the wall dry fully, and wipe it again with a clean damp sponge once it is dry to lift the powder.
Drying takes a full day, longer in humid weather or if the wall got soaked. Paint on damp drywall will blister, and you will blame the primer for it.
Step 6: Repair Small Holes and Sand the Surface
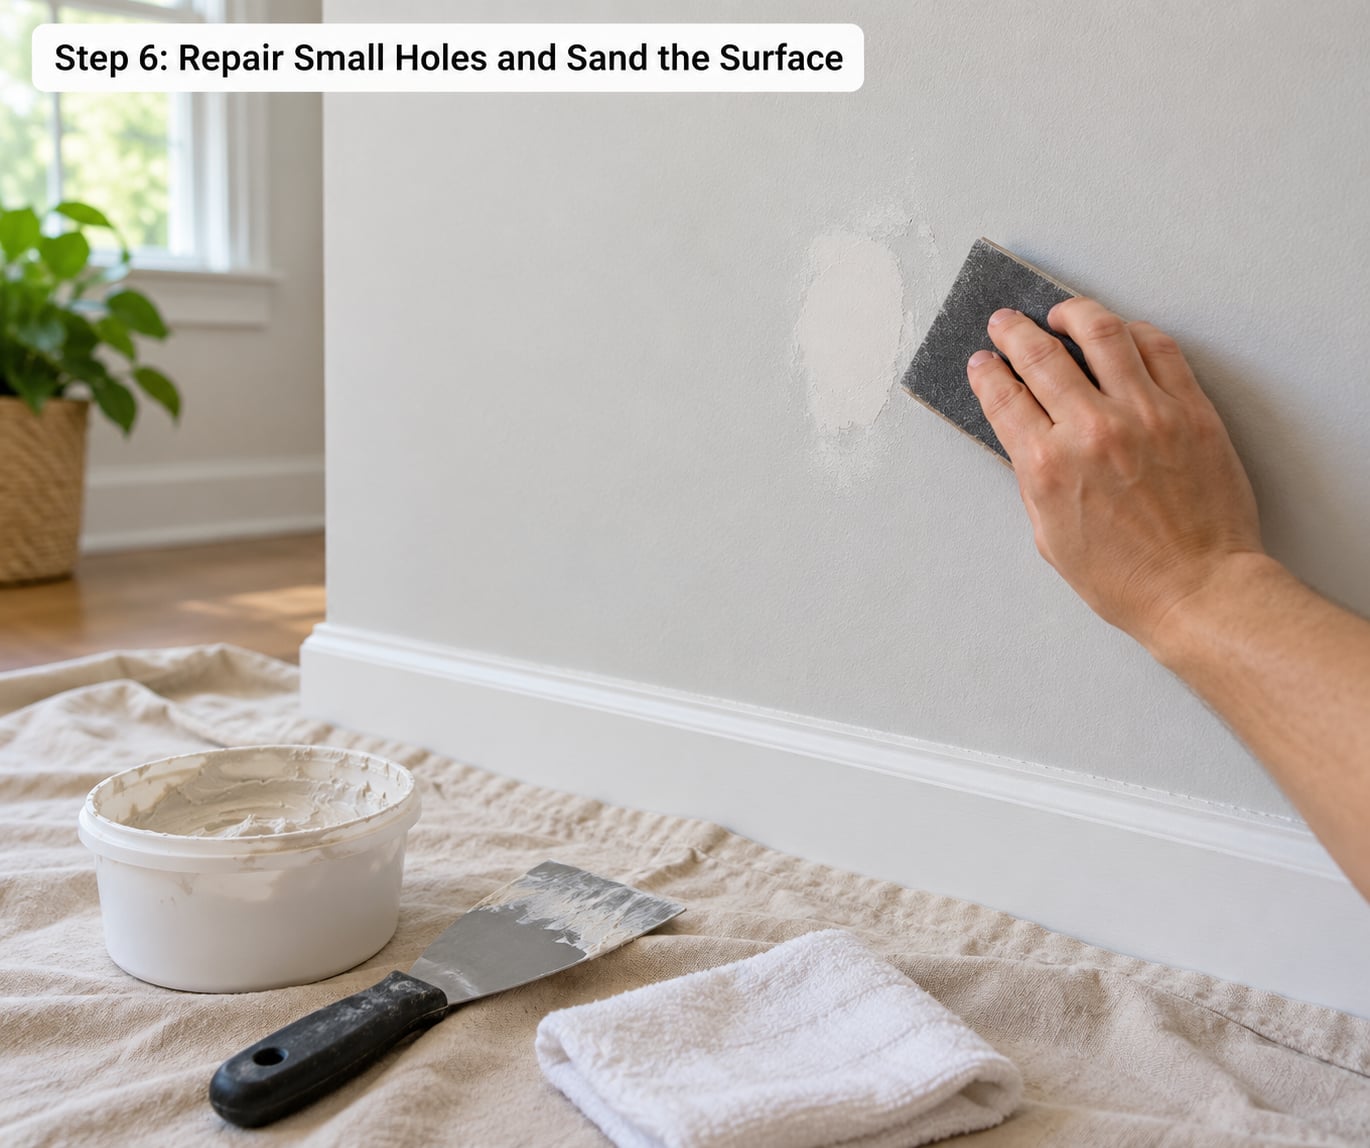
Patch every nail hole, dent, and torn scrap of paper facing with light-weight drywall compound. Feather the edges outward so the repair blends into the surrounding wall, let it dry, then sand it smooth with 220 grit or a sanding sponge. Wipe the dust off with a damp cloth before you paint.
If the paper face tore and you can see bare gypsum, that is still a normal repair. Press the loose fibers back flat, apply a thin coat of compound, and let it dry. A torn face is not a reason to replace a wall panel, though a section where the paper is gone over a wide area is a good reason to skim coat the whole wall.
Skim coating is a thin layer of compound skimmed across the entire surface to level out texture and old adhesive shadows. You need it when the wall has multiple paper layers, visible bumps, or a lot of torn spots. You do not need it when the paper came off clean and the wall is smooth under your palm. Prime with an oil-based or shellac primer to seal any residue that might still be hiding, then paint.
If you plan to hang new wallpaper rather than paint, roll on a fresh layer of wallpaper sizing instead. It gives the new adhesive something to grab and makes the next removal far less painful for whoever owns the place next.
Common Mistakes
These are the errors I have seen most often, and each one has a simple fix.
- Soaking the entire wall at once. Fix: limit each wet section to about four feet wide, and keep a second section dry and workable while you work the first.
- Using a metal scraper or a razor blade. Fix: switch to a plastic putty knife. Metal is the fastest way to gouge drywall paper, and no amount of careful pressure fixes that.
- Pulling the paper straight out instead of at a low angle. Fix: keep the sheet nearly parallel to the wall as you pull, and let the knife do the separating.
- Scoring too hard, or on fragile paper at all. Fix: lighter circles, fewer passes, or skip scoring and soak longer.
- Ignoring the backing that stays behind. Fix: let the wall dry for a few hours, soak it again, and scrape a second time. Often the backing releases whole on the second pass.
- Sanding compound before it dries. Fix: wait until it is hard and light-colored, usually a day for shallow fills.
- Skipping the test patch. Fix: always find a hidden corner first. Knowing your paper type takes five minutes and determines your entire approach.
- Painting over residue and calling it done. Fix: remove the residue properly and prime. Paint over hidden adhesive and you will be scraping bubbles off the wall next spring.
Two more things worth knowing. Wet stripped paper is heavy, slippery, and full of paste, so bag it as you go rather than piling it on the drop cloth. And if you hit a wall where the paper is fused so tightly that nothing is budging after a full soak, you have two honest choices: soak it a second day, or call a pro. Repeated soaking weakens the paper face, and there is a limit to what patience fixes.
Frequently Asked Questions
Can I remove old wallpaper from drywall with vinegar?
Yes. Mix roughly one part white vinegar with two parts hot tap water and use it exactly like a commercial stripper. Vinegar softens most wheat and cellulose wallpaper pastes, and it costs almost nothing. It is less effective on very old animal glue or on thick vinyl, where a longer soak or a gel stripper works better. Always test a hidden corner first, and never mix vinegar with any other cleaner.
Is it safe to use a steamer on drywall?
A steamer works well, but it is the fastest way to lift paper and the fastest way to damage the board underneath. Held too close, steam softens drywall paper until it blisters and peels away with the wallpaper. Keep the nozzle moving, hold it a few inches off the wall, and work in small areas. A plastic putty knife and a warm water solution do the same job with far less risk.
How do I remove wallpaper adhesive that is left behind?
Scrape the thick paste with a plastic putty knife while it is still damp, then wipe with a sponge and warm water plus a few drops of dish soap. For a thin film that keeps reappearing, a dilute trisodium phosphate solution works, with gloves, an open window, and pets and children out of the room. Do not scrub hard, because the residue is easier to lift than the drywall paper is to repair.
Can I reuse wallpaper that was removed from drywall?
Barely. Wallpaper comes off in torn, stretched strips with the adhesive baked through the backing, so it will never paste down smoothly again. Thin peel-and-stick vinyl is the exception, since a sheet that peels back cleanly in one piece can sometimes be reapplied. If you want salvageable paper, strip it in large pieces while the paste is still soft, and expect to lose most of it.
What should I do if the drywall paper tears while removing wallpaper?
Press the torn fibers back flat, mist them lightly, and apply a thin coat of light-weight drywall compound over the spot. Let it dry fully, sand it smooth, and wipe away the dust. A torn face is common on old paper and it is a repairable problem, not a reason to replace the panel. Only patch the spot, not the entire wall, unless you see widespread damage across several areas.
Conclusion
The safest first move is always the same: find a hidden corner, test it, and learn what you are dealing with before you soak anything. After that it is score, soak for 10 to 15 minutes, and peel at a low angle with a plastic putty knife.
Patience is what protects the drywall. Re-wet a stubborn patch instead of forcing the blade, work in sections instead of flooding the wall, and let everything dry before you repair and prime. Do those four things and a room that started as a two-day nightmare is an afternoon of work and a few small patches.