Learning how to make abstract canvas art for beginners takes about an hour and no drawing ability at all. You pick three colors, block in a background, and build marks on top until the canvas says something. That is genuinely the whole method.
It works because abstract painting leans on decisions about color and balance instead of on rendering a tree or a face. Mistakes leave texture rather than a wonky nose, and a beginner’s first canvas usually looks better than they expected.
Below is a full beginner project, from the supplies list to hanging it on the wall. It follows the exact process I would hand a friend on their first afternoon.
Table of Contents
- What You Need
- Canvas, panel or paper pad
- Step-by-Step: How to Make Abstract Canvas Art for Beginners
- Step 1: Prepare the surface
- Step 2: Choose a Simple Color Palette
- Step 3: Block In the Background
- Step 4: Add Simple Shapes and Lines
- Step 5: Layer Paint for Texture
- Step 6: Finish and Display the Canvas
- Three easy ideas if you want a second canvas
- Common Mistakes
- Frequently Asked Questions
- Do I need to prime canvas before painting abstract art with acrylics?
- How long does acrylic paint take to dry on canvas?
- What canvas size is best for a beginner’s first abstract painting?
- How do I stop my acrylic colors from turning muddy?
- How do I know when an abstract painting is finished?
- Conclusion
What You Need
Start small. An 8 by 10 inch canvas panel costs very little, dries fast, and takes up a corner of the table instead of a wall. Learning how to make abstract canvas art for beginners is much easier when the stakes are low.
- Surface. A stretched canvas, a canvas panel, or a canvas paper pad. Panels are flat and cheap, pads are cheapest and completely disposable.
- Acrylic paint. Heavy body acrylic for brush work. Fluid acrylic or pouring medium only if you want the pouring techniques.
- Brushes. One wide flat brush around 2 inches, one smaller flat for lines and edges, and a cheap natural bristle brush for texture.
- A palette knife. Optional, but this is how beginners get real texture fast. It is usually the single best tool in the kit.
- A palette. A plate, a sheet of wax paper, or a large piece of freezer paper taped down.
- Water cup and paper towels. Keep them separated. Wiping on a wet towel will drag pigment into your clean water.
- Varnish. Matte or satin acrylic varnish, applied once the painting is fully dry.
Gesso is the primer that seals the surface and gives paint something to grip. Most primed canvases already have it, so check the back of the panel before buying a jar.
If money is tight, do not buy a full brush set. A wide flat, a small flat, and a palette knife cover almost every beginner abstract technique, and foam rollers from a hardware section work in place of the wide flat.
Canvas, panel or paper pad
All three take acrylic paint. They differ in cost, texture and how nervous they make you.
- Stretched canvas has the most texture and looks the most finished. Best once you know you will keep painting.
- Canvas panel is flat, light, and takes a thin gesso coat without warping. The best first choice for most people.
- Canvas paper pad is the cheapest and lets you fail repeatedly. Paint soaks in more, so washes bloom instead of sitting on top.
Step-by-Step: How to Make Abstract Canvas Art for Beginners
Step 1: Prepare the surface
Unpainted canvas absorbs paint unevenly and the first color sinks in, which leaves a chalky look you cannot fix later. Lay the panel flat, seal the sides with masking tape if you want crisp edges, and apply a thin coat of gesso if the panel is raw.
Let that dry fully, usually an hour or two, before touching it with color. If you want a softer base, tone the panel with one thin coat of your lightest color now instead, then let it dry.
Step 2: Choose a Simple Color Palette
Two to four colors is the range that works for beginners. Five is where mud starts, and eight is where you lose track of what is on the canvas.
Pick from one of three reliable structures:
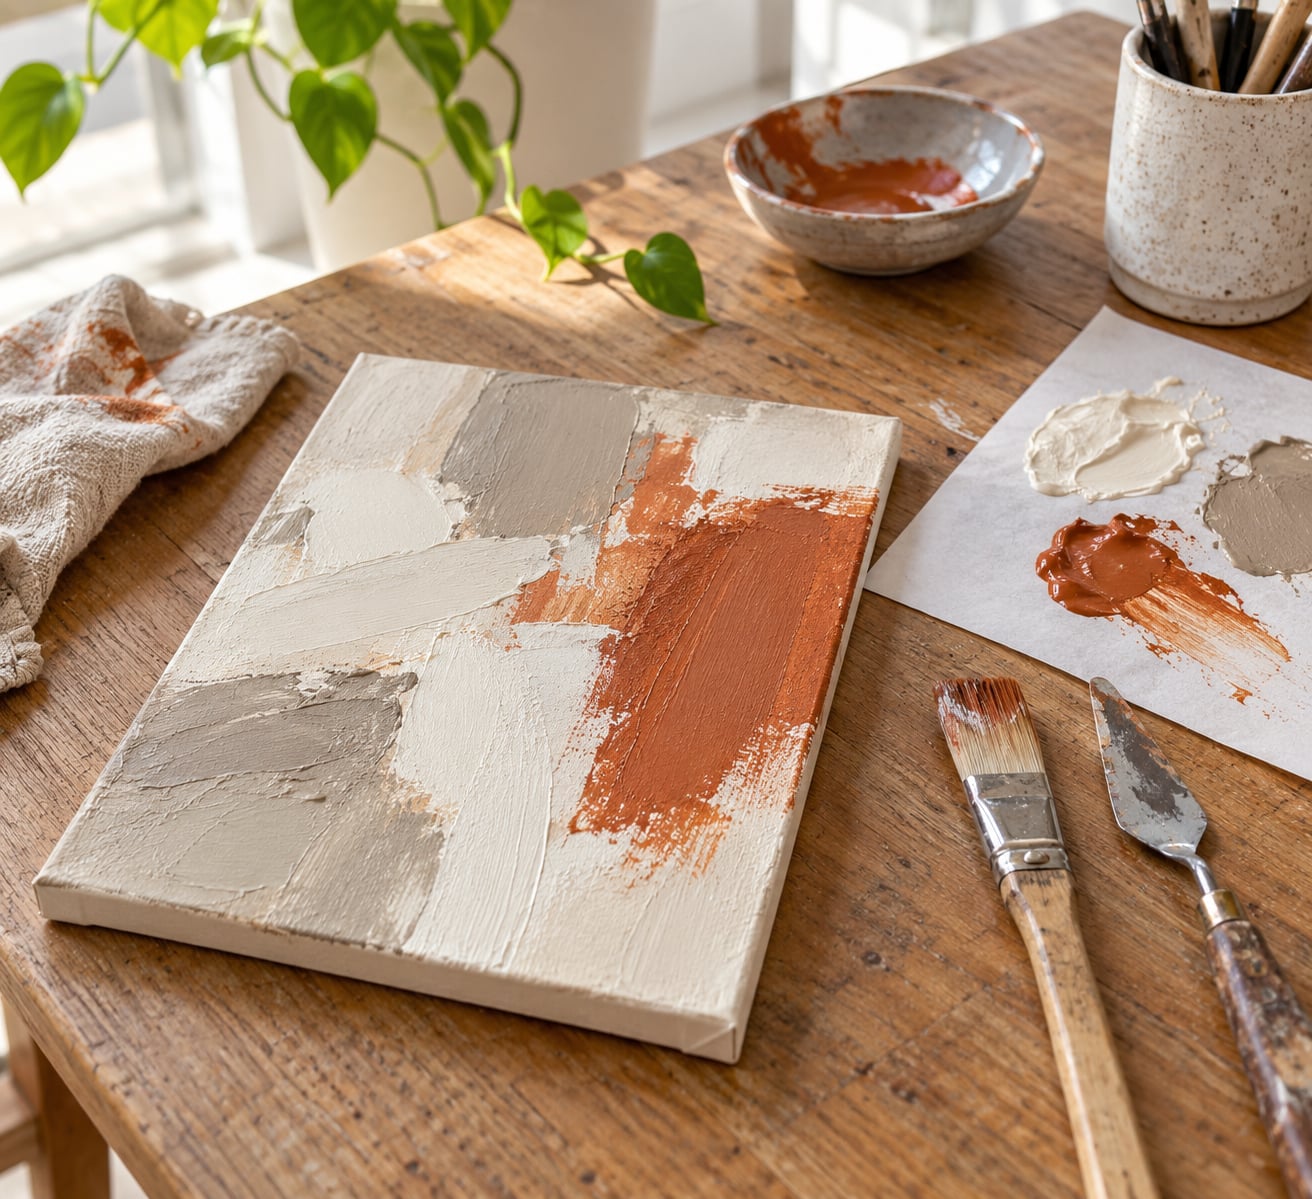
- Two neutrals plus one bold color. Cream and warm gray with rust or deep teal. Forgiving, and it reads as intentional in almost any room.
- A limited analogous set. Three neighbors on the color wheel, like ochre, rust and terracotta. Calm and warm, good above a sofa.
- One complementary pair plus a neutral. Deep blue and burnt orange with a soft off-white. High contrast, and the neutral keeps it from shouting.
Aim for roughly 70 percent of the canvas in one or two colors and 30 percent in the accent. That ratio is the simplest composition rule beginners can borrow from still-life and figure painters, and it keeps a busy-looking painting from feeling messy.
Sample colors from the room where the painting will hang before you buy anything. A swatch taped to the wall for a day settles arguments faster than a color wheel.
Step 3: Block In the Background
Cover the surface in one or two colors with the wide flat brush. Use broad strokes in more than one direction, and let some of the edges show.
Leave some strokes thin enough to let the gesso or tone underneath peek through. That variation is what keeps a background from looking like a wall of flat color. Do not go back and blend it smooth.
Touch-dry acrylic waits for nobody, so if you want to blend wet-into-wet you have about a minute. Work in small areas rather than trying to blend the entire canvas at once.
Step 4: Add Simple Shapes and Lines
While the background is still slightly damp, drop in your accent color as simple rectangles, arcs, or vertical lines. Big shapes read better than fiddly ones, and half of them should touch an edge of the canvas rather than float in the middle.
A cardboard scrap with a straight edge makes a crisp rectangle in one pull. Pull it once and move on. A bottle cap makes a half-circle. For lines, load the small flat brush and pull it in a single stroke without revisiting it.
Balance matters more than accuracy. Step back two feet and check that no corner is much heavier than the others, then add a small mark to the quiet side.
Step 5: Layer Paint for Texture
Once the block-in is dry, this is where the painting gets interesting. Load paint thickly onto the palette knife and drag it across the canvas. The ridge it leaves is called impasto, and it catches light in a way no brush does.
Other ways to break up a flat surface:
- Dry brush. Almost-dry brush over dry paint leaves scratchy streaks that follow the weave.
- Thin drips. Mix a color with extra water, stand the canvas upright on a protected surface, and drip from the top.
- Scrapes. Drag the palette knife edge across wet paint to lift a line of color and reveal what is underneath.
- Glazing. A thin transparent layer of color over dry paint deepens it without hiding the layer below.
Stop adding texture while you still like looking at it. Overworking is the most common beginner habit and the hardest one to unlearn.
Step 6: Finish and Display the Canvas
Acrylic paint needs about 24 hours before you handle a finished piece and roughly 72 hours before varnishing. If the room is cool or humid, give it longer rather than rushing.
Apply varnish in thin coats with a wide brush, following the grain of the wood on the back edges too. Matte varnish keeps the surface looking like paint. Satin gives a slight sheen and makes flat color look richer.
For hanging, a canvas panel can go straight onto a wall with two screws and felt pads behind the bottom corners. Stretched canvas works the same way if you have the hanging wire already attached. Skip ornate frames; a simple natural wood or black frame keeps the focus on the color.
Three easy ideas if you want a second canvas
Two-tone split. Divide the panel with a straight line, one solid color each side. Add a texture stripe across the seam.
String pull. Let three colors pool on the wet surface, then pull a string through them for a soft feathered effect.
Dirty pour. Layer several colors over the whole canvas without cleaning the brush between them. Keep the layers thin so nothing browns.
Common Mistakes
Using too many colors. Seven colors on one canvas guarantees a muddy middle. Pick three, and only bring out a fourth when you genuinely need it.
Mixing colors on the canvas. Blending every transition slowly is what creates mud. Leave edges where two colors meet. Cleaner-looking mixing happens on the palette, where you can throw paint away.
Painting too thickly. Thick paint over a wet surface picks up the brush hairs and dries lumpy. Save heavy impasto for the palette knife pass, and use thinner paint for everything before that.
Crowding the composition. Every gap you close costs the painting some air. Keep one area of the canvas, roughly a quarter, left with only background.
Not letting layers dry. Working into paint that is still wet lifts color instead of adding it. If your brush picks up paint from the canvas rather than laying it down, wait.
Judging it while you are still working. Fresh eyes see mistakes and also see things that are fine. Put the piece aside overnight and look again before you change anything.
Two habits help more than any other tip: rinse brushes in a separate dirty-water jar so your clean water stays clear, and wash brushes right after the session. Dried acrylic on bristles takes a lot more scrubbing than you want to do.
Frequently Asked Questions
Do I need to prime canvas before painting abstract art with acrylics?
Prime it if the canvas is raw or unprimed, since acrylic soaks into bare fabric and dries chalky. Most canvases and panels sold for painting already come gesso-primed, so check the packaging first. If it is white and even, you can paint straight on. A thin coat of acrylic gesso over a raw panel takes an hour or two to dry and makes later layers much easier to control.
How long does acrylic paint take to dry on canvas?
Touch-dry in 15 to 30 minutes, workable for about an hour, and fully dry after 24 to 72 hours depending on how thick the paint is and how humid the room is. Thin washes dry first and heavy palette-knife ridges take longest. Wait the full 72 hours before varnishing, because varnish applied too early can trap moisture and cloud the surface.
What canvas size is best for a beginner’s first abstract painting?
An 8 by 10 inch canvas panel is the sweet spot for a first piece. It is small enough that mistakes do not feel serious and small enough to dry in a day or two. Stretching your first attempt to a large wall-sized canvas usually ends in thin, watery paint. Move to 16 by 20 inches once you have finished two or three panels without rushing.
How do I stop my acrylic colors from turning muddy?
Muddy color comes from slowly dragging two complementary colors back and forth until the wheel turns many times. Lay the colors side by side with a hard edge instead of blending them. When you do need to mix, mix on the palette where you can scrape the waste away, and follow a simple 70/30 split so one color clearly dominates the area.
How do I know when an abstract painting is finished?
Stop when the canvas has one clear focal point, the colors still read as separate, and you feel you would rather hang it than fix it. Beyond that, extra layers tend to flatten what worked. A practical test: photograph the piece, wait a day, and compare. If nothing bothers you that you did not notice before, it is done.
Conclusion
The easiest first step is the smallest one: one 8 by 10 inch panel, three colors, and a single afternoon. Block in the background, drop in a few large shapes, add texture with a palette knife, and call it done.
Treat the wonky parts as data rather than failure. Texture where you meant a smooth gradient, a drip that landed two inches off, an edge you scraped on purpose. Abstract art gives beginners room to leave evidence of the process, and that room is the whole appeal.
Once you have two or three panels under your belt, step up to 16 by 20 and keep the same three colors. The method does not change, only the amount of canvas it has to cover.